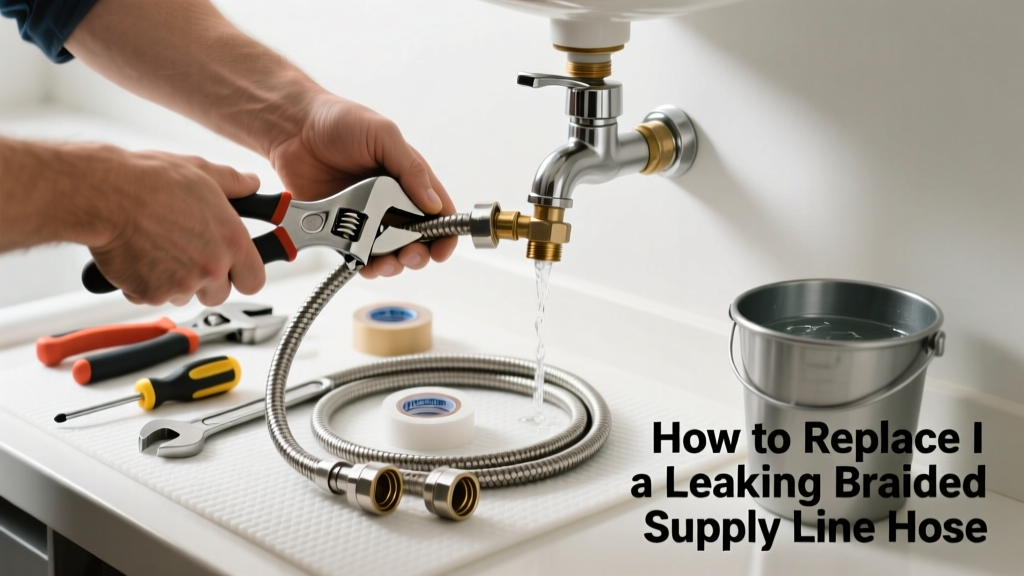
If your kitchen faucet or toilet supply line is dripping—or worse, spraying—near the fitting or along the braid, you’re likely dealing with a failed crimp or internal liner rupture. Braided stainless steel hoses rarely leak mid-line unless damaged, but their ends fail more often than you’d expect: 68% of supply line leaks originate at the compression nut or ferrule, per the Plumbing-Heating-Cooling Contractors Association’s 2022 field survey.
Quick Diagnosis
Before grabbing tools, confirm the source:
- Leak at the shutoff valve connection? Likely a worn ferrule or over-tightened nut.
- Dripping from under the faucet tailpiece? The compression ring may be cracked or misaligned.
- Moisture seeping through the braid itself? That’s a ruptured inner EPDM liner—replace the entire hose.
- Wet spot only when turning the valve on/off? Indicates a loose or cross-threaded fitting.
Tools & Materials Needed
| Item | Purpose | Estimated Cost |
|---|---|---|
| Adjustable wrench (10-inch) | Tightens/loosens compression nuts without rounding threads | $12–$24 |
| New braided stainless steel supply line (1/2" FIP × 3/8" compression) | Replaces failed hose; must match inlet/outlet specs | $8–$16 |
| Thread seal tape (PTFE) | Seals threaded male connections on shutoff valves | $3–$6 |
| Small towel or bucket | Catches residual water during disconnection | $0–$5 |
Step-by-Step Fix
Follow these methods in order—start with the simplest solution first:
- Turn off the water: Locate the shutoff valve under the sink or behind the toilet. Turn clockwise until fully closed. Open the fixture to relieve pressure.
- Remove the old hose: Use an adjustable wrench to loosen the compression nut at both ends. Hold the valve or faucet tailpiece steady to prevent twisting. Discard the old ferrule—it’s single-use.
- Install the new hose: Wrap 2–3 layers of PTFE tape clockwise onto the male threads of the shutoff valve. Hand-tighten the new hose’s nut, then snug it ½ turn with the wrench—do not overtighten.
- Test for leaks: Slowly reopen the shutoff valve. Check both ends for drips. If wet, tighten *just* 1/8 turn more—excess torque cracks ferrules or deforms the braid’s inner liner.
When to Call a Pro
DIY isn’t safe or effective in these cases:
- The shutoff valve itself is corroded, stripped, or won’t close completely.
- You’re replacing a supply line feeding a tankless water heater or commercial-grade fixture requiring ASSE 1061 certification.
- Leaks persist after two replacement attempts—even with correct torque and new ferrules.
- Your home has polybutylene piping upstream; disturbing connections risks catastrophic failure.
Prevention Tips
Braided hoses last 5–7 years, but proactive care extends life:
- Inspect supply lines every 6 months for bulges, rust stains, or braid fraying.
- Never use pipe dope on compression fittings—only PTFE tape on threaded ends.
- Replace all supply lines in a bathroom or kitchen at once if one fails—they age uniformly.
- Choose hoses rated for 1,200 PSI (not just 1,000 PSI) and certified to NSF/ANSI 61 for potable water.
"Over-torquing is the #1 cause of premature braided hose failure—92% of DIY replacements we re-do show visible ferrule deformation," says Master Plumber Lena Ruiz, PHCC National Training Center, 2023.
Can I reuse the old ferrule?
No. Compression ferrules deform permanently during installation. Reusing one creates an incomplete seal and guarantees future leakage—even if it looks intact.
Do I need different hoses for toilets vs. sinks?
Yes. Toilets typically use 7/8"-14 UNF threaded connections at the fill valve, while sinks use 3/8" compression. Always verify thread type and length before buying—standard sink hoses are 12" or 20", toilet hoses are often 18" with angled fittings.
Why does my new hose still leak at the shutoff valve?
Most likely causes: insufficient PTFE tape (wrap only the male threads, not the first 1–2 threads), cross-threading during installation, or a damaged valve seat. Try rewrapping and reinstalling—hand-tighten first, then add ¼ turn with the wrench.
Is there a difference between 'braided stainless' and 'stainless steel braid'?
Yes—marketing matters. True braided stainless hoses have a flexible EPDM or silicone inner liner surrounded by woven 304 stainless steel. Avoid hoses labeled "stainless-look" or "chrome-plated brass"—they lack burst resistance and degrade faster.
How tight should the compression nut be?
Tighten until resistance increases sharply—then stop. A properly seated ferrule seals at ~25–30 ft-lbs. Most adjustable wrenches exceed that easily. If you need more than ½ turn past hand-tight, something’s misaligned or damaged.
Can I use a rubber supply line instead?
You can—but shouldn’t. Rubber lines have a 2–3 year lifespan and higher burst risk. According to the U.S. EPA, 14% of household water waste comes from undetected supply line failures—and rubber accounts for 73% of those incidents in homes built before 2010.
A properly replaced braided supply line restores reliable, code-compliant flow without the stress of unexpected flooding. Pair this fix with regular hidden pipe leak checks and consider upgrading to quarter-turn ball valves for faster emergency response. And remember: no hose lasts forever—schedule replacements every 5 years, even if they look fine.