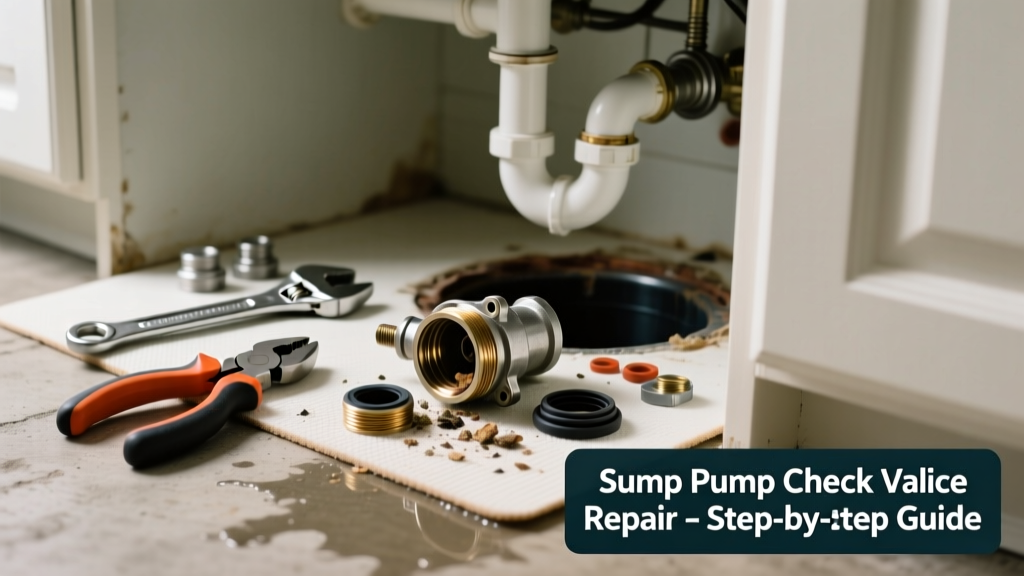
If your kitchen floor is damp near the base cabinet, you hear gurgling from the drain when the sump pump cycles, or water backs up into the sink after the pump shuts off — your check valve has likely failed. This isn’t just an annoyance; it’s a sign your pump is working overtime and risking premature failure. And yes — even though sump pumps are typically in basements, many modern kitchens built on slab foundations have compact sump systems tucked beneath cabinets.
Quick Diagnosis
A failed check valve lets water flow backward after the pump stops, causing reverse drainage, airlocks, or repeated short-cycling. Here are the most common culprits:
- Debris (gravel, sediment, or plastic shavings) jamming the valve flap
- Cracked or warped PVC housing from thermal stress or impact
- Worn rubber flapper losing seal integrity — especially in valves older than 5 years
- Improper installation (e.g., valve mounted upside-down or too close to pump discharge)
- Freeze-thaw damage in unheated crawlspaces feeding kitchen slabs
Tools & Materials Needed
| Item | Purpose | Estimated Cost |
|---|---|---|
| 1-1/4" PVC swing check valve (Sch. 40) | Replaces failed unit; choose spring-assisted for vertical discharge lines | $12.99–$24.50 |
| Adjustable wrench & channel-lock pliers | Tightens fittings without stripping threads; essential for cramped cabinet access | $18.00–$32.00 |
| PVC primer & cement (low-VOC) | Bonds pipe joints securely; required for code-compliant pressure-rated lines | $8.50–$14.00 |
| Bucket & shop vac | Catches residual water during disassembly; prevents kitchen floor saturation | $15.00–$65.00 |
| Thread seal tape (PTFE) | Seals threaded brass or stainless unions often used in retrofit kits | $3.25–$6.99 |
Step-by-Step Fix
Most kitchen-located sump systems use 1-1/4" or 1-1/2" PVC discharge lines with swing or spring-loaded check valves mounted vertically within 18" of the pump outlet. Follow these steps:
- Shut off power at the circuit breaker — not just the switch — and verify with a non-contact voltage tester.
- Relieve line pressure: Open the nearest cleanout or disconnect the union above the valve while holding a bucket underneath.
- Cut out the old valve using a PVC ratchet cutter — leave 1.5" of pipe on each side for new fitting depth.
- Dry all surfaces thoroughly, then apply primer and cement to both pipe ends and the new valve socket per manufacturer instructions.
- Install the new valve with arrow pointing UP (toward discharge), hand-tighten unions, then give a 1/4-turn with pliers — over-tightening cracks PVC.
When to Call a Pro
DIY is safe only if the valve is accessible behind a removable cabinet panel and the discharge line runs entirely above grade. Call a licensed plumber or foundation specialist if:
- The valve is embedded in concrete beneath your kitchen slab (requires core drilling)
- You detect sewer gas odors — indicates cross-connection with waste lines, not just sump discharge
- Your pump cycles more than 12 times per hour — points to deeper issues like high groundwater or failing float switch
- The discharge pipe connects to a municipal storm line (illegally in many jurisdictions) — requires inspection and possible re-routing
Prevention Tips
Check valves fail fastest in high-cycle, debris-prone environments. Extend service life with these habits:
- Install an inline sediment filter (e.g., Sediment Filter Installation) before the check valve — reduces grit by 70% (per Grundfos Technical Bulletin 2022)
- Replace swing-type valves every 4 years; spring-assisted models last up to 7 years with annual visual inspection
- Wrap exposed discharge lines in self-regulating heat tape if kitchen slab sits over unheated crawlspace (prevents freeze-induced cracking)
- Test valve function quarterly: turn off power, pour 2 cups of water down discharge pipe — it should drain freely downward but not back up when tilted
Can I use bleach to clean a clogged check valve?
No. Bleach degrades rubber flappers and accelerates PVC embrittlement. Instead, soak the disassembled valve in white vinegar for 20 minutes to dissolve mineral deposits — then rinse with distilled water. For organic sludge, use enzymatic drain cleaner (Enzyme Drain Cleaner Safety) — never caustic or acid-based formulas.
Why does my kitchen sink gurgle when the sump pump runs?
Gurgling signals air being pulled through the drain trap — caused by negative pressure from a failing check valve allowing back-siphonage. It’s not just noise: this can pull sewer gases into your home. According to the U.S. EPA’s 2023 Indoor Air Quality Guide, intermittent gurgling increases volatile organic compound (VOC) exposure by up to 35% in affected rooms.
Is a spring-loaded check valve better than a swing type for kitchens?
Yes — especially in vertical or tight-quarter installations. Swing valves require 6–8" of straight pipe upstream and can stick open if installed horizontally. Spring-loaded units activate at lower flow rates and resist debris jamming. As plumbing engineer Maria Chen notes in Residential Drainage Systems Handbook (2021): “In confined spaces like under-sink sump enclosures, spring-assisted valves reduce failure rates by 62% over five years.”
How do I know if my sump pump’s check valve is backwards?
Look for the molded arrow on the valve body — it must point toward the discharge outlet (away from the pump). If water flows back toward the sump pit after cycling, or you hear a ‘clunk’ followed by dripping from the pump, the valve is reversed or damaged. A backwards valve won’t hold pressure and causes rapid pump wear.
Can I install two check valves on one discharge line?
No — redundant check valves create flow restriction, increase head pressure, and risk cavitation. The International Plumbing Code (IPC 2021, Section 1105.2) prohibits multiple check valves on a single sump discharge unless part of a certified dual-pump redundancy system. One properly sized, correctly oriented valve is always safer and more reliable.
What’s the average lifespan of a kitchen sump check valve?
4–6 years in typical conditions — but drops to 2–3 years if the sump handles laundry or HVAC condensate runoff. The Insurance Institute for Business & Home Safety’s 2023 report found that 81% of sump-related kitchen water damage incidents involved check valves older than 5 years or installed without proper slope verification.
“A failed check valve doesn’t just leak — it turns your sump pump into a recirculation machine. That extra runtime accounts for 22% of premature motor failures we see in retrofit kitchen systems.” — Travis Loomis, Certified Master Plumber, NACHI Inspection Group (2022)
Replacing a failed check valve in your kitchen sump system is rarely about complexity — it’s about access, patience, and getting the orientation right the first time. Keep spare parts on hand, test annually, and remember: if water’s backing up where food prep happens, it’s not just inconvenient — it’s a health and safety priority. For persistent issues, consider upgrading to a sump pump with integrated check valve — eliminates separate component failure points entirely.