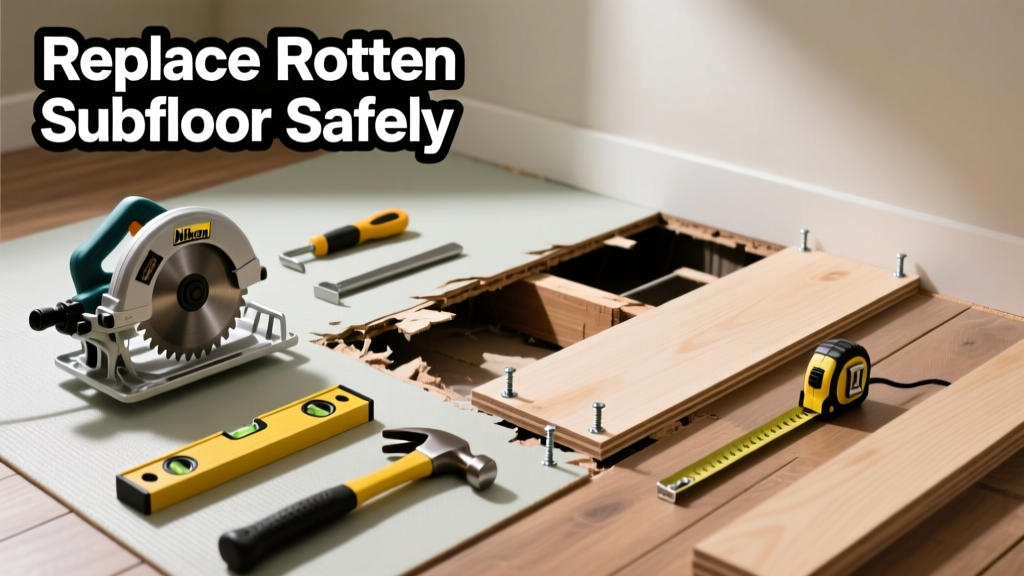
If you hear a soft, spongy crunch underfoot in your bathroom or laundry room—or notice a slight dip near a leaky supply line—you’re likely dealing with localized subfloor rot. Ignoring it invites mold growth, fastener failure, and eventual floor collapse. This guide walks you through replacing just the damaged portion—not the whole floor—saving time, money, and drywall demolition.
Quick Diagnosis
Rotten subfloor isn’t random—it follows water exposure patterns. Check for these root causes first:
- Undetected plumbing leak beneath a vanity, toilet flange, or washing machine pan
- Poor ventilation in bathrooms or basements allowing condensation buildup
- Missing or improperly sealed subfloor seams near exterior doors or showers
- Older OSB subfloor installed before modern moisture-resistant standards (pre-2005)
- Drain line backup that went unnoticed for >48 hours
Tools & Materials Needed
| Item | Purpose | Estimated Cost |
|---|---|---|
| Carpenter’s square & chalk line | Ensures clean, square cuts aligned with joists | $12–$25 |
| Reciprocating saw with carbide-tipped blade | Cuts through wet, nail-saturated plywood without binding | $45–$85 |
| 3/4" CDX plywood or AdvanTech subfloor panel | Moisture-resistant replacement material; matches existing thickness | $28–$42 per sheet |
| 16d galvanized ring-shank nails or 2.5" corrosion-resistant screws | Secures new subfloor without splitting or rusting | $8–$15 |
| Joist hanger brackets (if cutting across unsupported span) | Reinforces load path when removing joist-adjacent sections | $3–$7 each |
Step-by-Step Fix
Work methodically—this isn’t about speed, but structural integrity. Follow these steps in order:
- Shut off water and power to the area. Remove baseboards and flooring (vinyl, tile, or carpet) to expose full extent of damage. Probe with a screwdriver: if it sinks >1/4" into the subfloor, mark that zone.
- Trace a square repair box extending at least 6" beyond all soft areas—and align edges precisely with underlying joists. Use a carpenter’s square and chalk line; never cut diagonally or between joists.
- Cut and remove the damaged section using a reciprocating saw set to 1" depth. Cut along your chalk lines, then pry out debris. Inspect joists: if any show white fungal growth or crumble under light pressure, treat with borate solution before proceeding.
- Install blocking and support where needed. If your cut spans more than one joist bay or removes a joist-end nailing point, add solid 2×6 blocking between joists at both ends of the opening.
- Fasten the new subfloor panel with 2.5" coated screws spaced 6" on center along edges and 12" in the field. Stagger seams from adjacent sheets. Seal all perimeter edges with polyurethane caulk before reinstalling finish flooring.
When to Call a Pro
DIY stops where safety and code compliance begin. Call a licensed contractor if:
- The rotten area exceeds 32 sq. ft. (e.g., full bathroom or kitchen subfloor)
- You find active termite damage or >12" of rotted joist alongside the subfloor
- The affected zone includes a load-bearing wall’s sole plate attachment point
- Your home was built before 1978 and you uncover lead-paint-coated subfloor layers
- There’s evidence of ongoing water intrusion with no visible source—requires infrared moisture mapping
Prevention Tips
Replace once, protect forever. These habits reduce recurrence by over 70% according to the Insurance Institute for Business & Home Safety's 2023 report on residential water damage:
- Install a smart water leak detector (like the Moen Flo) under sinks and behind toilets
- Seal subfloor seams in wet zones with elastomeric sealant—not regular caulk—before laying tile or LVP
- Run bathroom exhaust fans for 20 minutes post-shower; use timers or humidity-sensing switches
- Inspect washing machine hoses every 6 months; replace rubber hoses with braided stainless steel every 5 years
Can I sister a joist instead of replacing the entire subfloor?
Yes—if the joist itself is sound but the subfloor above is compromised, sistering adds lateral stability. Bolt a new 2×8 alongside the existing joist using 1/2" carriage bolts spaced 16" apart. But only do this if rot hasn’t penetrated deeper than 1/4" into the joist face. According to the American Wood Council’s Design Guide for Residential Floor Systems (2022), sistering alone won’t restore rigidity to severely degraded subfloor panels.
Do I need to remove the entire finished floor to fix this?
No—you only need to remove the finish flooring (tile, hardwood, vinyl) within the repair zone plus ~2" beyond. If you have glued-down LVP, carefully score and lift just the affected section. For ceramic tile, break up only what’s directly over the rotten area using a cold chisel and hammer—don’t grind unnecessarily.
Is AdvanTech better than CDX for wet-prone areas?
Yes—AdvanTech absorbs <70% less moisture than standard CDX after 24-hour submersion (Huber Engineered Woods lab data, 2021). It also resists edge swelling and holds fasteners tighter in humid conditions. Use it in bathrooms, mudrooms, and basements—even if your original subfloor was plywood.
What if the rot extends under the toilet flange?
That’s common—and critical. Shut off water, disconnect the toilet, and remove the wax ring. Cut the subfloor repair box to include the flange mounting area. Install a reinforced flange (like the Oatey Twist-N-Seal) anchored into solid joist wood—not just the new subfloor. Never rely on toggle bolts alone in compromised wood.
Can I use construction adhesive instead of screws?
Adhesive helps—but doesn’t replace—mechanical fasteners. The International Residential Code (IRC R503.2.1.1) requires subfloor panels to be fastened with screws or nails at specified intervals. Use subfloor adhesive *with* screws, not instead of them. Skipping fasteners risks squeaks, telegraphing, and long-term deflection.
How long does the repair take from start to finish?
A typical 4' × 4' repair takes 6–8 hours for an experienced DIYer—including demo, prep, cutting, fastening, and cleanup. Add 24 hours if you apply borate treatment to adjacent joists or wait for caulk to cure before reinstalling flooring.
"Over 60% of subfloor replacements we see in metro Chicago homes stem from undetected supply-line leaks—not roof or foundation issues." — Mike Rinaldi, Certified Master Remodeler, Rinaldi Construction Group (2023)
Replacing a rotten subfloor patch isn’t glamorous—but done right, it restores decades of safe, quiet, level walking surface. You’ll know it’s solid when your vacuum glides silently, not thuds. And next time you hear that faint creak near the shower? You’ll already know exactly where to look, what tool to grab, and whether it’s truly yours to fix.