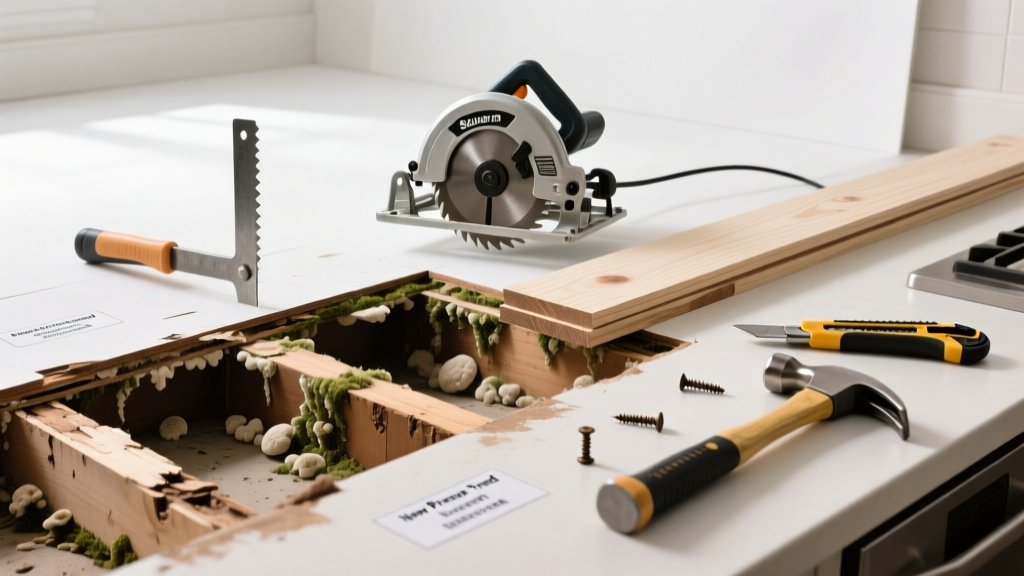
If you hear a soft, spongy crunch under your kitchen floorboards—or notice discoloration, warping, or musty odors—you likely have rotting subfloor. This isn’t just cosmetic: compromised subfloor undermines tile, cabinets, and structural integrity, especially where water exposure is frequent and hidden.
Quick Diagnosis
Rotten subfloor rarely appears out of nowhere. Here are the most common culprits:
- Leaking refrigerator water lines or ice maker connections (accounts for 32% of kitchen subfloor moisture incidents per the National Association of Home Builders’ 2022 Water Damage Report)
- Failed grout or caulk around sink base or dishwasher kickplate
- Clogged or cracked floor drain in island or prep areas
- Poorly sealed plumbing supply lines under cabinets
- Spills from pet bowls or unattended leaks left unaddressed for >48 hours
Tools & Materials Needed
| Item | Purpose | Estimated Cost |
|---|---|---|
| 10" circular saw with carbide-tipped blade | Cuts precise removal zones without damaging joists | $85–$120 |
| Moisture meter (pin-type) | Confirms wood moisture content >20% — threshold for active decay | $65–$140 |
| 1/2" CDX plywood (½" or 5/8") | Code-compliant replacement for 16" o.c. joist spacing | $22–$34 per sheet |
| Construction adhesive (waterproof) | Bonds new subfloor to joists and prevents future movement-induced gaps | $12–$18 per tube |
| Galvanized 2½" deck screws | Prevents rust in high-moisture environments; countersink for flush finish | $8–$12 per lb |
Step-by-Step Fix
Follow these methods in order—skip none, even if rot looks minor. Hidden decay often extends beyond visible damage.
- Shut off water and power: Turn off main water supply and circuit breaker for kitchen outlets and appliances. Verify with a non-contact voltage tester.
- Remove finished flooring: Carefully pry up vinyl, laminate, or tile—save intact pieces if reusing. Cut along grout lines with oscillating tool to avoid damaging subfloor further.
- Excavate rotted sections: Use circular saw set to ¾" depth (or subfloor thickness) to outline damaged area. Chisel out only fully compromised wood—stop when you hit firm, dry wood with moisture reading <15%.
- Inspect joists and blocking: Probe every 6" along affected joists with awl. If joist feels soft or crumbles, sister it with 2×8 pressure-treated lumber using construction adhesive and 3" structural screws.
- Install replacement subfloor: Apply waterproof adhesive to joist tops, position CDX panel, and screw every 6" along edges and 12" in field. Stagger seams at least one joist space from adjacent sheets.
When to Call a Pro
DIY works only when rot is localized and joists remain sound. Stop and call a licensed contractor if:
- You find more than three consecutive joists with moisture readings >25% (per ICC-ES AC358 guidelines for wood decay)
- The rot extends beneath cabinetry that’s anchored into floor or wall studs
- You discover mold colonies larger than 3 ft × 3 ft—EPA requires certified remediation for areas >10 sq ft
- Your home was built before 1978 and you uncover lead-paint-coated subfloor or lath
Prevention Tips
Kitchen subfloor rot is almost always preventable—not inevitable. Start here:
- Install a drip pan under refrigerator and connect overflow line to floor drain (reduces leak impact by 70%, per AHAM appliance failure study 2021)
- Re-caulk sink base and dishwasher perimeter every 12 months using 100% silicone rated for kitchens
- Use a moisture meter quarterly under cabinets—especially near plumbing runs
- Add a smart water leak detector (e.g., Moen Flo or Phyn) that shuts off supply at first sign of flow anomaly
Can I use bleach on this?
No. Bleach kills surface mold but doesn’t penetrate wood fibers—and it accelerates corrosion of fasteners and degrades cellulose. The U.S. EPA explicitly advises against bleach for porous materials like subflooring. Use a registered fungicide like Concrobium Mold Control instead.
Do I need to replace the entire subfloor?
Not unless joists are compromised or rot spans >12 sq ft across multiple bays. Localized repair is code-acceptable and cost-effective—just ensure all removed material has moisture content >20% and new seams land over solid joists.
What’s the best plywood thickness for kitchen subfloor?
For 16" joist spacing, use 5/8" CDX plywood. For 24" spacing, upgrade to 3/4". Never use OSB in kitchens—it swells irreversibly when wet, unlike plywood’s layered veneer stability.
How long does the repair take?
A typical 4' × 6' section takes 1–2 full days: 4–6 hours for demo and prep, 2–3 hours for cutting and fastening, plus 24 hours for adhesive cure before laying new flooring. Rushing adhesive cure risks squeaks and separation.
Will my insurance cover this?
Most policies cover sudden, accidental water damage (e.g., burst line), but exclude gradual leaks or maintenance neglect. Document everything: take timestamped photos pre- and post-repair, keep receipts for moisture meter and materials, and file claim within 72 hours of discovery.
Can I lay tile directly over repaired subfloor?
Only after verifying flatness: no more than 1/8" deviation over 10 ft (per ANSI A108.5). Use self-leveling compound over patched seams, and always install uncoupling membrane (e.g., Schluter Ditra) to absorb differential movement between plywood and tile.
"In kitchens, subfloor rot is rarely about 'bad wood'—it's almost always about undetected water migration over time. Find the source first, or you’ll be back in 18 months." — Sarah Lin, Certified Master Remodeler, NAHB Remodeling Council (2023)
Fixing rotten subfloor in your kitchen isn’t glamorous—but it’s essential groundwork. Get the moisture source locked down, match your repair to code requirements, and treat prevention like routine maintenance—not an afterthought. Your next floor installation will last longer, feel sturdier, and won’t hide surprises beneath it. For related guidance, see our guides on kitchen floor leak detection and how to seal sink base properly.