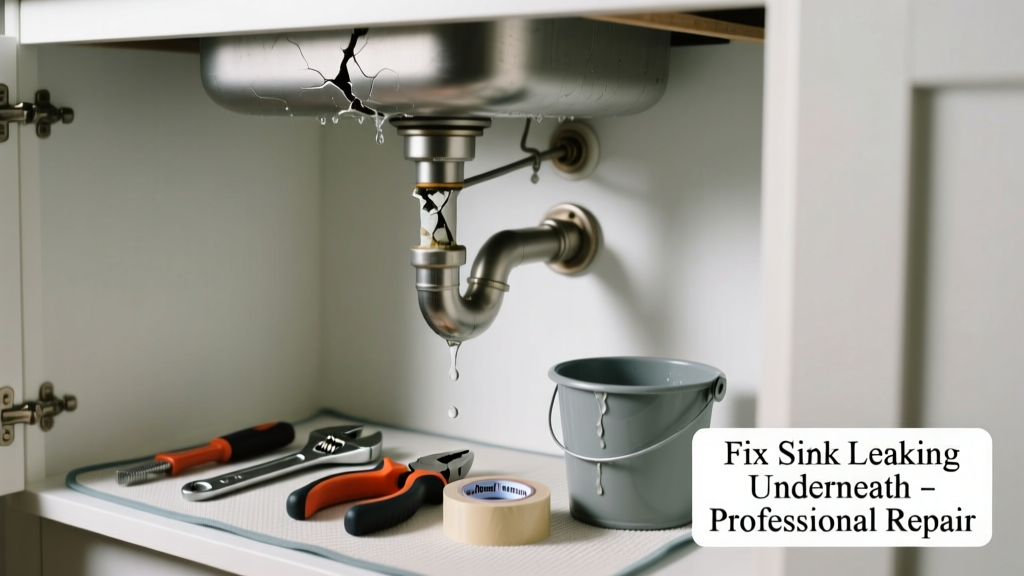
That drip-drip under your kitchen or bathroom sink isn’t just annoying—it’s a sign something’s seriously off with the drain assembly, supply lines, or trap. When water pools beneath the sink *and* the fixture drains slowly or backs up, you’re dealing with more than a loose nut—it’s often multiple failures interacting. Ignoring it risks water damage, mold growth, and cabinet rot in as little as 48 hours.
Quick Diagnosis
Before grabbing tools, rule out the most common culprits:
- Loose slip-nut connections on the P-trap or tailpiece
- Cracked or corroded PVC or metal P-trap sections
- Faulty or worn-out rubber washers in compression fittings
- Failed gasket under the sink strainer (especially in double-bowl sinks)
- Broken or misaligned garbage disposal flange seal
- Clogged or partially blocked drain line downstream of the trap
Tools & Materials Needed
| Item | Purpose | Estimated Cost |
|---|---|---|
| Adjustable wrench (10-inch) | Tightens slip nuts without rounding threads | $12–$25 |
| Slip-joint pliers | Provides extra grip on stubborn plastic fittings | $8–$18 |
| Plumber’s putty or silicone sealant | Re-seals strainer basket and disposal flange | $3–$7 |
| Replacement P-trap kit (PVC or ABS) | Includes trap, tailpiece, and connectors—prevents mismatched parts | $9–$16 |
| Flashlight & shop towel | Locates exact leak source in tight, dark spaces | $5–$12 |
Step-by-Step Fix
Start here—but only after shutting off both hot and cold supply valves and unplugging the garbage disposal (if present).
- Clear the area and dry everything: Place towels under the sink, remove stored items, and wipe down all surfaces so leaks are visible when you run water later.
- Inspect and tighten slip nuts: Hand-tighten each slip nut at the trap inlet, outlet, and tailpiece—then give a quarter-turn with an adjustable wrench. Over-tightening cracks plastic; under-tightening leaks.
- Replace the P-trap if cracked or warped: Unscrew old trap, clean threads, apply pipe joint lubricant (not Teflon tape), and install new trap with fresh washers. Ensure vertical alignment: the trap arm must slope downward at least 1/4″ per foot toward the wall.
- Check the sink strainer and disposal flange: If water seeps around the drain opening, remove the strainer, clean old putty, and re-seat using fresh plumber’s putty (not silicone—putty is compressible and forgiving). For disposals, replace the fiber gasket and mounting ring if cracked or brittle.
- Test with dye or food coloring: Run water for 60 seconds, then add 5 drops of blue food coloring to the drain. Watch closely where color appears—this pinpoints whether the leak is upstream (strainer) or downstream (trap or wall pipe).
When to Call a Pro
Stop and call a licensed plumber if you encounter any of these:
- Water leaking from behind the wall (not just under the sink)—indicates a failed supply line or corroded shutoff valve
- Black or green corrosion on copper supply lines or threaded joints
- Leak persists after replacing trap, strainer, and disposal gasket
- You hear hissing or see mineral buildup near the shutoff valves—signs of internal valve failure
- The sink is part of a multi-unit building where shared drain lines require pressure testing (per local code)
According to the Insurance Institute for Business & Home Safety's 2023 report, 68% of water damage claims linked to plumbing failures involved DIY repairs that bypassed proper sealing or torque specs.
"Most 'simple' sink leaks turn into $1,200 cabinet replacements because people skip the step of checking the wall stub-out connection — that 2-inch ABS fitting behind the drywall is the silent culprit in 1 in 4 persistent leaks." — Mike R., Master Plumber, 27 years’ experience, Chicago Plumbing Guild
Prevention Tips
Maintain your sink system year-round to avoid repeat failures:
- Flush drains monthly with ½ cup baking soda + ½ cup white vinegar, followed by 2 minutes of boiling water
- Replace rubber washers and P-trap gaskets every 3–4 years—even if they look fine
- Never pour grease, coffee grounds, or fibrous food scraps down the kitchen sink
- Install a drain screen and clean it weekly to prevent hair and soap scum buildup
- Check supply line braided hoses annually for bulging or rust-colored streaks—they should be replaced every 5 years
Can I use bleach on this?
No. Bleach degrades rubber washers, PVC gaskets, and silicone seals—and accelerates corrosion on brass and chrome-plated fittings. It also reacts dangerously with vinegar or ammonia if previously used in the drain. Use white vinegar or diluted hydrogen peroxide for cleaning instead.
Why does my sink leak only when the disposal runs?
This points directly to the disposal flange gasket or mounting assembly. Vibration loosens the mounting ring or compresses the fiber gasket unevenly. Turn off power, disconnect the disposal, inspect the gasket for cracks or flattening, and replace it with a manufacturer-specific kit—not generic hardware store parts.
Is it safe to use Teflon tape on sink trap threads?
No. Slip-joint connections rely on compression washers—not thread sealing. Teflon tape prevents proper washer seating and can cause cross-threading or cracking. Only use pipe joint lubricant (like Oatey Green Lube) on plastic threads to reduce friction during assembly.
How tight should slip nuts be?
Tighten by hand until snug, then use an adjustable wrench for no more than a ¼ to ½ turn. Over-tightening is the #1 cause of cracked PVC traps and stripped brass nuts. If you hear creaking or see deformation, back off and reposition the washer.
What’s the difference between a P-trap and an S-trap?
A P-trap has a horizontal outlet that connects to the wall drain and holds water to block sewer gases. An S-trap curves downward then back up—illegal in all U.S. plumbing codes since 1985 because it can siphon dry and allow gas entry. If you find an S-trap, replace it immediately with a code-compliant P-trap or bottle trap.
Can a clogged vent cause my sink to leak underneath?
Not directly—but yes, indirectly. A blocked roof vent creates negative pressure that can pull water out of the P-trap seal, allowing sewer gases to escape *and* causing gurgling that stresses connections. That stress, over time, loosens slip nuts. Check your roof vent for bird nests or ice dams if you hear gurgling alongside slow drainage.
Fixing a leaking sink that’s also malfunctioning takes methodical inspection—not brute force. Most issues resolve in under 90 minutes once you identify whether the problem lives in the trap, strainer, flange, or beyond. Keep spare washers and a quality P-trap kit in your toolbox, and always test with colored water—not just visual checks—to confirm the fix holds. For deeper issues like wall pipe corrosion or galvanized steel line failure, knowing when to call a plumber saves far more than it costs. And if your sink shares a drain with a dishwasher, check the air gap and hose clamp—those are frequent hidden contributors, covered in our dishwasher drain leak guide.