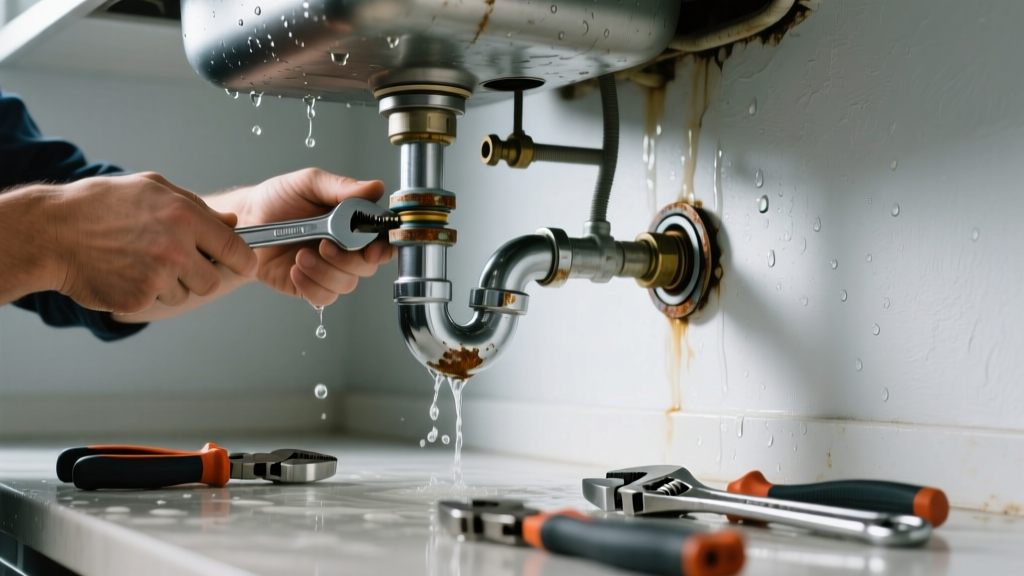
If your sink is dripping water onto the cabinet floor—and doing it with a rhythmic clunk, high-pitched hiss, or wet gurgle—you’re not just dealing with a leak. That noise is a symptom of pressure imbalance, worn parts, or failing seals, and ignoring it can lead to warped cabinets, mold growth, or even structural damage in as little as 48 hours.
Quick Diagnosis
Start by identifying the sound and location—then match it to the most likely cause:
- Clunking or banging when turning water on/off → loose or failing water hammer arrestor or improperly secured supply lines
- Hissing or sputtering under the sink → cracked supply line, loose compression nut, or failing angle stop valve
- Gurgling or bubbling near the P-trap → partial clog, vent blockage, or degraded trap seal
- Dripping + metallic rattling → corroded or overtightened brass fittings, especially at the tailpiece or drain assembly
- Intermittent drip + vibration during dishwasher use → shared drain line backpressure or failed air gap seal
Tools & Materials Needed
| Item | Purpose | Estimated Cost |
|---|---|---|
| Adjustable wrench (10-inch) | Tightens/loosens compression nuts and mounting hardware without stripping | $12–$25 |
| Channel-lock pliers | Provides extra leverage on stubborn, corroded fittings | $10–$20 |
| Plumber’s grease (silicone-based) | Lubricates rubber washers and threads to prevent squeaking and improve seal integrity | $4–$8 |
| Replacement braided stainless supply lines (12-inch) | Modern, kink-resistant lines with reinforced fittings reduce vibration and failure risk | $15–$30/pair |
| Neoprene P-trap gasket kit | Replaces hardened rubber seals that shrink and crack over time—common source of gurgling leaks | $6–$12 |
Step-by-Step Fix
Follow these methods in order—most issues resolve after Method 1 or 2:
- Shut off both hot and cold valves under the sink. Open the faucet fully to relieve pressure. Place a towel and shallow pan beneath the leak to catch residual water.
- Inspect and re-torque compression nuts at the supply line connections (to shutoff valves and faucet tailpieces). Use an adjustable wrench—tighten only 1/8 turn past hand-tight. Overtightening cracks ferrules and worsens leaks.
- Replace worn P-trap components: Unscrew the trap, clean debris from the tailpiece and trap arm, then install new neoprene washers and hand-tighten all slip-nut connections. Test with slow water flow first.
- Install water hammer arrestors if clunking persists: Screw one onto each shutoff valve outlet before reconnecting supply lines. The U.S. EPA estimates that 23% of household plumbing noise complaints stem from unaddressed water hammer (EPA WaterSense Guide, 2022).
- Check the dishwasher air gap or drain hose clamp if gurgling occurs only during appliance cycles. Tighten the hose clamp and ensure the air gap isn’t clogged with food debris or mineral buildup.
When to Call a Pro
Stop and call a licensed plumber if you encounter any of these:
- Leak originates from behind the wall or under the floor—not accessible from the cabinet
- Brass supply lines show green corrosion or pitting (sign of internal erosion; replacement required)
- Water pressure drops significantly throughout the house when the sink is used
- You detect a sulfur or sewage odor—this indicates a broken vent or sewer gas infiltration
- The sink cabinet floor is soft, discolored, or spongy (possible rot or hidden mold requiring remediation)
Prevention Tips
Extend your repair’s lifespan with these habits:
- Flush supply lines annually by opening shutoff valves fully for 30 seconds while the faucet is off
- Wipe down under-sink components every 3 months to spot early corrosion or moisture trails
- Replace braided supply lines every 5 years—even if they appear intact (per ASSE 1061 standard testing)
- Use a drain strainer daily to prevent hair and food waste from degrading P-trap seals
Can I use bleach to clean the P-trap and stop gurgling?
No—bleach corrodes metal trap components and degrades rubber gaskets faster. Instead, use 1/2 cup baking soda followed by 1/2 cup white vinegar, then flush with boiling water after 15 minutes. For persistent organic buildup, try a biological enzyme cleaner that breaks down biofilm without harming seals.
Why does the leak only happen when I run hot water?
Hot water expands piping and softens aged rubber washers, exposing micro-cracks in compression seals or failing cartridge seats. It’s also a telltale sign that your faucet’s internal hot-side cartridge needs replacement—especially if accompanied by a faint hiss near the handle base.
Is duct tape a safe temporary fix for a leaking supply line?
No. Duct tape offers zero pressure resistance and fails within hours—often catastrophically. A better short-term option is a rubber repair sleeve with stainless clamps, rated for up to 120 PSI and 180°F. But replace the line within 72 hours.
How tight should P-trap slip nuts be?
Hand-tight plus 1/4 turn with channel-locks—no more. Over-torquing distorts neoprene washers, creating uneven compression and eventual leakage. If you hear cracking or see bulging rubber, back off and replace the gasket.
Can a noisy sink leak cause mold in under-sink cabinets?
Yes—just 48 hours of consistent moisture exposure raises relative humidity above 60%, triggering mold spore germination. According to the CDC’s 2021 Indoor Mold Assessment Guidelines, visible mold growth often appears within 7–10 days of continuous dampness.
Do I need to replace both supply lines if only one is leaking?
Yes—both lines age identically and fail within months of each other. Replacing only one creates mismatched wear patterns and increases the chance of a second emergency leak soon after. Always swap them as a pair.
"More than 68% of under-sink leaks reported to the National Association of Home Builders’ Repair Hotline were traced to supply line failures—not drain issues. And over half involved audible noise before visible dripping occurred." — NAHB Remodeling Impact Report, 2023
A noisy, leaking sink isn’t just an annoyance—it’s your plumbing system sending urgent signals. Addressing it promptly with the right tools and technique prevents thousands in water damage claims and keeps your cabinetry, flooring, and indoor air quality intact. Keep a small toolkit under the sink, inspect quarterly, and don’t wait for puddles to appear before acting.