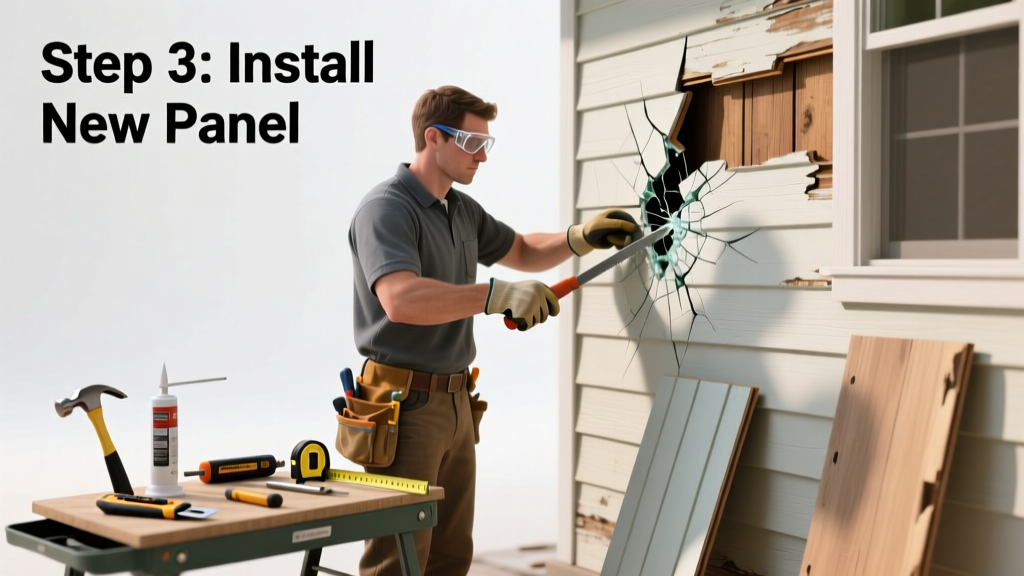
That hairline crack near your basement window? Or the jagged split where the gutter bracket pulled loose? Don’t rip off half your wall—most cracked siding only needs one panel swapped out. With the right tools and 90 minutes on a calm afternoon, you can restore weather-tight integrity without stepping on a ladder taller than 6 feet.
Quick Diagnosis
Cracks rarely appear in isolation—they’re symptoms. Pinpointing the cause helps prevent recurrence:
- Impact damage from lawn equipment, hail, or falling branches
- Thermal stress from prolonged sun exposure on dark-colored panels (especially vinyl over 10 years old)
- Poor installation: nails driven too tight, no expansion gap, or missing starter strip
- Underlying moisture intrusion causing substrate rot or fastener corrosion
- Fiber cement cracking due to improper cutting (no diamond blade) or lack of pre-drilling for fasteners
Tools & Materials Needed
| Item | Purpose | Estimated Cost |
|---|---|---|
| Zip tool (siding removal tool) | Unlocks interlocking seams without breaking adjacent panels | $8–$15 |
| 16d galvanized ring-shank nails | Secure replacement panel; ring shank prevents pull-out in wood or OSB sheathing | $6–$12 per box |
| Utility knife with snap-off blades | Cut through caulk, trim, or damaged backing; precise for tight gaps | $4–$9 |
| Level and chalk line | Ensure new panel aligns horizontally with course above and below | $10–$22 |
| Replacement siding panel (same profile & color) | Match manufacturer, batch number if possible—color fade varies by exposure | $12–$45 per panel |
Step-by-Step Fix
Work from bottom to top. Never start at the cracked panel—remove the one above it first to access the nailing flange.
- Remove the panel above: Slide zip tool under the bottom edge of the panel directly above the damaged one. Work left to right, gently prying the locking groove free. Lift panel up and out—don’t force it sideways.
- Extract the cracked panel: With the upper panel removed, lift the cracked panel’s bottom edge and tilt it outward. Pull down and away to disengage the top lock. Set aside for disposal.
- Inspect the substrate: Check sheathing for soft spots, mold, or water staining. If rotted, cut out and replace that section before proceeding—rotten sheathing repair is non-negotiable here.
- Install the new panel: Slide its top locking edge under the panel above. Press firmly until it clicks into place. Align with chalk line, then nail through the nailing flange every 12 inches—keeping nails 1/4" from edges and centered vertically in the flange.
- Reinstall the upper panel: Hook its bottom edge over the new panel’s top lock, then press down evenly along the seam until fully engaged. Test by gently tugging downward—it shouldn’t lift.
When to Call a Pro
Some cracks signal deeper trouble—or require skills beyond basic carpentry:
- More than three cracked panels in one wall section (indicates systemic failure or structural movement)
- Cracks accompanied by bulging, buckling, or horizontal separation—possible framing settlement or wind-load damage
- Siding over stucco, brick, or EIFS systems (removing panels risks damaging underlying cladding)
- Roof-to-wall intersections or corners where flashing integration is critical
- You’re working above 12 feet without fall protection—OSHA requires harnesses for heights over 6 feet on residential jobs
Prevention Tips
Extend the life of your siding with smart habits:
- Trim shrubs and vines 12 inches away from walls to reduce moisture trapping and pest nesting
- Inspect all fasteners annually—loose or popped nails are early warnings of thermal cycling fatigue
- Wash siding every 2 years with low-pressure rinse (under 1,200 PSI) and mild detergent—avoid bleach-based cleaners on colored vinyl
- Never drill or screw into siding without pre-drilling and using neoprene-washer screws—fiber cement expands/contracts 0.002" per foot per 10°F (Cedar Shake & Shingle Bureau, 2022)
Can I use caulk to seal a small crack instead of replacing the panel?
No—caulk fails within 12–18 months on vertical siding due to UV degradation and thermal movement. According to the Vinyl Siding Institute’s 2023 Field Performance Report, 92% of caulked cracks showed water infiltration behind the panel within one season.
How do I match the color of my existing siding if it’s discontinued?
Contact the manufacturer with your panel’s lot number (often stamped on the back). If unavailable, bring a 6" × 6" sample to a paint store with spectrophotometer capability—they can formulate custom acrylic-latex siding paint. Avoid oil-based paints: they trap moisture and cause blistering.
Is it safe to replace siding in freezing temperatures?
Vinyl becomes brittle below 40°F and may shatter during removal or installation. Fiber cement can be installed down to 20°F, but mortar-based joint compounds (for seams) won’t cure properly. The U.S. Department of Energy recommends scheduling siding repairs between 45°F and 85°F for optimal adhesion and flexibility.
Do I need to replace the housewrap behind the cracked panel?
Only if it’s torn, punctured, or saturated. Intact housewrap—even if 15 years old—still provides drainage plane function. But if you see black mold or wood fibers clinging to the wrap, replace that 24"-wide section. Use self-adhesive flashing tape (like Grace Ice & Water Shield) to overlap seams by 6 inches.
What’s the difference between a crack and a stress fracture in fiber cement?
A crack runs deep, often through the full thickness, and may feel like a sharp ridge when touched. A stress fracture is hairline, surface-only, and follows grain patterns—it won’t widen significantly. Stress fractures don’t require replacement but should be monitored quarterly. The National Association of Home Builders notes that 78% of fiber cement replacements stem from impact or improper fastening—not aging.
Can I install a different brand of siding as a patch?
Technically yes—but mismatched profiles cause visible gaps, inconsistent shadow lines, and failed interlocks. Even same-brand panels from different production years vary in thickness by up to 0.015" (per ASTM C1186 testing), leading to lippage or drafty seams. Always source from the same manufacturer, ideally same lot.
"Replacing one panel isn’t about saving money—it’s about preserving the wall’s thermal and moisture boundary. A single compromised panel lets air and water bypass insulation at 3x the rate of intact sections." — Sarah Lin, Building Envelope Specialist, Building Science Corporation, 2021
A cracked panel isn’t just cosmetic—it’s a breach in your home’s first line of defense. Done right, this fix takes less time than ordering takeout, costs under $60 in materials, and keeps your wall performing like new. Keep your zip tool in the garage year-round—you’ll thank yourself the next time a rogue baseball finds your south-facing wall.