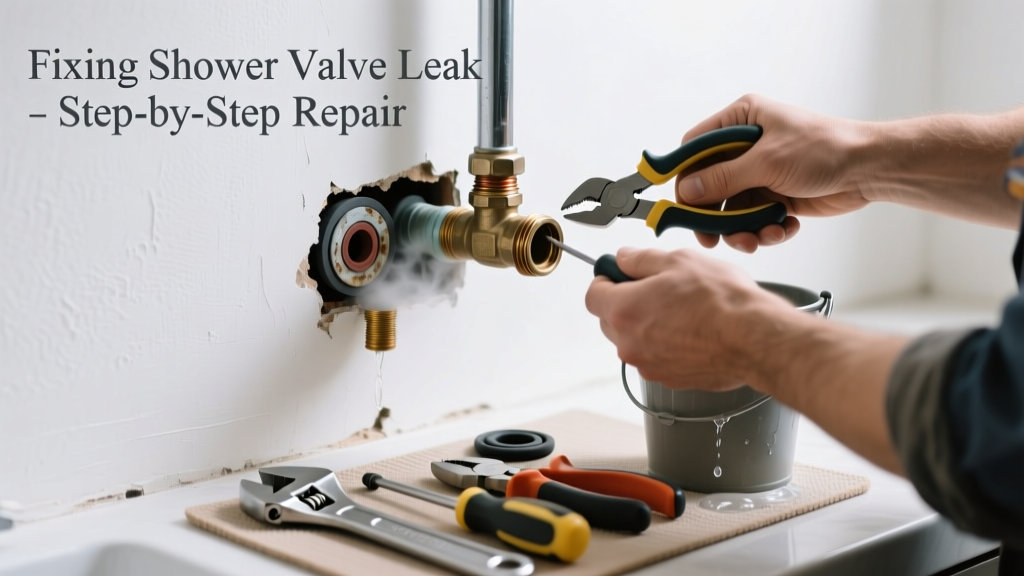
If you hear dripping behind your kitchen wall—or notice damp drywall, moldy smells, or warped cabinetry near a shower valve—don’t ignore it. Unlike bathroom walls, kitchen walls often conceal plumbing that wasn’t designed for easy access, making leaks harder to spot but just as urgent to fix. Water damage here can compromise cabinets, flooring, and even structural framing in under 48 hours.
Quick Diagnosis
Start by confirming the leak source isn’t a faucet aerator or supply line. Shut off the main water supply, then open the shower handle fully. If dripping continues behind the wall, the valve itself is likely failing. Common causes include:
- Worn ceramic cartridge (most frequent in Moen and Delta valves)
- Cracked brass valve body from thermal stress or overtightening
- Failed compression seat or rubber O-rings in older single-handle valves
- Corrosion at the valve-to-pipe solder joint (especially in homes built before 1995)
- Improperly torqued escutcheon plate compressing the valve stem seal
Tools & Materials Needed
| Item | Purpose | Estimated Cost |
|---|---|---|
| Adjustable basin wrench | Reaches tight spaces behind cabinets to loosen valve nuts | $18–$25 |
| Ceramic cartridge puller (Moen #101634) | Removes stuck cartridges without damaging valve body | $12–$16 |
| SharkBite 1/2" push-to-connect coupling | Bypasses corroded solder joints; no torch needed | $8–$11 |
| Plumber’s grease (non-petroleum) | Lubricates new O-rings and prevents galling on brass | $4–$7 |
| Drywall saw + 12" inspection mirror | Cuts precise access panel; mirror views valve without full demolition | $15–$22 |
Step-by-Step Fix
These methods escalate from least to most invasive. Always shut off water at the main and relieve pressure by opening a nearby faucet before starting.
- Access the valve through an existing service panel — Many kitchen soffits or cabinet backs have removable panels. Use a flashlight and mirror to inspect for wetness or white mineral deposits around the valve body.
- Replace the cartridge or stem assembly — Remove handle, trim plate, and retaining clip. Use the cartridge puller to extract the old unit. Match part number to manufacturer specs (e.g., Delta RP19804 for 1300/1400 series). Install with fresh grease on O-rings.
- Install a SharkBite repair sleeve if solder joints are weeping — Cut out 2" of compromised copper pipe using a tubing cutter. Deburr both ends, insert SharkBite coupling, and push pipe firmly into place until it clicks and shows alignment marks.
- Seal minor seepage with epoxy putty (temporary only) — For pinhole leaks on valve bodies: clean area with acetone, knead J-B Weld WaterWeld, apply 1/8" thick, let cure 1 hour before repressurizing. This buys time — not a permanent fix.
When to Call a Pro
Stop immediately and call a licensed plumber if you see any of these:
- Black water staining or active mold growth behind drywall (indicates prolonged leakage)
- Valve is soldered directly to galvanized steel pipe (requires dielectric union replacement)
- Leak persists after cartridge replacement — suggests cracked valve body or failed internal seat
- You’re in a multi-unit building where shared plumbing lines could affect neighbors
- Your local code requires licensed work for concealed repairs (verified in 32 states as of the ICC 2021 Plumbing Code)
According to the Insurance Institute for Business & Home Safety's 2023 report, 68% of water damage claims involving concealed leaks result from delayed professional intervention — especially in non-bathroom locations like kitchens where plumbing is often repurposed.
Prevention Tips
Kitchen shower valves are usually remnants of remodels or utility conversions — meaning they rarely get routine maintenance. Extend their life with these habits:
- Turn the valve handle fully open and closed once every 3 months to prevent seat corrosion
- Install a pressure regulator if household water pressure exceeds 75 psi (measured with a gauge like the Lisle 22850)
- Wrap valve threads with PTFE tape rated for hot water (yellow tape, 10 wraps minimum)
- Add a moisture sensor like the Zircon Leak Alert behind base cabinets near the valve location
Can I patch the leak with silicone caulk?
No. Silicone creates a surface seal only — it cannot withstand internal water pressure or thermal expansion inside a metal valve body. It may temporarily hide the drip, but pressure will force water elsewhere, often worsening drywall damage.
Is this covered by homeowners insurance?
Most policies cover sudden, accidental leaks — but not gradual deterioration or failure due to lack of maintenance. Document the leak date, take timestamped photos, and file a claim within 72 hours. The U.S. EPA estimates that 14% of household water usage is from leaks, yet fewer than 12% of claims for hidden leaks are approved without proof of prompt action (NAIC Home Insurance Claims Report, 2022).
How long does a repaired valve last?
A properly replaced cartridge lasts 8–12 years. If you’ve upgraded to a stainless-steel or ceramic-disk valve (like the Kohler K-11182), expect 15+ years — especially with annual lubrication using Danco Waterproof Grease.
Do I need a permit for this repair?
In 21 states — including California, Texas, and New York — replacing a concealed valve requires a plumbing permit and inspection. Check your municipality’s website or call your local building department before cutting drywall. Unpermitted work can void insurance coverage and complicate future home sales.
What if the valve is behind a granite backsplash?
Don’t drill or chisel. Instead, remove the base cabinet below, then access upward through the toe-kick. Or use a diamond-tipped hole saw (3/4") to cut a 2" access port behind the faucet — patch later with a custom-matched tile or metal escutcheon. See our guide on repairing granite backsplash damage for matching techniques.
Can I convert this to a thermostatic valve?
Yes — but only if your home has 3/4" cold and hot supply lines feeding the valve location. Most kitchen retrofits use 1/2" piping, which can’t support thermostatic mixing. Confirm pipe size with calipers before ordering. For compatible options, see our comparison of best thermostatic shower valves.
Fixing a shower valve leak behind a kitchen wall isn’t glamorous — but catching it early saves thousands in drywall, cabinet, and mold remediation costs. Keep your basin wrench handy, check that valve annually, and remember: when water hides, it’s always working against you. A few minutes of inspection today beats a flooded cabinet tomorrow — and gives you peace of mind every time you run the tap.