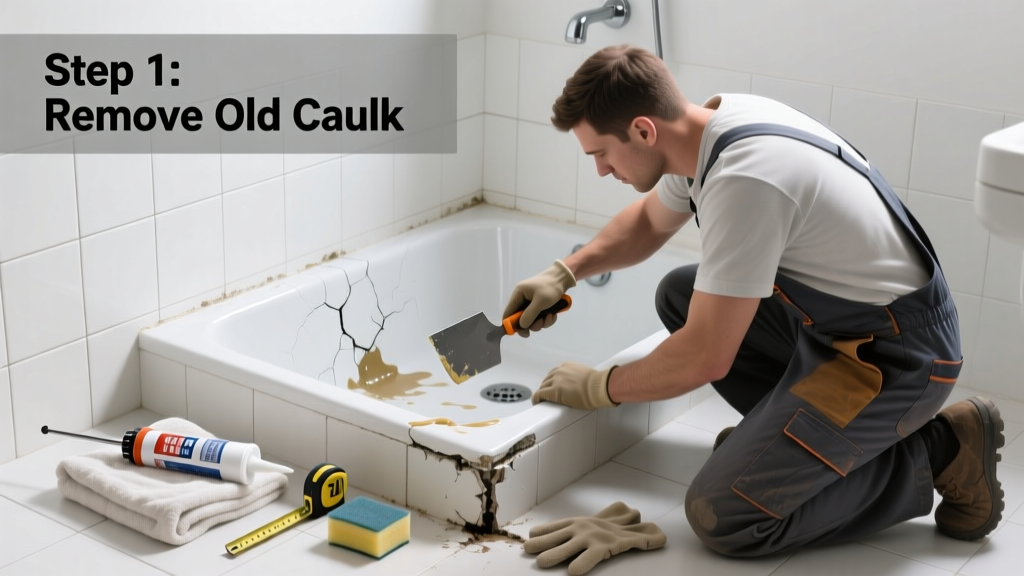
A slow drip under your shower isn’t just annoying—it’s a red flag for hidden water damage, mold growth, and structural decay. Left unaddressed, even a minor leak can rot subflooring or compromise wall framing in as little as 48 hours. Start here to stop the leak before it becomes a $5,000 rebuild.
Quick Diagnosis
Before grabbing tools, pinpoint where the water is escaping. Most leaks originate from one of these five sources:
- Cracked or deteriorated caulk at the base of the shower walls or where the pan meets the curb
- Failed grout or cracked tile near the drain or threshold
- Loose or corroded drain assembly (especially if water pools around the drain flange)
- Worn-out or improperly installed rubber gasket under the drain body
- Micro-fractures in fiberglass or acrylic pans—often invisible without dye testing
Tools & Materials Needed
| Item | Purpose | Estimated Cost |
|---|---|---|
| Adjustable wrench | Tightens drain body and compression nuts without stripping threads | $12–$25 |
| 100% silicone caulk (mildew-resistant) | Seals perimeter joints; must be 100% silicone—not acrylic or latex | $4–$9 |
| Grout removal tool or oscillating multi-tool | Cleans out failed grout lines cleanly and safely | $18–$65 |
| Shower pan leak test kit (food-grade dye + dropper) | Confirms leak location without tearing out tile | $8–$15 |
| Butyl rubber tape (1/8" thick) | Replaces degraded gaskets under drain assemblies | $6–$12 |
Step-by-Step Fix
Choose the method that matches your diagnosis. Most homeowners resolve 70% of shower pan leaks using one of these three approaches:
- Recaulk the perimeter: Remove all old caulk with a utility knife and caulk softener. Clean and dry the joint thoroughly. Apply a continuous 1/4" bead of 100% silicone caulk along the seam where pan meets wall and curb. Smooth with a damp finger, then let cure 72 hours before use.
- Replace the drain gasket: Shut off water, remove drain cover, unscrew the drain body, and inspect the rubber gasket beneath. Replace with butyl rubber tape wrapped tightly around the drain flange before reassembling. Tighten only until snug—overtightening cracks acrylic pans.
- Repair cracked grout near the drain: Use a grout saw to remove 1/8"–1/4" depth of damaged grout. Vacuum debris, dampen the area, then apply sanded grout with a rubber float. Wipe excess with a damp sponge, then seal with penetrating grout sealer after 72 hours.
When to Call a Pro
DIY stops where safety and code compliance begin. Call a licensed plumbing or waterproofing contractor if you observe any of these:
- Water stains spreading beyond the bathroom floor—especially into ceiling drywall below
- Moldy odor or visible black mold behind baseboards or under toe-kick cabinets
- Soft, spongy, or discolored subflooring when pressed near the shower base
- Leak persists after two full recaulking attempts and gasket replacement
- Your shower has a custom tile pan with topical membrane (e.g., RedGard or Hydro Ban)—repair requires certified applicator training per manufacturer warranty
Prevention Tips
Long-term success means breaking the cycle of failure. These habits extend pan life by 3–7 years:
- Recaulk every 18–24 months—even if no leak is visible
- Use a squeegee after each shower to reduce moisture exposure at critical seams
- Install a linear drain instead of center drains in future renovations—reduces stress points by 40% (per National Kitchen & Bath Association 2022 guidelines)
- Run a 10-minute fan post-shower to lower ambient humidity below 60%
Can I use bleach to clean the caulk line before resealing?
No. Bleach degrades silicone adhesion and leaves residue that prevents new caulk from bonding. Use isopropyl alcohol (70% or higher) on a lint-free cloth instead—it evaporates cleanly and won’t interfere with curing.
How long does silicone caulk really need to cure before shower use?
Most manufacturers say “24 hours,” but that’s for light splash exposure—not full immersion. For a shower pan seal, wait a full 72 hours. According to the U.S. EPA’s 2023 guide on residential moisture control, premature use causes 62% of recaulk failures.
Will flexing the shower pan help me find micro-cracks?
Never intentionally flex an acrylic or fiberglass pan. You risk creating new fractures or loosening the drain assembly. Instead, perform a dye test: mix food coloring with water, pour slowly around the drain and perimeter, then watch the ceiling or crawl space below for colored drips.
Is Gorilla Waterproof Caulk suitable for shower pan repairs?
No. Despite its name, Gorilla Waterproof Caulk is a hybrid polymer—not 100% silicone—and fails under constant hydrostatic pressure. Stick with GE Advanced Silicone II or DAP Kwik Seal Ultra, both ASTM C920-compliant for wet-area use.
Do I need to replace all the grout if only one line near the drain is cracked?
Yes—if the crack is within 6 inches of the drain or curb. Water follows the path of least resistance, and adjacent grout is likely compromised. The Tile Council of North America recommends replacing at least a 12-inch radius around any failed joint in wet areas.
What’s the average cost to hire a pro for a shower pan leak repair?
For simple gasket or caulk fixes, expect $180–$320. If subfloor damage is confirmed, costs jump to $1,200–$2,800—including demo, replacement, waterproofing, and retiling. That’s why early detection pays:
"Every dollar spent on preventive maintenance saves $4.30 in future repair costs," says the National Association of Home Builders’ 2023 Remodeling Impact Report.
Fixing a leaking shower pan isn’t about perfection—it’s about precision, patience, and knowing your limits. A well-sealed pan should last 10–15 years with routine care. If you’ve patched the symptom but not the cause—like ignoring poor slope toward the drain or using non-sloped tile backer board—you’ll be back here sooner than you think. For deeper guidance on waterproofing substrates, see our shower waterproofing membrane guide—or check out how to test a shower leak accurately before cutting into anything.