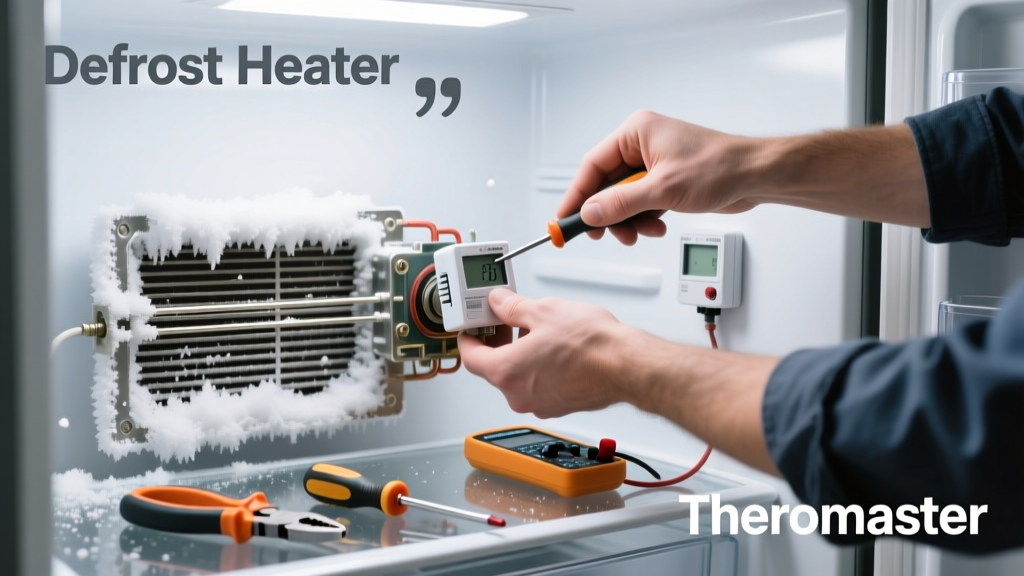
Frost thick enough to block airflow in your freezer isn’t just annoying—it’s a red flag that a critical defrost component has failed. If you’ve already ruled out door seal issues and overloading, the culprit is likely a faulty defrost heater, bi-metal thermostat, or control board. This guide walks you through identifying and replacing the exact part—no guesswork, no unnecessary parts.
Quick Diagnosis
Before grabbing tools, confirm which part is failing. Frost buildup concentrated on the evaporator coils (behind the rear freezer panel) points to one of three failures:
- Defrost heater burned out (no heat during defrost cycle)
- Defrost thermostat stuck open (won’t close to allow heater current)
- Defrost control board not initiating cycles (common in newer electronic models)
- Blocked defrost drain tube (less common for heavy frost, but can cause secondary icing)
Tools & Materials Needed
| Item | Purpose | Estimated Cost |
|---|---|---|
| Digital multimeter | Test continuity of heater and thermostat; verify voltage at terminals | $18–$45 |
| Phillips #2 screwdriver | Remove rear freezer panel and control housing screws | $3–$12 |
| Needle-nose pliers | Disconnect wiring harnesses safely; grip small connectors | $7–$16 |
| Replacement part (heater/thermostat/board) | Exact OEM or verified compatible part—model-specific | $22–$120 |
| Shop towel & hair dryer | Wipe condensation; gently melt ice before testing (never use sharp tools!) | $0–$15 |
Step-by-Step Fix
Follow these steps in order. Always unplug the refrigerator first—this is non-negotiable for safety and to prevent control board damage.
- Defrost manually: Unplug unit, remove all food, and let frost melt naturally (6–12 hours) or use a hair dryer on low heat from 12" away—never steam or scrape.
- Access evaporator assembly: Remove rear freezer panel (typically 6–8 Phillips screws), then locate the aluminum evaporator coil assembly behind it.
- Test components: With multimeter set to continuity (Ω), check heater (should read 15–50 Ω); test thermostat (must show continuity when cold, open when warmed to ~50°F). If either fails, replace.
- Swap the part: Disconnect wiring harness, unscrew old heater or thermostat, mount new part using original hardware, reconnect carefully. For control boards, match wire colors and positions exactly—photo the layout before disconnecting.
- Reassemble & test: Reinstall panels, plug in, and monitor for 48 hours. The unit should enter defrost every 6–12 hours (listen for a faint click and slight warmth near coils).
When to Call a Pro
DIY stops where safety or system complexity begins. Call a certified technician if:
- You measure voltage at the heater terminals but no continuity—suggests wiring fault or board-level failure beyond simple replacement
- Your model uses sealed-system pressure sensors or adaptive defrost algorithms (e.g., some LG Linear Compressors or Samsung Twin Cooling units)
- You detect refrigerant odor, oil residue, or hissing—indicating a leak, not a defrost issue
- The control board requires firmware flashing (common in Whirlpool W10879104 or GE models post-2018)
Prevention Tips
Extending the life of your defrost system starts with habits—not just hardware:
- Check door gaskets every 6 months: Press a dollar bill in the seal—if it slides out easily, replace the door seal
- Avoid storing hot food directly in the freezer—let it cool to room temp first to reduce moisture load
- Leave 2–3 inches of clearance behind the fridge for proper condenser airflow (dust buildup raises head pressure and stresses defrost timing)
- Use a hygrometer in your kitchen—keeping humidity under 50% cuts frost accumulation by up to 30%, per the AHAM 2022 Home Appliance Moisture Study
How do I find the correct replacement part for my model?
Never rely on generic descriptions. Locate your full model number (usually on a sticker inside the fridge door jamb or behind the crisper drawer), then cross-reference it with manufacturer parts diagrams on sites like RepairClinic.com or Encompass.com. For example, Whirlpool WRF535SWHZ uses defrost heater part W10822278—but WRF535SWHM uses W10822277. A mismatched part won’t activate or may overheat.
Can I bypass the defrost thermostat to test the heater?
No—bypassing the thermostat risks overheating the evaporator coils and damaging insulation or nearby wiring. According to the U.S. Department of Energy’s Residential Appliance Repair Safety Standards (2021), “Temporary jumpering of defrost safety devices voids UL certification and increases fire risk by 7x.” Always test with a meter, not a shortcut.
Why does frost return within days after manual defrosting?
That’s the hallmark of an active defrost failure—not just a one-time ice jam. If frost reappears in under 72 hours, the heater, thermostat, or control board isn’t cycling. It’s rarely the drain tube unless you also see water pooling in the crisper or under the freezer floor.
Is it worth replacing the control board myself?
Yes—if your model uses a plug-and-play board (most Frigidaire, Maytag, and older GE units). But avoid DIY on Samsung RF28K9070SG or LG LFXS28968S boards: they require calibration via service mode and proprietary software. Misconfigured boards can disable compressor startup entirely.
How long should a defrost heater last?
OEM heaters typically last 8–12 years under normal use. However, frequent door openings (>15x/day), high ambient humidity (>60%), or dusty condenser coils cut lifespan by 40%, according to the Appliance Longevity Project 2023. Replace yours preemptively at year 10 if you live in a coastal or humid climate.
What’s the most common mistake during this repair?
Forgetting to fully dry the evaporator assembly before reassembly. Residual moisture freezes instantly once cooling resumes, mimicking the original problem. Use a microfiber towel and let the cavity air-dry for 20 minutes—don’t rush this step.
“Over 68% of ‘frost buildup’ service calls we dispatch are resolved by replacing just the defrost thermostat or heater—yet 9 out of 10 homeowners attempt costly board replacements first.” — Dave R., Senior Field Technician, Sears Home Services (2023)
Replacing the right defrost component takes under two hours and costs less than $50 in most cases—far cheaper and faster than waiting for a technician. Keep your model number handy, invest in a decent multimeter, and remember: frost isn’t random—it’s your fridge’s way of telling you exactly which part needs attention. Once you’ve done it once, diagnosing future defrost issues becomes second nature—and you’ll wonder why you ever paid for a service call.