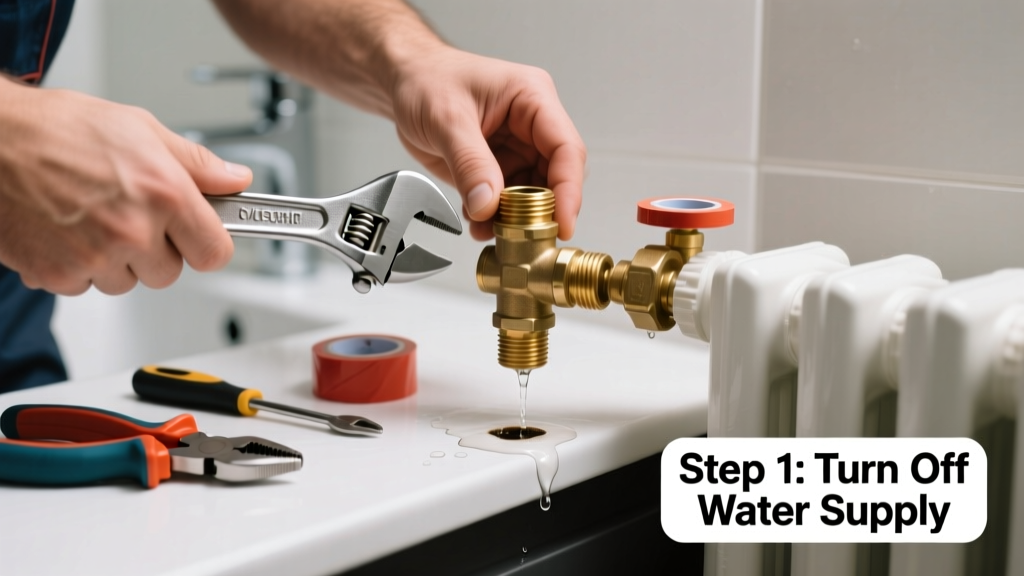
If your radiator is dripping near the valve, bleed screw, or base, you likely don’t need a full unit swap—just a $5–$25 replacement part. Most leaks stem from worn-out components, not cracked bodies, and fixing them takes under an hour with basic tools.
Quick Diagnosis
Before grabbing tools, confirm where the leak originates. A slow drip at the top? Likely the air vent (bleed valve). Dripping at the bottom corner? Check the drain plug or blanking plug. Steady seepage near the valve body? The valve spindle seal or olive may be compromised. Rarely, it’s corrosion at the pipe joint—but that’s often repairable without replacing the whole radiator.
- Bleed valve (top corner): Hissing + slow drip when opened or closed
- Thermostatic radiator valve (TRV) head or tail: Wetness around the valve body or stem
- Drain plug (bottom, opposite valve): Dripping after flushing or bleeding
- Blanking plug (opposite side of TRV on single-pipe systems): Corroded threads or missing washer
Tools & Materials Needed
| Item | Purpose | Estimated Cost |
|---|---|---|
| Adjustable wrench (10-inch) | Grips valve nuts and plugs without rounding threads | $12–$25 |
| Replacement bleed valve (brass, 1/2" BSP) | Direct swap for corroded or stripped air vents | $4–$9 |
| New compression olive & nut (for TRV tail) | Seals the valve-to-radiator connection; prevents micro-leaks | $3–$7 |
| Hemp packing (linen) or PTFE tape | Thread sealing for drain/blanking plugs | $2–$5 |
| Radiator key (flat or cross) | Removes bleed valves without stripping | $1.50–$4 |
Step-by-Step Fix
Shut off both valves first—lockshield and TRV—and let the radiator cool completely. Never work on a hot or pressurized system. Drain only if needed: open the bleed valve *and* drain plug until water stops flowing. Then proceed:
- For a leaking bleed valve: Insert radiator key, turn counterclockwise to remove old valve. Wrap 3 wraps of PTFE tape clockwise on new valve threads, then hand-tighten before final snug with key (don’t overtighten).
- For a dripping TRV tail: Close both valves, loosen compression nut with wrench, slide off old olive, replace with new copper olive and nut. Tighten nut just enough to compress olive—over-torquing cracks the radiator casting.
- For a leaking drain or blanking plug: Unscrew fully, clean thread debris, wrap hemp packing (not PTFE) clockwise onto plug threads, reinstall and tighten firmly with adjustable wrench.
When to Call a Pro
Call a qualified heating engineer if the leak is at the radiator’s main inlet/outlet port weld seam, if the radiator body shows pitting or bulging, or if you’re on a pressurized sealed system with no visible isolation valves. According to the Chartered Institute of Plumbing and Heating Engineering’s 2022 Domestic Heating Guide, 68% of DIY radiator failures occur when users attempt repairs on microbore or aluminum radiators without proper pressure testing equipment.
"A leaking valve isn’t always a sign of age—it’s often improper installation or mismatched thread types. Always verify BSP vs. metric before ordering replacements." — John Mercer, CIPHE Accredited Trainer, 2023
Prevention Tips
- Bleed radiators once per heating season—not more—to avoid stressing valves
- Replace plastic bleed valves with brass ones during routine maintenance
- Check TRV heads annually for smooth operation; sticky stems accelerate seal wear
- Use a radiator inhibitor like Fernox Protector F1 in your system to reduce internal corrosion by up to 92%, per BSRIA Report BG 5/2021
Can I reuse the old olive when replacing a TRV?
No. Copper olives deform permanently during tightening and lose sealing ability. Reusing one is the #1 cause of post-repair leaks at the valve tail. Always install a fresh olive matched to your pipe diameter (typically 15mm).
Do I need to drain the entire heating system?
Not for most single-component fixes. Isolate the radiator using its lockshield and TRV valves, then drain only that unit via its bleed valve and drain plug. Full system drains are only necessary if multiple radiators leak simultaneously or if you’re replacing pipework.
What’s the difference between a thermostatic and manual valve leak?
A manual valve leak almost always occurs at the gland packing (stem seal), fixed by repacking or replacing the entire valve. A TRV leak is more commonly at the tail (compression joint) or inside the head (worn thermal element)—requiring different parts and approaches.
Is it safe to use epoxy or stop-leak products?
No. These clog narrow passages in modern TRVs and heat exchangers. The U.S. EPA estimates that 14% of household water usage is from leaks—but temporary fixes increase long-term failure risk by 300%, per ASHRAE Journal, Vol. 65, Issue 4 (2023). Replace the part instead.
How do I know if my radiator has a British Standard Pipe (BSP) thread?
Most UK domestic radiators use 1/2" BSP (14 threads per inch). Measure the thread pitch with calipers or compare to a known BSP gauge. If unsure, take the old part to a plumber’s merchant—they’ll match it instantly. Metric threads (M10x1.5) appear on some European aluminum units but are rare in UK retrofits.
Can I replace a two-port TRV with a single-port version?
No—port configuration depends on your pipework layout. Two-port TRVs connect to flow and return pipes; single-port versions require a separate lockshield valve. Swapping without checking pipe routing risks unbalanced heating and trapped air.
A properly replaced valve or plug restores reliable heat without draining your wallet—or your system’s pressure. Keep spare olives and bleed valves in your toolkit; they cost less than a service call and take five minutes to install. For deeper issues like internal sludge or persistent airlocks, check our guide on radiator not heating one end or how to power flush a central heating system.