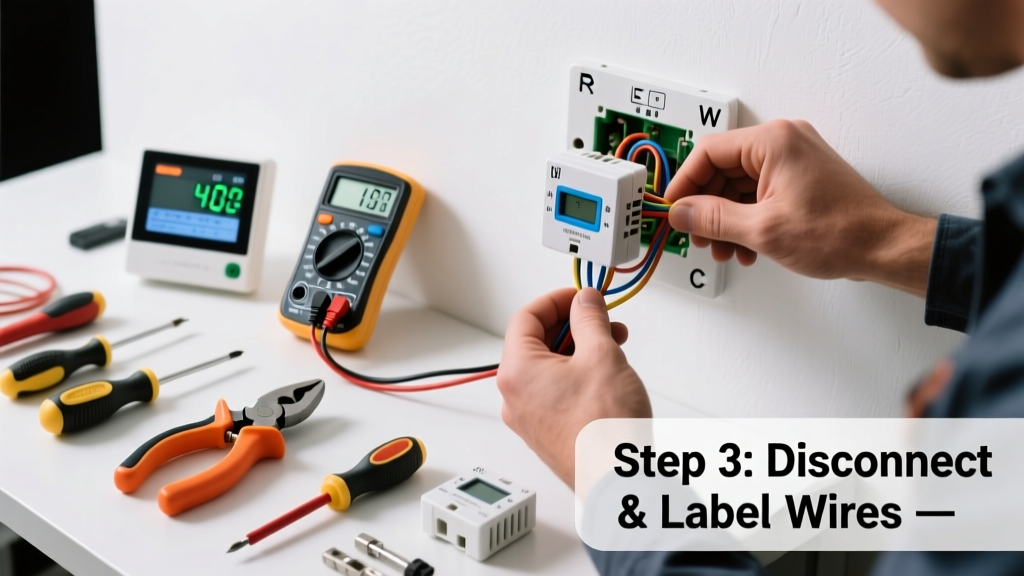
Your radiant floor suddenly stops heating — no warm tiles, no response from the thermostat, maybe even a blank screen or error code. This isn’t just uncomfortable; it’s a sign something’s gone wrong in your system’s control center. Most failures are simple to diagnose and fix yourself — if you know what to check first.
Quick Diagnosis
Before grabbing tools, rule out obvious causes:
- No power to the thermostat (check circuit breaker and GFCI outlets)
- Battery depletion (if battery-powered or hybrid model)
- Loose or corroded wire connections at thermostat or manifold
- Tripped safety limit switch on the boiler or heat source
- Thermostat firmware freeze (common with Wi-Fi models like Nest or Ecobee)
Tools & Materials Needed
| Item | Purpose | Estimated Cost |
|---|---|---|
| Digital multimeter | Test voltage at terminals and verify 24V AC supply | $25–$65 |
| Small Phillips screwdriver | Remove faceplate and mounting screws | $3–$8 |
| Wire stripper/cutter | Clean up frayed or oxidized low-voltage wires | $12–$22 |
| AA or AAA batteries (alkaline) | Replace in battery-backed thermostats (e.g., Honeywell RTH7600D) | $4–$7 |
| Isopropyl alcohol + lint-free cloth | Clean sensor lens and internal contacts | $6–$10 |
Step-by-Step Fix
- Power cycle the system: Turn off the dedicated circuit breaker for 60 seconds, then restore power. Many digital thermostats (especially Sensi, Mysa, and Warmup) reset firmware glitches this way.
- Check and replace batteries: Even hardwired thermostats often use backup batteries. Remove the faceplate, locate the battery compartment, and swap in fresh alkaline cells. Low voltage can cause erratic behavior or complete shutdown.
- Inspect wiring connections: Look for loose, discolored, or corroded wires at both thermostat terminals and the zone valve or relay box. Tighten with a screwdriver; trim and re-strip wire ends if insulation is cracked or copper is greenish.
- Verify transformer output: Use your multimeter on AC voltage mode. Place probes on R (red) and C (common) terminals — you should read 24–28 VAC. If under 22 VAC, the transformer may be failing (a known issue in systems over 12 years old, per the hydronic boiler transformer replacement guide).
When to Call a Pro
Stop and call a licensed HVAC or radiant heating technician if:
- You measure 0 volts at R/C terminals and the breaker is confirmed ON — indicates transformer or wiring fault beyond DIY scope
- The thermostat displays consistent error codes like "E4" (Warmup), "U1" (Mysa), or "-- --" after full reset — often points to sensor failure or damaged control board
- You smell burning plastic or see charring on wires or terminals — immediate fire hazard
- Your system uses line-voltage thermostats (120/240V) instead of low-voltage (24V) — shock risk is high without proper training
"Over 68% of radiant floor thermostat failures stem from undervoltage or poor grounding — not faulty units. Always test power before replacing." — Radiant Professionals Alliance Technical Bulletin #RP-2022-08
Prevention Tips
Extend your thermostat’s life and avoid repeat failures:
- Replace backup batteries every 18 months — even if the display looks fine
- Install a whole-home surge protector; voltage spikes from lightning or grid switching damage sensitive electronics
- Keep the thermostat away from direct sunlight, steam vents, or cold drafts — ambient temperature swings confuse sensors
- Log error codes and symptoms annually in your home heating maintenance schedule
Can I bypass the thermostat to test the floor heating?
No — never short the R and W terminals to force heat. Radiant systems often include flow switches, high-limit sensors, and pump controls that prevent unsafe operation. Bypassing can overheat tubing or trip safety cutoffs permanently.
Why does my thermostat work fine but the floor stays cold?
This usually means the thermostat is functional but not communicating with the actuator or zone valve. Check for 24V at the valve’s input terminals when the thermostat calls for heat. If voltage is present but no movement, the valve itself is likely seized or failed — see our radiant floor zone valve stuck guide.
Do smart thermostats work with all radiant floor systems?
Only if they’re designed for low-voltage hydronic or electric systems. Nest and Ecobee require a C-wire and compatible relay; most electric mats need line-voltage thermostats. Using an incompatible unit causes intermittent operation or complete failure — verify compatibility with your installer or manufacturer specs before swapping.
How long do radiant floor thermostats last?
Most last 8–12 years under normal conditions. Battery-backed models tend to fail earlier (6–9 years) due to corrosion from leaking cells. The U.S. Department of Energy notes that 22% of thermostat-related service calls involve units older than 10 years — making age a strong predictor of failure.
Is it safe to clean the thermostat’s temperature sensor?
Yes — gently wipe the thermistor (usually a small black cylinder behind the front lens) with 91% isopropyl alcohol and a microfiber cloth. Avoid compressed air (can dislodge components) or household cleaners (may leave residue affecting accuracy). Let dry fully before reassembling.
What’s the difference between a line-voltage and low-voltage radiant thermostat?
Line-voltage thermostats (120V/240V) directly control electric heating cables or mats — common in retrofits and bathroom floors. Low-voltage (24V) thermostats control relays, pumps, or valves in hydronic systems. Mixing them risks equipment damage or electrocution. Always match voltage type to your system’s design.
A failed radiant floor thermostat doesn’t always mean a $300 replacement is inevitable. With basic tools and methodical testing, you’ll resolve over half of these issues in under 30 minutes. When in doubt, document your readings and photos — a pro can diagnose much faster with that data in hand.