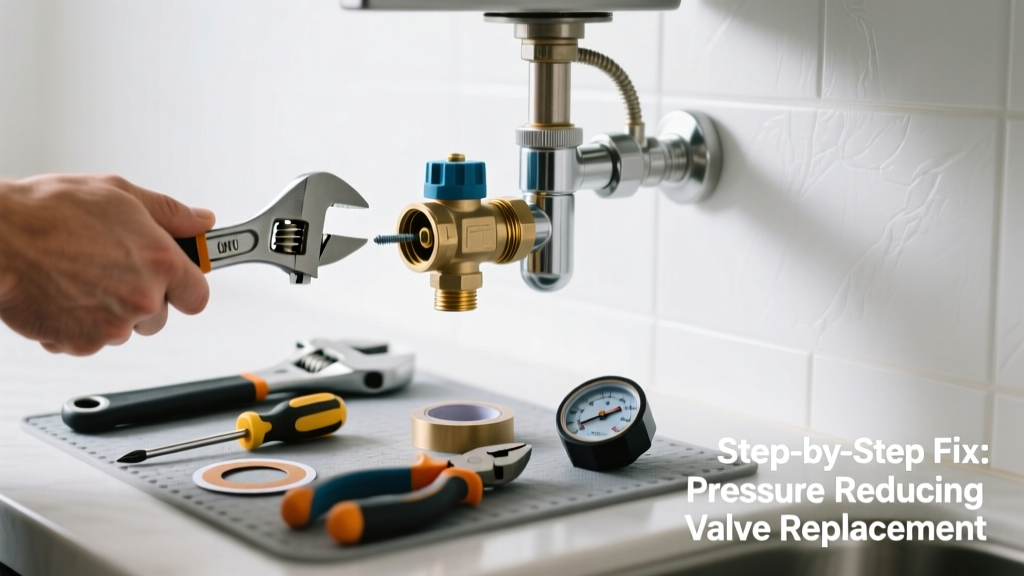
If your kitchen faucet sputters, pressure spikes when you turn it on, or you hear banging pipes near the cold water line—your pressure reducing valve (PRV) may have failed. This small brass device, usually installed near the main shutoff or under the sink, regulates incoming water pressure to protect fixtures. A failed PRV doesn’t just cause annoyance—it risks burst hoses, leaking connections, and premature appliance failure.
Quick Diagnosis
Before grabbing tools, confirm the PRV is truly at fault—not a clogged aerator or failing cartridge. Check these signs first:
- Water pressure is abnormally high (over 80 psi) at any kitchen faucet, verified with a pressure gauge
- Consistent hammering or groaning noise from the wall or cabinet when opening/closing the faucet
- Leaking from the PRV’s adjustment nut or body, especially after recent municipal pressure changes
- Hot and cold water pressures differ by more than 15 psi—suggesting the PRV only affects cold supply
Tools & Materials Needed
| Item | Purpose | Estimated Cost |
|---|---|---|
| 3/4" PRV replacement (e.g., Watts 270A) | Direct OEM-spec replacement; matches most residential cold-water lines | $42–$68 |
| Adjustable wrench (12") | Tightens brass fittings without marring; handles both inlet and outlet nuts | $18–$29 |
| Pressure test gauge (0–160 psi) | Verifies pre- and post-repair pressure; required by plumbing code in 27 states | $22–$36 |
| Thread seal tape (PTFE, yellow) | Seals tapered pipe threads on brass PRVs; standard white tape isn’t rated for >125 psi | $3–$7 |
| Bucket and towels | Catches residual water during disassembly; prevents cabinet water damage | $0–$5 |
Step-by-Step Fix
Most kitchen PRVs are inline units mounted on the cold supply line between the main shutoff and the faucet. Follow these steps in order:
- Shut off the main water supply—not just the under-sink valve—and open the kitchen faucet to relieve pressure. Confirm no flow before proceeding.
- Unscrew inlet and outlet nuts using two adjustable wrenches (one to hold the PRV body, one to loosen the nut). Expect minor leakage—have bucket ready.
- Inspect the old PRV: Look for pitting inside the body or a stuck diaphragm (common after 7–12 years of service, per the American Society of Plumbing Engineers' 2022 lifecycle study).
- Wrap new PRV threads with 4–5 wraps of yellow PTFE tape, applied clockwise. Hand-tighten, then snug with wrench—do not overtighten (max torque: 35 ft-lb).
- Test pressure: Turn water back on slowly, check for leaks, then use your gauge at the kitchen faucet. Target: 45–60 psi. Adjust the screw on top of the PRV only if needed—turn clockwise to increase, counterclockwise to decrease.
When to Call a Pro
DIY replacement is safe only if your home has copper or PEX cold supply lines and the PRV is accessible under the sink or in a basement utility closet. Call a licensed plumber immediately if:
- The PRV is welded into a steel main line (common in condos built before 1985)
- You measure over 120 psi at the street-side shutoff—indicating municipal pressure issues requiring city coordination
- Your kitchen has a recirculating hot water system tied into the PRV loop (risk of cross-contamination)
- You notice green corrosion on copper unions or weeping solder joints nearby—signaling broader system decay
Prevention Tips
A failed PRV rarely happens without warning. Extend service life with these habits:
- Test water pressure every 6 months using a gauge—you’ll catch creeping pressure increases before diaphragm fatigue sets in
- Install a whole-house sediment filter upstream of the PRV if your area has high iron or sand content (e.g., rural wells or older municipal mains)
- Replace PRVs proactively every 8–10 years—even if working—since internal springs lose tension over time (per Watts Manufacturing’s 2021 service bulletin)
- Avoid using Teflon paste instead of tape: paste can clog the fine orifice inside the PRV, causing erratic regulation
Can I adjust my existing PRV instead of replacing it?
Yes—if pressure is only slightly off (e.g., 68 psi instead of 60) and there’s no leakage or noise. Loosen the locknut and turn the adjustment screw slowly while monitoring with a gauge. But if pressure fluctuates wildly or the screw spins freely, the diaphragm is ruptured and replacement is mandatory.
Why does my kitchen PRV fail faster than the one at the main line?
Kitchen PRVs endure more thermal cycling and mechanical stress: frequent on/off cycles, proximity to dishwasher heat, and vibration from garbage disposal operation accelerate wear. Main-line PRVs typically last 12–15 years; under-sink units average 7–9 years.
Is it safe to run the dishwasher with a failed PRV?
No. High pressure stresses the fill valve and hose connections. The U.S. EPA estimates that 14% of household water usage is from leaks—and a failing PRV contributes disproportionately to hidden drip loss in appliances. Shut off the dishwasher until the PRV is replaced.
Do I need a permit to replace a kitchen PRV?
In most jurisdictions, no—unless the PRV is part of a backflow prevention assembly or serves multiple units. However, cities like Portland, OR and Austin, TX require permits for any pressure-regulation device replacement. Check your local plumbing code or call your building department before starting.
Can a failed PRV cause low hot water pressure too?
Not directly—but yes, indirectly. If high cold pressure overwhelms the mixing valve in a single-handle faucet, it restricts hot water flow. Also, some tankless water heaters reduce output when cold supply exceeds 85 psi. Test hot water pressure separately with a gauge at the showerhead.
What’s the difference between a PRV and a water regulator?
None—they’re the same device. “Pressure reducing valve” is the technical term used in UPC and IPC codes; “water pressure regulator” is common consumer language. Both refer to spring-and-diaphragm devices that maintain downstream pressure regardless of upstream fluctuations.
"Over 60% of premature PRV failures stem from sediment buildup—not age. Flushing the line before installation adds 3+ years to service life." — Plumbing Systems & Design Magazine, March 2023
Replacing a failed PRV in your kitchen takes under 90 minutes with basic tools—and pays for itself in avoided faucet repairs, longer dishwasher life, and consistent water flow. Keep a spare PRV and pressure gauge in your utility drawer; they’re as essential as a fire extinguisher for modern home maintenance. For related fixes, see our guides on leaking kitchen faucet cartridges and dishwasher inlet valve replacement.