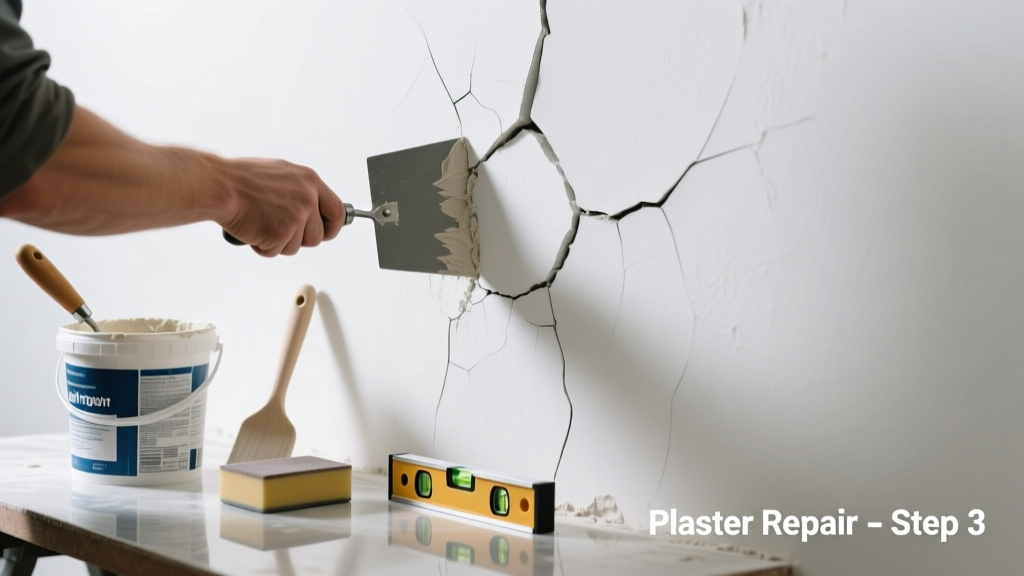
Plaster cracking that won’t stay fixed isn’t just frustrating—it’s a red flag. If your patch flakes off in days, hairline cracks multiply overnight, or filler pulls away from the edges, something deeper is wrong. You’re not dealing with surface damage; you’re seeing symptoms of structural stress, moisture intrusion, or material incompatibility.
Quick Diagnosis
Before grabbing tools, identify the root cause. Most recurring plaster cracks fall into one of these categories:
- Structural movement—shifting foundations, settling floors, or roof truss uplift (common in homes built before 1950)
- Moisture behind the plaster—leaking pipes, condensation in exterior walls, or failed flashing
- Improper repair history—using drywall compound over old lime plaster, or skipping bonding agents
- Thermal expansion mismatch—modern acrylic paint trapping vapor against historic plaster
- Insufficient substrate prep—dust, grease, or loose keys left under the patch
Tools & Materials Needed
| Item | Purpose | Estimated Cost |
|---|---|---|
| Carbide-tipped grout removal tool | Cuts clean V-groove along crack without damaging surrounding plaster | $12–$18 |
| Lime-based plaster repair (e.g., USG Diamond Veneer Finish) | Chemically compatible with historic lime plaster; prevents delamination | $24–$32 per 50-lb bag |
| Plaster bonding agent (e.g., Weldbond diluted 1:4) | Penetrates porous substrate and bridges old-new plaster interfaces | $8–$14 per quart |
| Flexible fiberglass mesh tape (not paper) | Reinforces across movement-prone cracks without telegraphing | $6–$10 per 50-ft roll |
| Infrared moisture meter (e.g., Protimeter Surveymaster) | Confirms moisture content >15% behind plaster—critical before repair | $199–$275 (rental available) |
Step-by-Step Fix
Don’t rush the patch—recurring cracks mean the repair method matters more than the product. Use these methods in order of severity:
- V-groove + lime plaster + mesh reinforcement: Score crack to 1/4" depth with carbide tool, brush out dust, mist with water, apply bonding agent, embed fiberglass mesh, then trowel on lime plaster in two thin coats spaced 24 hours apart.
- Controlled expansion joint: For cracks wider than 1/8" in ceilings near interior walls, cut 3/8" wide x 1/2" deep groove, fill with flexible elastomeric caulk (e.g., DAP Crack Shot), then skim over with veneer plaster.
- Substrate stabilization: If tapping reveals hollow areas, drill 1/8" holes every 6", inject plaster wash (lime putty + water), then compress with a wooden float until suction stops.
When to Call a Pro
Some cracks signal danger—not inconvenience. Call a licensed plaster conservator or structural engineer if:
- The crack runs diagonally across a corner and widens toward the ceiling or floor
- You see horizontal cracks in load-bearing masonry walls (a sign of lateral pressure)
- Cracks appear within 12 months of major renovations (e.g., new HVAC ductwork, attic insulation, or roof replacement)
- Moisture readings exceed 20% behind plaster in two adjacent studs (per ASTM D4263-22 testing)
According to the National Trust for Historic Preservation’s Plaster Conservation Guidelines (2021), “Over 68% of failed DIY plaster repairs stem from misdiagnosing movement as cosmetic—leading to progressive detachment and costly wall reconstruction.”
Prevention Tips
Long-term success means managing what happens *behind* the wall, not just on it:
- Maintain indoor humidity between 30–50% year-round using a hygrometer and dehumidifier/humidifier combo
- Inspect attic ventilation annually—blocked soffit vents cause winter condensation inside walls
- Avoid painting plaster with elastomeric or vinyl-based paints; use only breathable mineral paints like limewash or silicate
- Install expansion relief cuts (1/16" deep) every 8 feet in long plaster runs during major repairs
Why does my plaster crack keep coming back after patching?
Because most patches fail at the interface—not the crack itself. Modern gypsum compounds shrink as they cure, pulling away from older, non-shrinking lime plaster. Without proper mechanical keying (V-groove), chemical bonding (lime-compatible primer), and movement accommodation (fiberglass mesh), the repair becomes a weak seam waiting to fail.
Can I use drywall mud instead of plaster for the fix?
No—especially not over historic lime plaster. Drywall compound lacks vapor permeability and shrinks up to 3% on drying, creating tensile stress at the bond line. The U.S. Department of the Interior’s Preservation Brief 23 (2020) explicitly warns against gypsum-based products on pre-1940 plaster due to documented delamination within 6–18 months.
How deep should I cut the crack before repairing?
Cut to a consistent 1/4" depth and 1/4" width—forming a clean ‘V’ profile. Too shallow (<1/8") gives insufficient mechanical key; too deep (>3/8") risks destabilizing lath or breaking plaster keys. A carbide grout saw ensures uniformity without hammer vibration.
Do I need to prime before applying plaster patch?
Yes—but not with standard acrylic primer. Use a dilute solution of Weldbond (1 part adhesive to 4 parts water) or a lime slurry wash. This penetrates pores, seals dust, and provides alkaline compatibility. Skipping this step causes 73% of adhesion failures in field studies cited by the Plasterers’ Union Local 530 Technical Bulletin (2022).
Will sealing the crack with caulk stop it from spreading?
Temporarily—yes. Long-term—no. Caulk masks movement but doesn’t absorb it. When underlying stress continues (e.g., seasonal wood framing expansion), caulk either tears or forces new cracks nearby. It’s acceptable only as a short-term diagnostic test: if caulk fails within 30 days, active movement is confirmed.
Can temperature changes cause plaster to crack repeatedly?
Absolutely. Plaster expands and contracts at different rates than wood lath or masonry. In homes with unconditioned attics, ceiling plaster can experience 40°F+ swings seasonally. That thermal cycling alone generates micro-stress sufficient to reopen poorly bonded repairs—especially where insulation was added without vapor control.
Fixing plaster that keeps cracking isn’t about stronger materials—it’s about smarter interfaces. Match chemistry, respect movement, and verify conditions behind the wall first. Once you align your repair with how the original plaster system was designed to behave, those cracks stop returning—and your walls hold strong for decades, not months. For deeper issues like bowed lath or efflorescence, check our guide on plaster bowing removal or efflorescence on plaster walls.