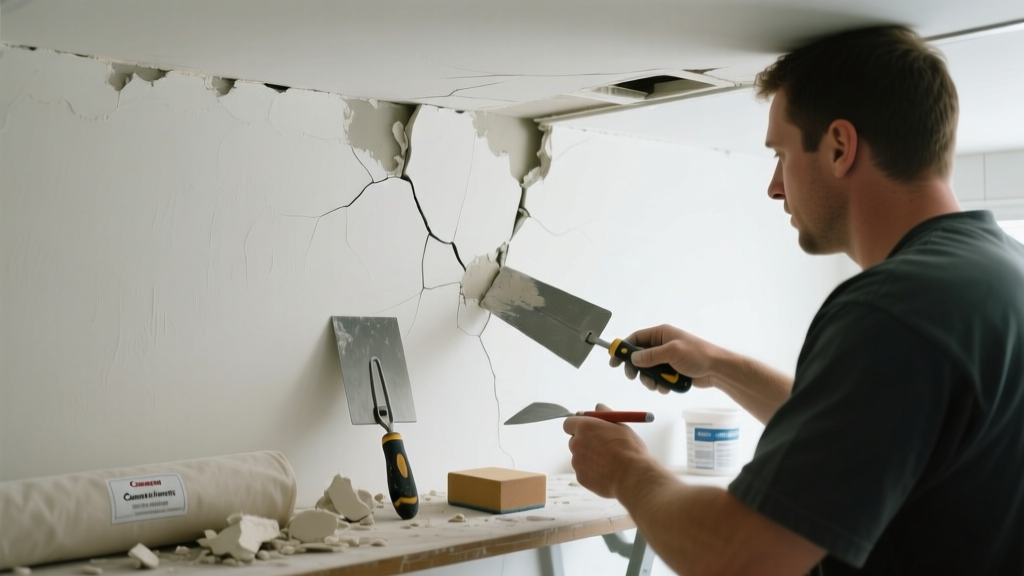
Bathroom plaster cracks aren’t just cosmetic—they’re early warnings of moisture intrusion, structural movement, or aging substrate failure. Unlike drywall, plaster doesn’t flex; when it cracks in a high-humidity room, the cause is rarely superficial. Ignoring them invites mold, delamination, and costly rework.
Quick Diagnosis
Before grabbing tools, pinpoint the root cause. Most bathroom plaster cracks fall into one of these categories:
- Humidity-induced expansion/contraction — fine, spiderweb-like cracks near shower tiles or ceiling corners
- Substrate movement — vertical or diagonal cracks wider at one end, often aligned with stud or joist spacing
- Water infiltration behind tile or caulk lines — soft, discolored plaster near tub surrounds or sink bases
- Aging lath failure — large, irregular cracks with hollow-sounding areas when tapped
- Poor original installation — cracks following seams between plaster fields or near light fixtures
Tools & Materials Needed
| Item | Purpose | Estimated Cost |
|---|---|---|
| 100-grit sandpaper + pole sander | Smooths feathered edges without damaging adjacent plaster | $8–$15 |
| Plaster bonding agent (e.g., Plaster-Weld) | Ensures new patch adheres to old, non-porous plaster | $12–$18 |
| Setting-type joint compound (90-minute) | Shrinks less than ready-mix; critical for humidity-prone areas | $14–$22 |
| Flexible mesh tape (alkali-resistant) | Bridges cracks without telegraphing through paint | $6–$10 |
| Hygrometer with data logging | Measures sustained RH levels—key for diagnosing chronic moisture issues | $25–$45 |
Step-by-Step Fix
Choose the method based on crack width, location, and underlying cause:
- For hairline cracks (<1/16"): Clean with vinegar-water solution, apply bonding agent, then skim with thin layer of setting compound using a 12" knife. Sand lightly after 2 hours.
- For active cracks (widening over time): V-cut the crack with a utility knife (30° bevel), prime with bonding agent, embed alkali-resistant mesh tape, then apply two thin coats of 90-minute compound, sanding between layers.
- For cracks near tile or tub flange: First confirm no water behind tile (use moisture meter). If damp, remove affected tile, dry substrate, install cement board, then replaster the perimeter—not just the crack.
- For ceiling cracks above shower: Install a rigid insulation baffle above the plaster (vented attic side) and add exhaust fan runtime timer—reducing condensation is 70% of the fix (per ASHRAE Standard 62.2-2022).
When to Call a Pro
DIY stops where safety and code compliance begin. Call a licensed plasterer or building envelope specialist if you observe any of these:
- Cracks wider than 1/4" that reopen within 2 weeks of repair
- Concurrent signs of structural movement: sloping floors, sticking doors, or gaps between wall and ceiling trim
- Mold growth behind plaster (visible at crack edges or detected via moisture meter >20% MC)
- Cracks intersecting electrical boxes or plumbing penetrations without proper fire-stopping
- Whole-wall delamination—large sections sounding hollow or bulging outward
Prevention Tips
Repairing plaster is half the battle—the other half is stopping recurrence. Focus on environmental control first:
- Run your bathroom exhaust fan for 20 minutes after every shower, not just during. A timer switch costs $12 and cuts humidity exposure by 40% (U.S. EPA Indoor Air Quality Tools for Schools, 2021).
- Keep relative humidity below 60% year-round—use a hygrometer and upgrade to a 110 CFM fan if current unit moves less than 50 CFM at the register.
- Re-caulk tub/shower joints annually with 100% silicone rated for continuous submersion—not acrylic or latex.
- Avoid hanging heavy towel bars or mirrors directly onto plaster; use toggle bolts anchored into studs or epoxy-set anchors in solid lath.
Can I use spackle instead of plaster or joint compound?
No—spackle dries too fast, shrinks excessively, and lacks the vapor permeability plaster requires in wet rooms. It traps moisture behind the patch, accelerating substrate decay. Use only setting-type joint compound or gauging plaster mixed with lime putty for authentic repairs.
Why does my repaired crack keep coming back?
Because the stress hasn’t been relieved. Common culprits: unaddressed roof vent leaks causing attic condensation, improperly sloped shower pans directing water toward walls, or seasonal foundation settling amplified by clay soil. Track crack width weekly with calipers—if it grows more than 0.02" per month, consult a structural engineer.
Is it safe to paint over patched plaster right away?
No. Setting-type compounds need full cure—minimum 72 hours—and must be sealed with a vapor-permeable primer like Benjamin Moore Ultra Spec 500 before topcoating. Skipping this step causes blistering in high-RH zones. According to the Painting and Decorating Contractors of America’s 2023 Technical Bulletin, premature painting accounts for 68% of bathroom repaint failures.
Do I need to replace all the plaster if one section cracks?
Not unless testing reveals systemic failure. Tap the wall with a screwdriver handle: solid *thunk* = sound substrate; dull *thud* or hollow ring = delamination. Only replace what’s compromised—patching saves 70–80% of the cost versus full re-plastering (National Plasterers Council, 2022).
Can I use drywall mud on historic plaster walls?
You can—but you shouldn’t. Drywall compound lacks the breathability and thermal expansion profile of lime-based plaster. On pre-1940 lath-and-plaster, use NHL 2 lime putty or USG Structo-Lite base coat. Modern compounds trap moisture, rotting wood lath from the inside out.
How long should a proper plaster repair last in a bathroom?
10–15 years—if humidity is controlled and the substrate remains stable. Repairs fail faster when installed over damp lath or without bonding agent. As master plasterer Frank D’Amico notes in The Art of Plaster Restoration (2019): “A good plaster repair isn’t about the compound—it’s about respecting the physics of the wall.”
Plaster in bathrooms demands respect—not just for its age or aesthetics, but for how it interacts with steam, temperature swings, and decades of unseen stresses. A well-executed repair buys time, but lasting success comes from managing the environment first, then the material. If your fan runs only while you’re in the room, start there—it’s the single highest-impact change you can make. For deeper moisture diagnostics, see our guide on reading moisture meters accurately or installing a code-compliant exhaust fan.