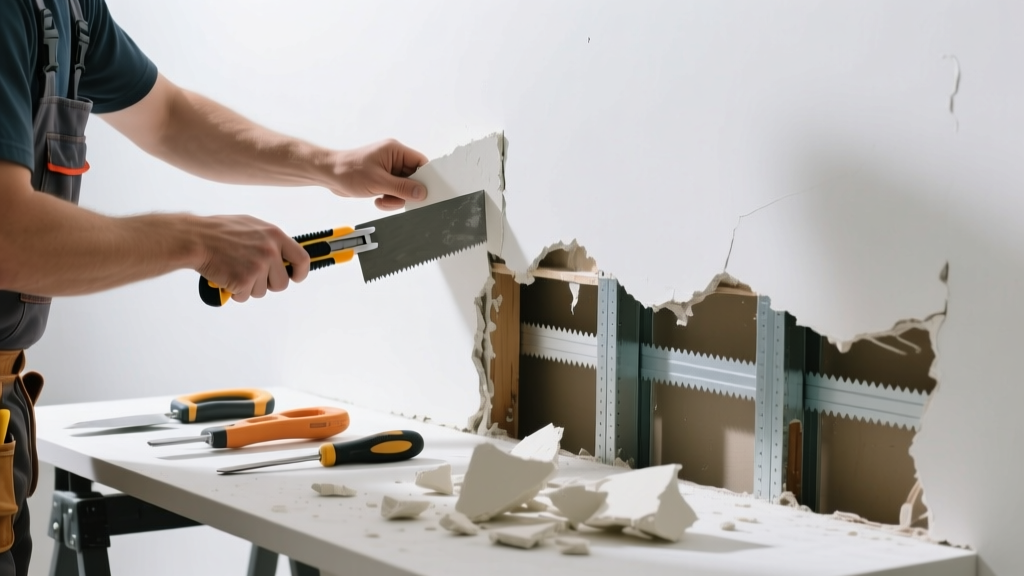
If you’ve spotted a soft, swollen, or drum-like bulge in your plaster wall—especially one that moves when pressed—it’s not just cosmetic. That’s failed lath-and-plaster separating from the substrate, and patching over it will fail again. Replacement of the affected section is the only lasting fix.
Quick Diagnosis
Before cutting into the wall, confirm the cause. Most bulging plaster stems from one or more of these:
- Water intrusion behind the wall (leaky pipe, roof leak, or condensation)
- Rotted wood lath due to chronic moisture exposure
- Loose or detached metal lath (common in post-1940s plaster)
- Structural movement pulling lath away from framing
- Previous poor repair with incompatible materials (e.g., drywall compound over plaster)
Tools & Materials Needed
| Item | Purpose | Estimated Cost |
|---|---|---|
| Utility knife with fresh blades | Cuts clean edges through plaster without cracking adjacent areas | $3–$8 |
| 12" drywall saw or oscillating tool | Removes damaged plaster and lath efficiently; avoids hammer damage to framing | $15–$65 |
| Plaster base coat (e.g., Diamond Patch or Structo-Lite) | Provides strong, breathable underlayer compatible with historic plaster | $12–$22 per 50-lb bag |
| Plaster finish coat (e.g., Imperial or Durabond 90) | Smooth, sandable top layer that matches original texture and hardness | $14–$28 per 25-lb bag |
| Galvanized lath nails or staples | Secures new wood or metal lath to studs without rust bleed-through | $4–$9 |
Step-by-Step Fix
- Mark and cut the damaged area: Use a straightedge and utility knife to score a square or rectangular outline around the bulge—extend at least 2" beyond visible damage. Cut through plaster and lath using a drywall saw, staying flush against framing to avoid cutting into studs.
- Remove failed material: Pry out all loose plaster and compromised lath. Check stud surfaces for rot or mold; treat with borate solution if needed. Vacuum dust thoroughly.
- Install new lath: Staple 1" x 2" wood lath horizontally across studs (or use perforated metal lath). Overlap seams by 1" and fasten every 4" along each edge.
- Apply base coat: Trowel on 3/8" of base plaster, pressing firmly into lath keys. Let cure 24–48 hours—don’t rush drying with heat or fans.
- Finish and blend: Apply two thin finish coats, feathering edges into surrounding plaster. Sand lightly with 180-grit after final cure. Prime with oil-based or bonding primer before painting.
When to Call a Pro
DIY replacement works only when the bulge is localized and framing is sound. Call a licensed plasterer or structural contractor if:
- The bulge exceeds 24" x 24" or spans multiple studs
- You find wet insulation, active leaks, or >1/4" sag in ceiling joists
- Mold covers >10 sq ft or penetrates inside wall cavities
- Electrical wiring or plumbing runs through the damaged zone and lacks accessible junction boxes
"Over 60% of plaster failures I see stem from undetected moisture behind walls—not age alone." — James R. Larkin, Master Plasterer & Instructor, North American Building Trades Academy (2022)
Prevention Tips
Prevent recurrence by addressing root causes now:
- Install exhaust fans with timers in bathrooms and kitchens (minimum 50 CFM per 50 sq ft)
- Seal exterior wall penetrations (outlets, pipes) with silicone caulk rated for masonry
- Check attic ventilation—insufficient airflow raises interior humidity year-round
- Use a hygrometer to maintain indoor RH between 30–50%; above 60% encourages lath rot
Can I use drywall instead of plaster for the repair?
Yes—but only if you’re willing to accept a visible texture mismatch and reduced thermal mass. Drywall over lath creates a weak bond and often telegraphs seams. For authenticity and durability, match the original system: wood lath + lime-gypsum plaster for pre-1920s homes; metal lath + gypsum base coat for mid-century builds.
How long does plaster take to fully cure?
Base coat requires 24–48 hours before finishing; full chemical cure takes 28 days. You can paint after 7 days with a proper plaster primer, but avoid heavy scrubbing or hanging items until full cure. The U.S. Gypsum Association notes that plaster gains 90% of its strength by day 7, but micro-cracks form if stressed too early.
Do I need to remove all the plaster down to the lath?
No—only the bulging section and any adjacent plaster that sounds hollow or crumbles under light pressure. Tap with a screwdriver handle: solid areas ring sharply; failed sections sound dull or thud. Leave intact plaster untouched unless it’s within 1" of the cut edge and shows hairline cracks.
What’s the best primer for patched plaster?
Use an oil-based or shellac-based bonding primer like Zinsser Cover Stain or B-I-N. These seal porous plaster, prevent flashing, and block alkali burn. Latex primers often lift or bubble on fresh plaster because they don’t penetrate deeply enough—and they trap moisture beneath.
Can I repair plaster bulging on a ceiling?
Yes, but expect higher difficulty and risk. Ceiling work requires scaffolding or sturdy staging—not step ladders. Always brace joists before cutting, and use a backing board (1/4" plywood) screwed to joists first to support new lath. According to the National Plasterers Council’s 2021 Safety Bulletin, 72% of DIY ceiling plaster injuries involve falls from unstable platforms.
Is wire mesh a good substitute for wood or metal lath?
No. Hardware cloth or chicken wire lacks rigidity and doesn’t hold plaster keys. It sags under wet plaster weight and pulls away from framing. Stick to 2.5"-wide wood lath (1/4" thick) or ASTM C1002 galvanized expanded metal lath for reliable adhesion.
A properly repaired plaster bulge won’t just look seamless—it’ll last as long as the original wall did, provided moisture stays out and framing stays stable. Take time to diagnose the why before the how, and don’t hesitate to pause and consult a pro if you uncover evidence of systemic decay. Your home’s plaster isn’t fragile—it’s resilient, once you speak its language.