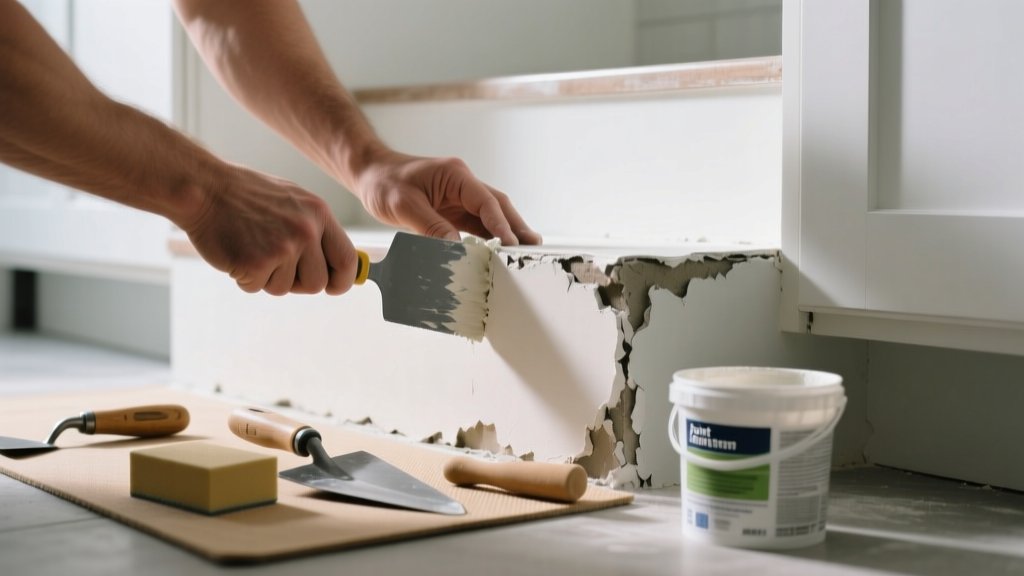
That soft, spongy spot on your kitchen ceiling or wall isn’t just unsightly—it’s a red flag. Plaster bulging in the kitchen almost always points to moisture intrusion from leaks, steam buildup, or poor ventilation, and ignoring it risks mold growth, electrical hazards, or sudden collapse. Act fast, but don’t rush into patching without identifying the root cause.
Quick Diagnosis
Before grabbing tools, confirm what’s really going on. Bulging plaster rarely happens in isolation—it’s a symptom. Here are the most common culprits:
- Leaking supply line behind cabinets (especially under-sink cold/hot lines or dishwasher connections)
- Roof or attic leak tracking down interior walls near soffits or exterior corners
- Poorly vented range hood dumping humid air into attic or wall cavities instead of outside
- Condensation buildup behind plaster due to missing or damaged vapor barrier
- Old lath separating from framing—more likely in homes built before 1950 with horsehair plaster
Tools & Materials Needed
| Item | Purpose | Estimated Cost |
|---|---|---|
| Stud finder with AC detection | Locates framing and avoids drilling into live wires behind wet plaster | $25–$45 |
| Moisture meter (pin-type) | Measures exact % moisture content in plaster and substrate—critical for confirming active leaks | $60–$120 |
| Utility knife & stiff putty knife | Cuts away compromised plaster cleanly; removes loose material without damaging lath | $8–$15 |
| Setting-type joint compound (e.g., Durabond 45) | Shrinks less than premixed mud; bonds well to old plaster and resists kitchen humidity | $12–$18 per 25-lb bag |
| Galvanized plaster washers & drywall screws | Secures sagging lath back to studs—prevents future bulging when used with adhesive | $7–$12 |
Step-by-Step Fix
These methods escalate from minimal intervention to full repair—choose based on moisture readings and extent of damage:
- Stop the source first. Shut off water if plumbing is suspected. Turn off power at the breaker if bulge is near outlets or switches. Confirm no active leak with moisture meter readings above 18% (U.S. EPA recommends <15% for interior plaster).
- Stabilize and reattach lath. Drill pilot holes through plaster into studs every 6″ along the bulge’s perimeter. Apply construction adhesive (e.g., PL Premium) to lath behind the bulge, then secure with galvanized plaster washers and 1¼" screws. Let cure 24 hours.
- Trim and patch. Cut away only the visibly detached, crumbly plaster with a utility knife—don’t gouge sound areas. Feather edges with a putty knife. Apply two thin coats of setting-type joint compound, sanding lightly between coats.
- Prime and paint with mold-resistant finish. Use Zinsser Mold Killing Primer (EPA-registered), then topcoat with semi-gloss acrylic—kitchen-grade for wipeability and humidity resistance.
When to Call a Pro
DIY stops where safety and code compliance begin. Call a licensed contractor or restoration specialist if:
- Moisture readings exceed 22% across more than a 3 ft² area (per IICRC S520 2023 standards)
- You find black, fuzzy mold deeper than surface staining—or smell persistent mustiness after drying
- The bulge spans over two studs or includes ceiling-to-wall junctions (risk of structural compromise)
- Electrical boxes or wiring are exposed, damp, or discolored—do not touch
- Your home has knob-and-tube wiring behind plaster (common in pre-1940 kitchens); disturbance requires licensed electrician review
Prevention Tips
Kitchens generate more daily moisture than any other room—up to 5 pints per day from cooking and dishwashing (ASHRAE Handbook, 2022). Prevent recurrence with these targeted upgrades:
- Install a ducted range hood exhausting outdoors—not into attic or crawl space—with minimum 400 CFM capacity
- Seal all plumbing penetrations behind cabinets with silicone caulk rated for potable water contact
- Add a dehumidifier set to 45–50% RH during high-humidity months or if no exterior venting exists
- Inspect under-sink supply lines and P-traps quarterly for corrosion, swelling, or weeping joints
- Replace non-perforated vinyl wallpaper—common in older kitchens—with breathable paint or clay-based finishes
Can I use bleach on the discolored plaster?
No. Bleach doesn’t penetrate porous plaster deeply enough to kill mold roots and can corrode metal lath or wiring. It also produces toxic fumes when mixed with ammonia (common in cleaners). Instead, use an EPA-registered mold killer like RMR-86 or Concrobium Mold Control—and only after fixing the moisture source.
How long does plaster need to dry before patching?
Minimum 72 hours with active airflow and dehumidification—but verify with a pin-type moisture meter. Plaster below 15% moisture content is safe to patch. Rushing leads to trapped moisture, blistering, and re-bulging within weeks.
Will spackling paste work instead of setting compound?
Not reliably. Standard spackle shrinks, cracks, and lacks adhesion strength for kitchen environments. Setting-type compounds (like Durabond or Easy Sand 90) chemically harden and resist humidity—critical for areas exposed to steam and temperature swings.
Is this covered by homeowners insurance?
Sometimes—but only if caused by a sudden, accidental event (e.g., burst pipe). Gradual leaks, maintenance neglect, or pre-existing conditions are routinely denied. Document everything with dated photos and moisture meter logs before filing a claim.
Can I paint over the bulge temporarily to hide it?
Avoid it. Painting traps moisture, accelerates lath rust, and hides worsening decay. That ‘slight bump’ could become a 12-inch crater overnight. If you must delay repair, at least cut a small inspection hole (2”×2”) to monitor for drips or new discoloration.
What’s the average cost to professionally repair a 4 ft × 4 ft bulge?
According to HomeAdvisor’s 2023 Remodeling Cost Report, median cost is $840–$1,650—including moisture remediation, lath reattachment, plaster replacement, and mold testing. DIY saves ~60%, but only if moisture is fully resolved first.
"Plaster bulges aren’t cosmetic—they’re hydraulic warnings. Every inch of lift means water has built enough pressure to separate plaster from lath. That pressure doesn’t go away until the source is dead." — Steve Loken, historic plaster conservator and author of Plaster Repair Manual, 2021
Plaster bulging in the kitchen isn’t a ‘wait-and-see’ issue—it’s your home’s way of sounding an alarm. The right fix starts with accurate diagnosis, not speed. Take time to trace moisture to its origin, verify dryness with proper tools, and reinforce—not just cover—the problem. A solid repair today keeps your kitchen safe, healthy, and functional for decades. For related help, see our guides on leaky kitchen faucet repair and range hood venting checklist.