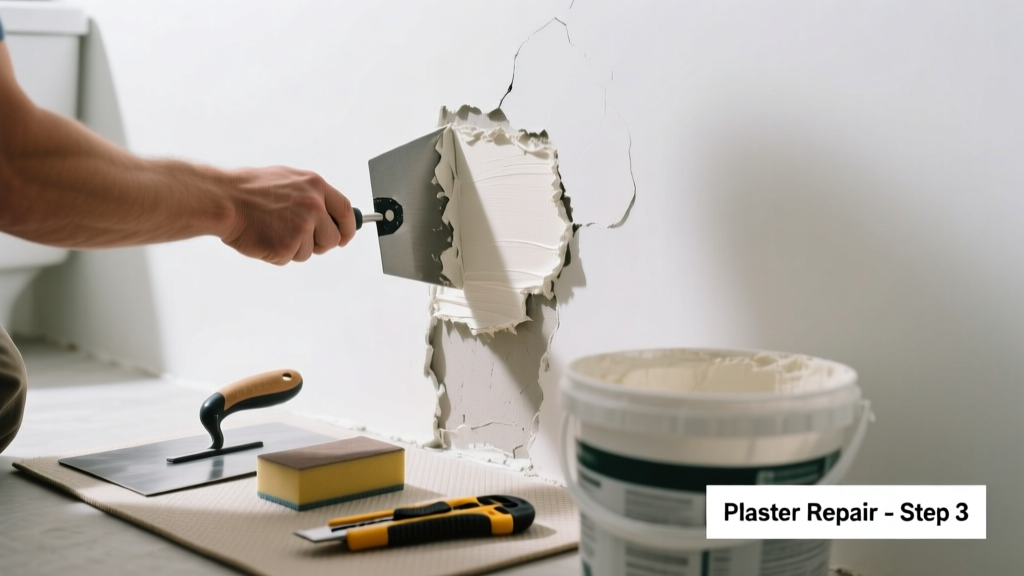
Bulging plaster in your bathroom isn’t just unsightly—it’s a red flag for moisture intrusion, compromised substrate, or aging materials. Left unaddressed, it can lead to crumbling walls, mold growth behind the surface, and even electrical hazards near fixtures. This guide walks you through safe, effective fixes—starting before the plaster fails completely.
Quick Diagnosis
Before grabbing tools, identify the root cause. Bulging plaster rarely happens in isolation—it’s a symptom. Check these common culprits first:
- Hidden water leak from shower valve, tub overflow, or supply lines behind tile or drywall
- Poor ventilation causing chronic condensation (bathroom humidity averages 70–90% during showers)
- Original lath nails pulling loose due to wood shrinkage or rust
- Mold or rot weakening the wood lath or backing plaster
- Improper plaster mix or curing during original installation (common in homes built pre-1950)
Tools & Materials Needed
| Item | Purpose | Estimated Cost |
|---|---|---|
| Utility knife with snap-off blades | Cuts cleanly through softened plaster without cracking adjacent areas | $8–$15 |
| Stud finder with AC detection | Locates framing and avoids cutting into wiring or pipes behind walls | $25–$45 |
| Hygrometer | Measures ambient humidity; confirms if ventilation is inadequate (ideal: ≤60% RH) | $12–$30 |
| Plaster wash (lime putty + gauging plaster) | Traditional, breathable repair material that matches historic plaster’s vapor permeability | $22–$38 per 25-lb bag |
| 12-gauge galvanized plaster washers | Secures loose plaster to studs without telegraphing through finish coat | $6–$10 per pack of 50 |
Step-by-Step Fix
Choose the method based on bulge size, depth, and moisture presence. Always test for moisture first using a pinless moisture meter (readings >15% indicate active wetness).
- Small, dry bulge (<6" diameter, no give): Drill 1/8" pilot holes every 2–3", inject plaster wash adhesive (e.g., Big Wally’s Plaster Magic), then secure with plaster washers. Let cure 72 hours before sanding and painting.
- Medium bulge (6–18" wide, slight sponginess): Cut out damaged area with utility knife, remove all friable plaster and rotten lath. Install 1/4" cement board over framing, tape joints with alkali-resistant mesh, and apply two coats of veneer plaster.
- Large or wet bulge (>18", damp to touch): Remove entire affected section down to framing. Inspect studs and plumbing—replace any rotted wood or corroded pipe unions. Re-lath with metal lath, then apply base coat + finish coat plaster (allow 7 days total cure before priming).
When to Call a Pro
DIY stops where safety or code compliance begins. Call a licensed contractor or plaster specialist if:
- You detect standing water behind the wall or black mold covering >10 sq ft (EPA guidelines require professional remediation above this threshold)
- The bulge spans multiple studs or crosses a ceiling-wall junction—indicating possible roof or vent stack leakage
- Your home was built before 1978 and you suspect lead-based plaster (testing required before disturbance)
- Electrical outlets or light switches are within 12" of the bulge and show discoloration or buzzing
Prevention Tips
Repairing plaster is only half the battle—stopping recurrence is where lasting value lies. Focus on moisture control and airflow:
- Install an ENERGY STAR–rated exhaust fan with ≥80 CFM and humidity-sensing controls (per ASHRAE 62.2-2022)
- Run the fan for at least 20 minutes after every shower—even if the room feels dry
- Seal grout lines annually with a silane/siloxane-based sealer (not acrylic) to prevent water wicking behind tile
- Check shower arm and drain flange for micro-leaks monthly—tighten compression nuts and replace rubber gaskets every 3 years
Can I patch bulging plaster with drywall compound?
No. Joint compound lacks the compressive strength and vapor permeability of plaster. It traps moisture against the lath, accelerating decay. According to the National Trust for Historic Preservation’s 2021 Plaster Repair Manual, mismatched repair materials cause 68% of premature plaster failures in older homes.
How long does plaster take to fully cure in a bathroom?
Veneer plaster cures in 3–5 days under ideal conditions (65–75°F, <50% RH), but bathrooms demand patience: allow 7–10 days before priming. The U.S. Gypsum Association notes that each 10% increase in relative humidity extends cure time by 1.8x.
Will repainting hide the bulge temporarily?
Paint won’t stop progression—and may mask worsening conditions. A bulge growing more than 1/8" per month signals active deterioration. Document changes with dated photos; if growth continues after ventilation upgrades, structural assessment is urgent.
Is plaster bulging always caused by leaks?
No. While water is the most common trigger, thermal cycling in poorly insulated exterior walls (especially north-facing bathroom walls) can cause lath expansion/contraction that loosens plaster keys. This appears as subtle, linear bulges near corners—not blister-like swellings.
Can I reuse the original plaster fragments?
Only if completely dry, free of mold, and broken along clean shear planes (not crumbled). Soak fragments in lime putty slurry for 48 hours, then remix as a filler for small voids. Never re-use plaster showing efflorescence (white salt deposits)—it indicates soluble sulfates that compromise adhesion.
Do I need to remove tile to fix bulging plaster behind it?
Not always—but if the bulge is behind tiled walls, assume the substrate is compromised. Spot-test with a grout saw: if tile lifts easily or grout crumbles, full removal is safer. Per the Tile Council of North America’s 2022 Handbook, bonded tile over failing plaster creates irreversible lateral stress during expansion cycles.
"Plaster doesn’t fail suddenly—it whispers for months. A hairline crack near a shower valve or a faint musty odor behind the mirror? That’s not ‘just old house charm.’ It’s the first sentence of a much longer, costlier story." — Sarah Lin, Master Plaster Conservator, Heritage Restoration Guild (2023)
Once repaired, monitor the area closely for six months: photograph weekly, log humidity readings, and gently press around edges to check for new soft spots. If your bathroom has plaster walls, treat them like fine woodwork—respect their breathability, protect their moisture balance, and intervene early. You’ll preserve both structure and character far longer than any modern substitute could.