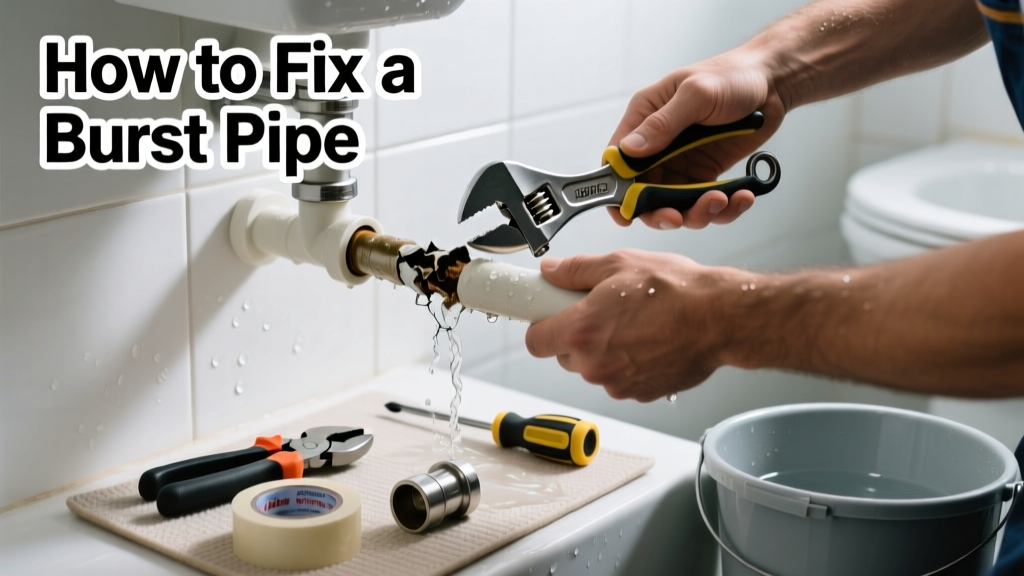
A burst pipe in the bathroom isn’t just inconvenient—it’s an emergency that can flood floors, warp subflooring, and trigger mold in under 48 hours. Water pressure from a standard home supply line (40–80 psi) means even a dime-sized rupture can release over 250 gallons per day. Act fast, but don’t rush into risky repairs without knowing what you’re dealing with.
Quick Diagnosis
Bathroom pipe bursts rarely happen without warning. Check for these telltale signs before water starts gushing:
- Visible cracks or bulges in copper, PEX, or PVC supply lines under the sink or behind the toilet
- Discolored, damp drywall near baseboards or ceiling tiles below upper-floor bathrooms
- Unusual hissing sounds or drops in water pressure at faucets or showerheads
- Freeze-thaw damage: Look for frost on pipes or cracked solder joints after sub-32°F weather
- Corrosion on older galvanized steel pipes—especially near elbows and shut-off valves
Tools & Materials Needed
| Item | Purpose | Estimated Cost |
|---|---|---|
| Adjustable wrench | Tightens compression fittings and shuts off supply valves without stripping threads | $12–$25 |
| PEX crimping tool & rings | Secures replacement PEX sections; required for code-compliant repairs | $45–$85 |
| SharkBite push-fit couplings | Allow no-solder, no-crimp repairs on copper, PEX, or CPVC—ideal for tight spaces | $8–$15 each |
| Bucket & towels | Catch runoff and absorb standing water; prevents slip hazards and subfloor saturation | $5–$20 |
| Water leak detector (e.g., Moen Flo) | Identifies hidden moisture behind walls before drywall fails—critical for early intervention | $199–$249 |
Step-by-Step Fix
Choose the method based on pipe type, location, and burst size. Never attempt repairs under active pressure.
- Shut off water immediately: Locate the main shutoff valve (usually near water heater or basement entry) and turn clockwise until tight. If accessible, also close the individual shut-offs under the sink or behind the toilet.
- Drain residual pressure: Open the lowest faucet in the house (e.g., basement utility sink) and highest (e.g., upstairs bathroom tub) to vent air and relieve trapped water.
- Assess and cut: Use a tubing cutter—not a hacksaw—for clean, burr-free cuts on copper or PEX. Remove the damaged section plus ½ inch on either side.
- Install repair: For copper: Solder a new coupling using flux and lead-free solder (requires open flame). For PEX: Crimp a new segment with matching diameter and use a go/no-go gauge to verify seal. For mixed materials or tight access: Use SharkBite couplings—push pipe fully in until it clicks and rotates freely.
- Test slowly: Turn water on at ¼ flow for 60 seconds. Watch for drips at joints. Increase gradually. Run for 10 minutes before reassembling cabinets or drywall.
When to Call a Pro
DIY is unsafe or insufficient in these cases:
- The burst occurs inside a wall cavity with no access panel—and moisture has already spread beyond visible drywall
- You suspect the main supply line (1-inch or larger copper or HDPE) is compromised, especially if located under concrete slab
- The pipe is part of a recirculating hot water loop with a dedicated pump and check valve system
- Local code prohibits homeowner repairs on pressurized supply lines (e.g., Massachusetts requires licensed plumbers for any work beyond faucet cartridge replacement)
- You’ve attempted two repairs in the same month—indicating systemic issues like excessive water pressure or electrolysis corrosion
"Over 37% of bathroom water damage claims involve failed supply line connections—not the fixture itself—according to the Insurance Institute for Business & Home Safety's 2023 Residential Plumbing Failure Report."
Prevention Tips
Most bathroom pipe bursts are preventable with consistent maintenance:
- Replace rubber supply hoses every 5 years—even if they look fine. Braided stainless steel hoses last 8–10 years but still degrade internally.
- Install a whole-house pressure regulator if your municipal supply exceeds 75 psi (check with a $15 pressure gauge screwed onto an outdoor spigot).
- In cold climates, insulate all exposed pipes with foam sleeves rated for R-3 or higher—and keep cabinet doors open during sub-20°F nights.
- Test shut-off valves quarterly by turning them fully off and on—sediment buildup causes failure when you need them most.
- Use a smart water monitor like water leak detector to get alerts before minor seeps become major floods.
Can I use duct tape or epoxy putty as a permanent fix?
No. Duct tape degrades under constant moisture and pressure. Epoxy putty (like JB Weld) may hold temporarily on low-pressure drain lines—but fails on supply lines above 30 psi. The U.S. EPA estimates that 14% of household water usage is from leaks, many caused by 'temporary' fixes left in place too long.
Do I need to replace the entire pipe run or just the burst section?
Just the damaged section—if the rest shows no corrosion, pitting, or discoloration. However, if you’re working on galvanized steel pipes installed before 1985, replacement of the full run is strongly advised. These pipes typically last only 40–50 years before internal rust restricts flow and increases burst risk.
What if the burst happened behind tile or drywall?
Stop water flow first. Then carefully cut a 12″ x 12″ access panel in the least visible spot—centered on the leak, not at the edge. Use a drywall saw or oscillating tool. Save the cutout piece to reinstall later. Avoid prying tile; instead, drill small pilot holes and gently tap out grout lines with a carbide-tipped chisel.
Is my homeowner’s insurance likely to cover this?
Most policies cover sudden, accidental water damage—but exclude damage from lack of maintenance (e.g., ignoring known corrosion) or wear-and-tear. Document everything: take timestamped photos before, during, and after repair. File a claim only if damage exceeds your deductible—typically $500–$2,500—and always notify your insurer within 72 hours.
Can I reuse old compression nuts or ferrules?
No. Compression fittings rely on precise deformation of the ferrule to create a watertight seal. Reusing them risks splitting or improper seating. Always install new brass or stainless steel ferrules and nuts—even if the old ones look undamaged. A $2 ferrule prevents a $2,000 subfloor replacement.
How do I know if the water heater’s temperature/pressure relief valve triggered instead of a pipe burst?
Look for a steady drip or spray from the T&P valve’s discharge tube (usually routed to floor level near the heater). Test it by lifting the lever briefly—if water flows freely and stops when released, it’s functional. If it leaks continuously or won’t shut off, replace it immediately. This is unrelated to bathroom pipe bursts but often mistaken for one.
Fixing a burst pipe in the bathroom is manageable with the right tools and timing—but never at the expense of safety or code compliance. A slow drip today could mean warped flooring or mold remediation next week. Keep shut-off valve locations memorized, test them twice yearly, and treat every minor leak as a warning sign. For persistent issues, consider upgrading to PEX piping or installing a whole-home shutoff system like smart water shutoff valve.