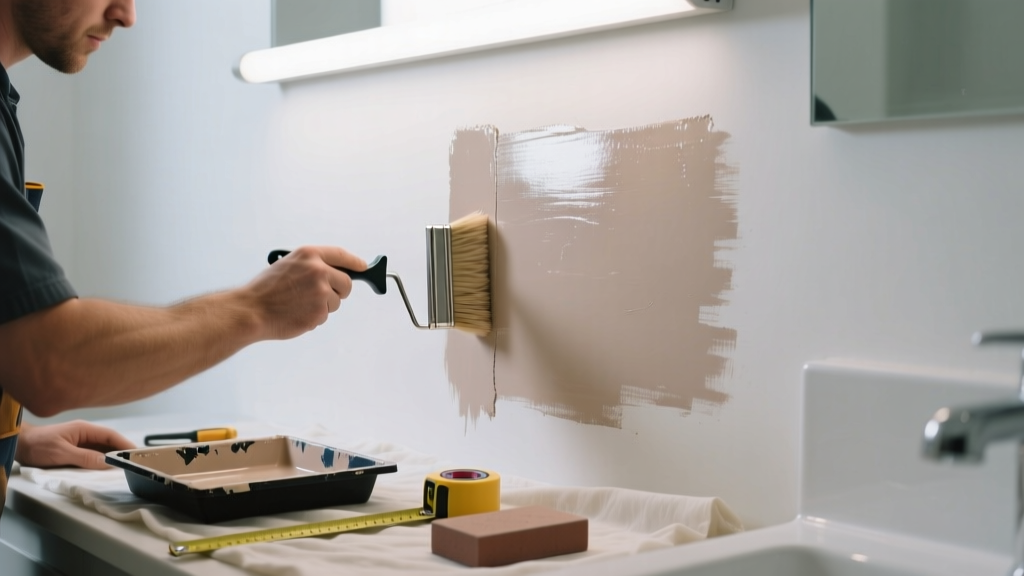
You spot it the second you flip on the bathroom light: a dull patch next to a glossy stripe, or a chalky swatch beside satin-smooth wall. That jarring paint sheen mismatch isn’t just ugly—it’s a red flag for moisture exposure, improper prep, or product incompatibility in one of your home’s most demanding rooms.
Quick Diagnosis
Sheen mismatch rarely happens by accident. It usually points to one (or more) of these root causes:
- Touch-up paint applied without matching sheen, brand, or batch number
- Previous repairs done with flat or eggshell paint over existing semi-gloss (common in bathrooms)
- Moisture damage causing topcoat degradation—especially near showers or vents
- Using interior paint not rated for high-humidity areas (e.g., standard flat latex instead of mold-resistant semi-gloss)
- Inadequate surface cleaning before repainting, leaving soap scum or mineral deposits that block uniform sheen development
Tools & Materials Needed
| Item | Purpose | Estimated Cost |
|---|---|---|
| 320-grit sandpaper (sponge or sheet) | Scuffs mismatched areas for even adhesion and sheen blending | $4–$8 |
| Mold-resistant semi-gloss paint (1 qt) | Ensures durability and consistent reflectivity in humid air | $22–$34 |
| Microfiber roller cover (3/8" nap) | Delivers smooth, uniform sheen without stippling or texture variation | $6–$12 |
| Isopropyl alcohol (91%) | Cleans residue and preps non-porous surfaces without water swelling | $5–$9 |
| Paint stir sticks & chip brush (1.5") | For precise feathering and edge control during touch-ups | $3–$7 |
Step-by-Step Fix
Don’t repaint the whole wall unless necessary. Try these targeted methods in order:
- Feather-and-recoat method: Lightly sand the mismatched area and 6" beyond using 320-grit. Wipe clean with alcohol-dampened cloth. Apply one thin coat of your original semi-gloss paint—stirred thoroughly—using a microfiber roller. Let dry 4 hours; assess. Repeat if needed.
- Full-section repaint: If mismatch spans >2 sq ft or includes caulk lines or tile edges, cut in with a 1.5" angled brush, then roll full wall section from ceiling to tub surround. Use same paint lot and batch—check the code on the can lid.
- Sheen-leveling glaze: For minor inconsistencies (e.g., slight gloss variation after drying), mix 1 part clear acrylic glaze with 3 parts semi-gloss paint. Apply with soft brush in thin, even strokes over affected zone only.
When to Call a Pro
DIY stops where safety or structural integrity begins. Call a licensed painter or moisture specialist if:
- You find bubbling, blistering, or soft drywall behind the mismatch—signs of chronic moisture intrusion
- The sheen inconsistency appears alongside black mold spots larger than 10 sq in (per EPA guidelines, remediation requires containment and PPE)
- Multiple walls show mismatch within 6 months—indicating systemic ventilation failure or plumbing leaks behind walls
- You’re unable to match the original paint sheen despite using manufacturer-matched products (may require spectrophotometer analysis)
Prevention Tips
Preventing sheen mismatch starts before the first brushstroke:
- Always store leftover paint with the batch number written on the lid—and keep it sealed tightly in a cool, dry place (not the steamy bathroom closet)
- Label every touch-up job: date, wall location, sheen level, and paint lot number in your home maintenance log
- Install an exhaust fan rated for at least 50 CFM and run it for 20 minutes post-shower—this cuts humidity spikes that degrade sheen consistency
- Use only paints labeled "bathroom-safe" or "mold-resistant" with ASTM D3273 certification (tested per 2022 UL standards)
Can I use vinegar instead of isopropyl alcohol for cleaning?
Vinegar works for mild soap scum but lacks the rapid evaporation and solvent strength needed to remove silicone residue or dried latex film. Isopropyl alcohol (91%) lifts contaminants without swelling drywall paper—critical in high-moisture zones. Vinegar’s acidity can also dull semi-gloss finishes over time.
Will sanding make the wall look worse?
Only if you go too aggressive. Use 320-grit *dry*—never wet-sand in bathrooms—and limit pressure to what your fingertip can comfortably apply. According to the Painting and Decorating Contractors of America’s 2023 Field Manual, “Over-sanding creates micro-scratches that trap light unevenly, worsening perceived sheen variation.”
How long should I wait between coats in a humid bathroom?
Minimum 4 hours at 70°F and 50% RH—but add 2 hours for every 10% increase in humidity. At 75% RH (common in unvented bathrooms), wait 6–8 hours. Use a hygrometer like the ThermoPro TP50 to verify conditions before recoating.
Can I mix flat and semi-gloss paint to get satin?
No—sheen isn’t linear. Mixing creates unstable emulsions that separate, crack, or fail adhesion testing. The U.S. EPA’s 2022 Paint Performance Guidelines state: “Blending sheens voids manufacturer warranties and increases VOC off-gassing risks in enclosed spaces.” Buy satin directly—or use a dedicated sheen-adjusting additive like Benjamin Moore’s Gennex® Leveler.
Do LED lights exaggerate sheen mismatch?
Yes. Cool-white LEDs (5000K+) cast sharp directional light that highlights microscopic texture and reflectivity differences. Warm-white bulbs (2700K–3000K) diffuse light more evenly. Test your repair under both lighting types before calling it done.
What if the mismatch is on textured drywall?
Texture magnifies sheen variation. Use a 3/8" microfiber roller *loaded lightly*, and roll in one direction only—no back-rolling. For knockdown or orange-peel textures, consider applying a thin skim coat of setting-type joint compound (e.g., USG All-Purpose) before priming and painting. This evens the substrate without altering profile.
“In bathrooms, sheen isn’t cosmetic—it’s functional. A mismatched finish often means compromised moisture resistance, which accelerates deterioration.” — Sarah Lin, Certified Master Painter & IBHS Home Repair Advisor, 2023
A properly matched sheen doesn’t just look seamless—it signals that your bathroom walls are holding up against steam, splashes, and daily wear. Next time you reach for that spare quart, check the batch code first. And if you’re tackling other moisture-related fixes, see our guides on bathroom exhaust fan noise fix and caulk peeling in shower. Small details, when handled right, keep your space both beautiful and built to last.