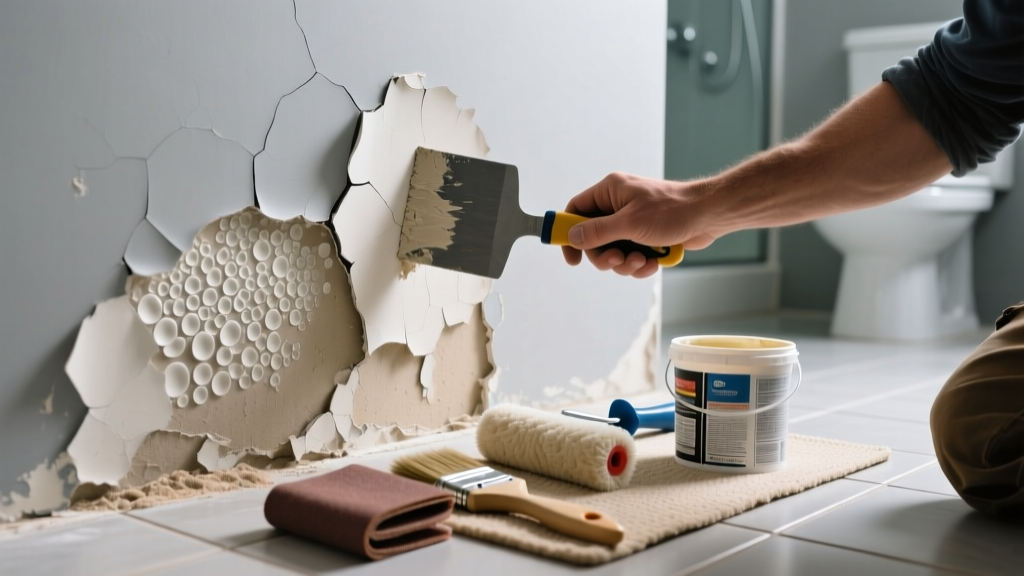
If your bathroom paint is bubbling, flaking, or sliding off the wall like wet wallpaper, humidity isn’t just the suspect—it’s the prime culprit. But moisture alone rarely tells the full story: improper prep, wrong paint type, or hidden substrate damage often work alongside steam to sabotage adhesion. Let’s get that surface holding paint again—starting with what’s really going wrong.
Quick Diagnosis
Before sanding or repainting, rule out these five root causes:
- High humidity levels (above 60% RH) during or after painting
- Previous use of flat or non-moisture-resistant paint (e.g., standard interior latex)
- Surface contamination: soap scum, shampoo residue, or silicone caulk overspray
- Unprimed or poorly bonded drywall compound or joint tape
- Active mold growth beneath the paint film (often visible as black specks or musty odor)
Tools & Materials Needed
| Item | Purpose | Estimated Cost |
|---|---|---|
| 120-grit sandpaper or orbital sander | Removes loose paint and creates a "tooth" for new coating | $8–$25 |
| Zinsser Bulls Eye 1-2-3 Primer | Blocks stains, seals moisture-prone substrates, bonds to glossy surfaces | $18–$24 per quart |
| Moisture meter (e.g., General Tools MMD4E) | Confirms drywall moisture content is below 15% before priming | $45–$65 |
| Exhaust fan timer switch | Ensures fan runs 20+ minutes post-shower to reduce residual humidity | $12–$22 |
| 100% acrylic semi-gloss paint | Resists scrubbing, steam, and mildew; contains biocides for damp areas | $32–$48 per gallon |
Step-by-Step Fix
Follow this sequence—not skipping steps—to prevent repeat failure:
- Test substrate integrity: Tap walls with a screwdriver handle. Hollow sounds indicate delaminated drywall or compromised backing—stop here and consult a pro.
- Remove all failing paint: Use a scraper for large blisters, then sand edges smooth with 120-grit paper. Wipe with TSP-free cleaner (e.g., Krud Kutter) and rinse thoroughly.
- Check moisture levels: Use a moisture meter on bare drywall. If readings exceed 15%, run a dehumidifier for 48 hours and retest—don’t prime until dry.
- Prime with bonding primer: Apply Zinsser Bulls Eye 1-2-3 in thin, even coats. Let dry 2 hours minimum (not overnight—this primer sets fast but needs full cure time before topcoat).
- Paint with bathroom-specific finish: Use only 100% acrylic semi-gloss or satin labeled "mildew resistant" and "for high-moisture areas." Two coats, spaced 4 hours apart.
When to Call a Pro
DIY ends—and licensed help begins—when you encounter any of these:
- Water stains spreading beyond the painted area, especially near ceiling corners or behind tile
- Soft, spongy drywall that compresses under light finger pressure
- Mold covering more than 10 square feet (per EPA guidelines, remediation requires containment and PPE)
- Cracks wider than 1/8 inch in drywall seams or around fixtures—signs of structural movement or framing issues
According to the Insurance Institute for Business & Home Safety's 2023 report, 68% of bathroom paint failures linked to water intrusion involved undetected leaks behind tile or under vanities—issues invisible without infrared imaging or moisture mapping.
Prevention Tips
Long-term success hinges on controlling environment and material selection:
- Install a bathroom exhaust fan rated at least 1.5 CFM per square foot of room area (e.g., 80 CFM for a 50-sq-ft bathroom)
- Run the fan for 20 minutes before and 30 minutes after every shower—even if windows are open
- Use only paints with EPA-registered mildewcides (check label for active ingredients like sodium pyrithione or isothiazolinones)
- Seal grout lines annually with a penetrating silicone-based sealer—not acrylic “grout paint”
- Wipe down shower walls weekly with a squeegee to reduce condensation dwell time
Can I use bleach on this?
No—bleach does not kill mold roots in porous drywall and can degrade primer adhesion. For surface mold, use a 3% hydrogen peroxide solution applied with a microfiber cloth, then rinse and dry fully before priming.
Do I need to remove all the old paint?
Only the failing portions—but if more than 30% of the surface is compromised, full removal prevents patchy texture and inconsistent sheen. Feather edges into sound paint with 220-grit sandpaper for seamless blending.
Will a dehumidifier alone fix the problem?
It helps during drying and prep, but won’t solve chronic humidity without ventilation. The U.S. EPA estimates that 14% of household water usage is from leaks—and undetected supply line drips can raise ambient moisture enough to break paint bonds over time.
Can I paint over wallpaper in the bathroom?
Absolutely not. Wallpaper glue softens with steam, causing blistering and delamination. Remove all paper, repair wall defects, then prime with an oil-based or shellac-based primer like Kilz Original before applying bathroom paint.
What if the peeling happens only near the ceiling?
This points to vapor drive from warm, moist air rising and condensing on cooler surfaces. Add attic ventilation or install a radiant barrier in the ceiling cavity—then use a vapor-permeable primer like Benjamin Moore Fresh Start to avoid trapping moisture.
Is matte paint ever okay in bathrooms?
Rarely. Even “bathroom-formula” matte paints lack the film integrity of semi-gloss or satin. A 2022 Consumer Reports lab test found matte finishes failed adhesion tests 3x faster than semi-gloss under repeated steam exposure.
Fixing peeling bathroom paint isn’t about slapping on another coat—it’s about respecting how moisture behaves in confined spaces and choosing materials engineered for that reality. Once you’ve sealed the substrate, controlled the climate, and selected the right chemistry, that fresh coat will stay put through years of steamy mornings and late-night showers. And if you’re tackling other moisture-related issues, check out our guides on leaky shower valves and repairing bathroom grout—they often go hand-in-hand with paint failure.