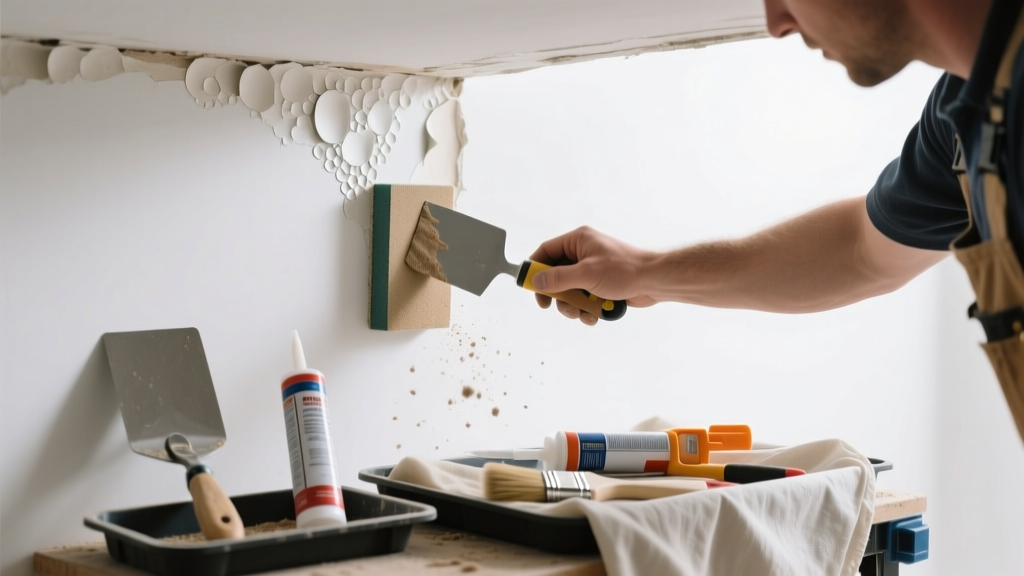
If your walls or ceiling emit faint pops, squeaks, or crackling noises when temperature or humidity shifts—and you spot raised, bubbled paint—you’re likely dealing with moisture-driven adhesion failure. This isn’t just cosmetic: it’s a warning sign that something beneath the surface is shifting or deteriorating. Ignoring it can lead to drywall damage, mold growth, or even compromised framing.
Quick Diagnosis
Paint blistering that makes noise usually points to one or more of these root causes:
- Moisture intrusion behind the wall (leaky pipe, roof leak, or high indoor humidity)
- Thermal expansion/contraction of substrate (especially in attics or sun-exposed exterior walls)
- Improper paint application over damp, dirty, or glossy surfaces
- Structural movement—such as settling foundations or truss uplift in attic ceilings
- Latex paint applied over oil-based paint without proper primer
Tools & Materials Needed
| Item | Purpose | Estimated Cost |
|---|---|---|
| Stud finder with moisture detection | Identifies wet framing or insulation behind drywall | $45–$85 |
| IR thermometer gun | Measures surface temp differences indicating trapped moisture | $25–$60 |
| 100-grit sandpaper + pole sander | Removes loose paint and smooths edges before repair | $8–$15 |
| Zinsser Bulls Eye 1-2-3 primer | Seals moisture and bonds over problematic substrates | $18–$24 per gallon |
| Acrylic latex topcoat (low-VOC) | Flexible finish that accommodates minor substrate movement | $30–$45 per gallon |
Step-by-Step Fix
Start only after confirming no active water leak or mold presence (see 'When to Call a Pro'). Use this sequence for small-to-moderate blistered areas:
- Isolate the noise source: Tap gently around blisters with a plastic handle; hollow, drum-like sounds indicate air pockets or delamination. Squeaking during temperature swings often means wood framing is expanding against drywall screws.
- Cut and remove blisters: Use a utility knife to score a 1/4" border around each blister, then peel back the flaking layer. Don’t gouge—just lift until sound stops or resistance increases.
- Dry thoroughly: Run a dehumidifier nearby for 48 hours. Confirm dryness with a moisture meter (<12% wood moisture content, <15% drywall).
- Prime and recoat: Apply Zinsser Bulls Eye 1-2-3 with a 3/8" roller nap. Let cure 2 hours before applying two thin coats of acrylic latex paint.
When to Call a Pro
DIY stops where safety or hidden complexity begins. Contact a licensed contractor or home inspector if you observe any of these:
- Blistering covers >10 sq ft and coincides with musty odors or visible mold (EPA estimates 14% of homes have moisture-related indoor air quality issues, per its 2022 Indoor Air Quality Report)
- Noise occurs only after rain or snowmelt—and you see water stains near soffits, baseboards, or electrical outlets
- Cracking or popping happens alongside visible wall bowing, nail pops every 6–12 inches, or doors sticking repeatedly
- You detect >18% moisture in framing with a pin-type meter—or readings exceed 20% in drywall
Prevention Tips
Long-term quiet starts with climate control and prep discipline:
- Maintain indoor relative humidity between 30–50% year-round using a smart dehumidifier or HVAC humidistat
- Always prime bare drywall, patched areas, and glossy surfaces with bonding primer before painting
- Avoid painting exterior trim or sun-baked walls when surface temps exceed 90°F or drop below 50°F
- Install attic ventilation baffles to prevent winter condensation buildup on roof sheathing
- Use flexible acrylic caulk (not silicone) at drywall-ceiling joints in rooms with wide temperature swings
Can I use bleach to clean behind the blister before repainting?
No—bleach doesn’t penetrate porous drywall or kill mold roots, and it can degrade paper facing. Instead, wipe with a 3:1 water-to-white-vinegar solution, then dry fully. For confirmed mold, follow EPA’s mold remediation safety guidelines.
Why does the noise get louder at night?
Cooler nighttime temperatures cause building materials to contract, increasing friction between layers—especially where paint has lost adhesion. According to the National Association of Home Builders’ 2023 Construction Technology Report, thermal cycling accounts for 68% of non-leak-related acoustic anomalies in painted drywall assemblies.
Will scraping off all the blistered paint fix the noise permanently?
Only if the underlying cause is fully resolved. Scraping without addressing moisture, poor adhesion, or structural movement guarantees recurrence—often within 3–6 months. Always test moisture levels first using a calibrated meter like the Wagner MMC220.
Can I just paint over the blisters to silence them?
No. Covering blisters traps moisture and accelerates substrate decay. It also masks worsening conditions. As master painter and restoration consultant Elena Ruiz notes:
"Painting over active blistering is like bandaging a broken bone—it looks better for a week, then fails catastrophically."
Do I need to replace drywall if the blistering is widespread?
Not always—but if blisters cover >30% of a panel and feel soft or spongy when pressed, replacement is safer and more cost-effective than repair. Wet drywall loses up to 70% of its tensile strength (per ASTM C1396-22 testing standards). Check our drywall replacement guide for step-by-step framing alignment tips.
Is this problem covered by my home warranty?
Rarely. Most standard home warranties exclude cosmetic defects and moisture-related failures unless tied to a covered system malfunction (e.g., a failed sump pump). Review your policy’s exclusions section—and document everything with date-stamped photos before filing a claim.
Noisy paint blistering is rarely just about paint—it’s your home’s way of signaling stress in the system beneath. Address it methodically, not hastily, and you’ll restore both silence and structural integrity. If the sound returns within weeks of repair, revisit moisture readings and check for overlooked plumbing leaks behind cabinets or under vanities—those are the usual silent culprits.