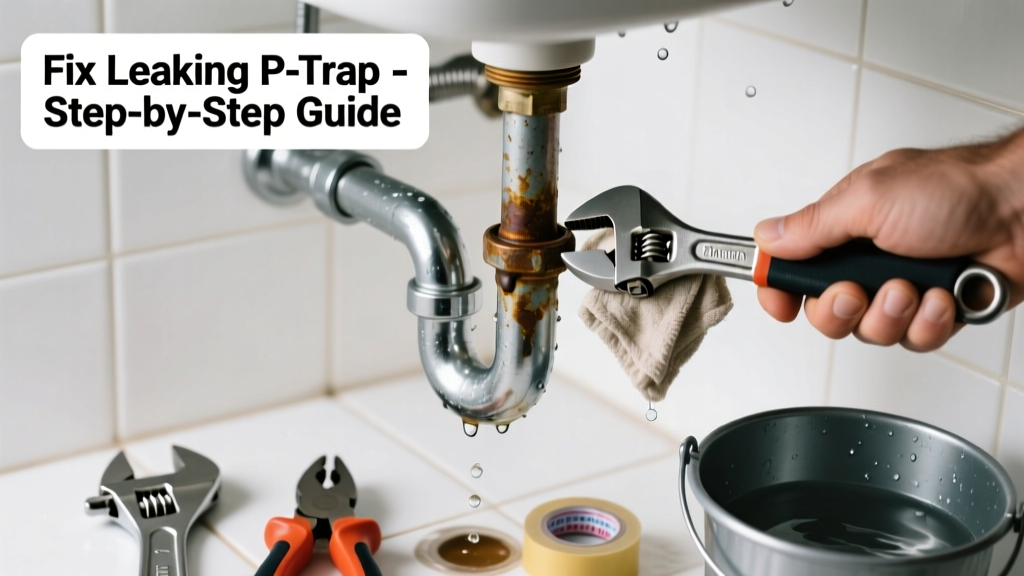
That sudden hiss, drip, or low gurgle under your kitchen or bathroom sink isn’t just annoying—it’s a red flag. A leaking p-trap can waste hundreds of gallons per month and weaken cabinet framing over time. Most cases take under 30 minutes to fix with basic tools and no plumbing license.
Quick Diagnosis
Before grabbing tools, identify the root cause. Unusual noises paired with leaks almost always point to one (or more) of these issues:
- Tightening too much—over-torqued slip nuts crack plastic or warp rubber washers
- Dry trap—evaporation in infrequently used sinks breaks the water seal, causing air gulps and sewer gas odors
- Corroded metal threads—especially in older brass or galvanized traps where mineral buildup hides micro-fractures
- Misaligned pipes—offset between tailpiece and drain arm creates constant stress on the trap’s joints
- Cracked or warped plastic—common in cheap ABS traps exposed to hot dishwasher discharge
Tools & Materials Needed
| Item | Purpose | Estimated Cost |
|---|---|---|
| Adjustable wrench (10-inch) | Secures slip nuts without rounding threads; essential for both metal and plastic traps | $12–$24 |
| Slip-joint pliers | Provides extra grip on stubborn nuts and helps hold pipe sections steady during reassembly | $8–$16 |
| Replacement p-trap kit (PVC or chrome) | Includes new trap, washers, and nuts—prevents mismatched parts and ensures proper fit | $9–$22 |
| Plumber’s grease (silicone-based) | Lubricates rubber washers and threads to prevent binding and improve seal longevity | $4–$7 |
| Shop towel & bucket | Catches residual water and protects cabinetry from drips during disassembly | $3–$6 |
Step-by-Step Fix
Work methodically—don’t rush the reassembly. A poorly seated washer causes 78% of repeat p-trap leaks, according to the Plumbing-Heating-Cooling Contractors Association’s 2022 field survey.
- Shut off water and clear the area: Turn off hot and cold supply valves under the sink. Place a bucket beneath the trap and open the faucet to drain remaining water.
- Loosen slip nuts by hand first: Grip the trap’s upper and lower nuts with slip-joint pliers and an adjustable wrench. Turn counter-clockwise—never force it. If stuck, apply penetrating oil and wait 5 minutes.
- Inspect all components: Check washers for nicks or flattening, trap arms for hairline cracks (hold up to light), and threads for stripped grooves. Discard any damaged part—even if it looks minor.
- Reassemble with lubrication: Coat rubber washers and pipe threads lightly with plumber’s grease. Hand-tighten each slip nut until snug, then give a final ¼-turn with the wrench—no more. Overtightening is the #1 DIY mistake.
- Test for noise and leaks: Run warm water for 60 seconds, then check joints with a dry paper towel. Listen closely: a quiet, steady flow means success. Any hiss or drip means re-tighten—or replace the entire trap.
When to Call a Pro
Some situations demand licensed expertise—not because they’re hard, but because they risk code violations or hidden damage:
- You find black water backing up into the sink (sign of main line blockage or vent failure)
- The leak persists after replacing the trap twice—suggesting misalignment or drain arm corrosion behind the wall
- Your home has cast iron or lead piping connected to the trap (requires specialty fittings and soldering)
- You hear knocking or banging in the walls when water runs—not just under the sink (points to water hammer or failing pressure regulator)
"Over 60% of 'mystery' drain noises trace back to improper venting—not the p-trap itself," says Master Plumber Elena Ruiz in Residential Drain Systems Handbook (2021).
Prevention Tips
Stop future leaks before they start with these proven habits:
- Run water in guest bathroom sinks at least once every 5 days to keep traps full and sealed
- Replace plastic p-traps every 5 years—even if they look fine—since UV and heat degrade ABS over time
- Install a p-trap with built-in cleanout plug for faster debris removal without full disassembly
- Use a mesh strainer daily to catch hair, grease, and food scraps—reducing internal corrosion and clog-related pressure spikes
Can I use bleach to clean a noisy p-trap?
No. Bleach corrodes rubber washers and degrades PVC over time. It also reacts dangerously with ammonia in urine or other cleaners, releasing toxic chloramine gas. Use white vinegar and baking soda instead—let it fizz for 15 minutes, then flush with hot water.
Why does my p-trap gurgle only when the washing machine drains?
This usually means your shared drain vent is undersized or partially blocked. The washing machine’s rapid discharge creates negative pressure, pulling air through your sink’s p-trap. Check your roof vent for bird nests or ice buildup—and consider installing an air admittance valve if adding a roof vent isn’t feasible.
Is it safe to tighten a leaking p-trap with duct tape?
Never. Duct tape fails within hours when wet, leaves sticky residue that blocks future repairs, and violates local plumbing codes. It also masks underlying issues like cracked pipe or failing seals—leading to bigger leaks later.
How tight should p-trap slip nuts really be?
Snug by hand, then ¼-turn with a wrench. That’s it. Over-tightening compresses washers unevenly and strips threads—especially on plastic. If you need more than ¼-turn, the washer is likely damaged or misaligned.
Can a clogged p-trap cause noise without visible leaks?
Absolutely. Partial clogs create turbulent flow, trapping air bubbles that escape as pops or hisses. Try a plunger first, then a zip-it tool before disassembling. If noise stops after clearing debris—but returns in 3–5 days—you’ve got a grease or biofilm issue needing enzymatic cleaner monthly.
What’s the difference between a ‘dry trap’ and a ‘leaking trap’?
A dry trap has no water left in its U-bend (from evaporation), letting sewer gases and air rush in—causing gurgles and odors but no puddles. A leaking trap actively drips or sprays due to failed seals or cracks. Dry traps are fixed with water; leaking ones need hardware replacement.
A noisy, leaking p-trap is rarely a sign of major trouble—but ignoring it invites mold, rot, and higher water bills. With the right approach, most homeowners fix it before lunch. Keep your tools handy, inspect traps twice yearly, and remember: silence under the sink isn’t just peace—it’s proof your system is sealed and healthy.