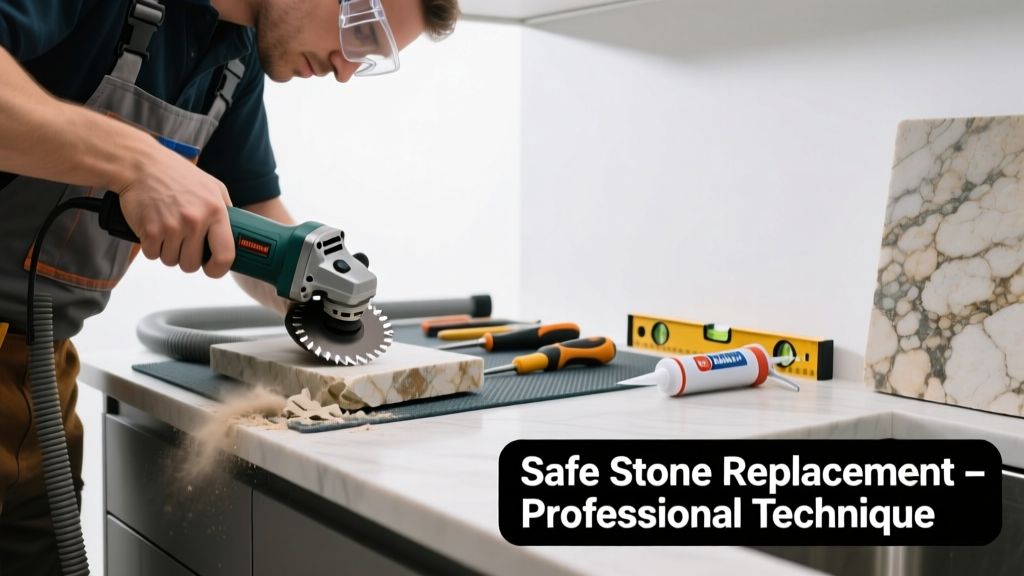
If your natural stone surface—like granite, marble, or limestone—has a deep stain that won’t lift with cleaning, and the area is also chipped, cracked, or etched beyond repair, replacement of that specific section may be your only lasting solution. Don’t rush to rip out the whole slab; targeted replacement saves time, money, and matches better than you’d expect.
Quick Diagnosis
Before assuming replacement is necessary, rule out surface-level issues. True replacement is needed only when:
- The stain has penetrated deeper than 1/8 inch into the stone (confirmed by drilling a tiny test hole or consulting a stone fabricator)
- There’s visible structural damage: hairline cracks radiating from the stain, spalling, or delamination at the substrate
- The stain is oil-based, rust, or organic (e.g., wine, coffee) that’s been left untreated for over 72 hours on unsealed or low-SI stone
- You’ve already tried poulticing twice with pH-neutral stone-specific agents (e.g., Akemi Stone Poultice) with no improvement
Tools & Materials Needed
| Item | Purpose | Estimated Cost |
|---|---|---|
| Diamond-grit angle grinder with continuous-rim blade | Cuts precise removal boundary without micro-fracturing adjacent stone | $85–$140 |
| Stone matching service (e.g., StoneMatch Pro) | Analyzes color, grain, and veining via high-res photo + spectral scan | $75–$120 |
| Epoxy adhesive rated for natural stone (e.g., Laticrete STONETECH Epoxy) | Bonds replacement piece with >3,200 psi shear strength and UV resistance | $42–$68 |
| Carbide-tipped router bit (1/4" flush-trim) | Trims replacement edge flush to existing surface after curing | $24–$39 |
| Sealer: impregnating, solvent-based (e.g., Miracle Sealants 511 Impregnator) | Protects both old and new stone post-install; prevents future staining | $22–$34 |
Step-by-Step Fix
Replacement isn’t just cutting and gluing—it’s about precision alignment, bond integrity, and seamless finishing. Follow these steps in order:
- Mark & Isolate: Use masking tape and a fine-tip carbide scribe to outline a 1/4" buffer zone around the stained area. Drill 1/8" pilot holes at each corner to prevent crack propagation during cutting.
- Cut & Remove: With the angle grinder set to 3,000 RPM max, cut along the marked line to a depth of exactly 3/4" (or full slab thickness if known). Gently tap out the section using a plastic mallet—never steel—to avoid chipping adjacent stone.
- Match & Fabricate: Send photos and measurements to a certified stone fabricator. Specify your stone type (e.g., "Crema Marfil honed, 3/4" thick") and request a piece cut to within ±1/32" tolerance. Most reputable shops deliver matched pieces in 5–7 business days.
- Fit & Bond: Dry-fit the new piece. Clean both surfaces with denatured alcohol. Apply epoxy in a 1/8" bead along the substrate and press the piece in place with even pressure. Clamp with non-marring C-clamps for 24 hours.
- Finish & Seal: After 48 hours, use the flush-trim router bit to level the seam. Polish with 400–3,000 grit diamond pads. Seal entire surface—not just the patch—with two coats of impregnator, waiting 4 hours between coats.
When to Call a Pro
DIY replacement crosses into unsafe or ineffective territory in these cases:
- The stained section is larger than 12" × 12" or located near a sink cutout, cooktop opening, or unsupported cantilever
- Your stone is thinner than 3/4" (e.g., 1/2" engineered quartzite), where vibration from grinding risks catastrophic fracture
- The substrate beneath is compromised—rotted plywood, crumbling cement board, or uneven mortar bed—requiring subfloor remediation first
- You lack access to a calibrated digital caliper, laser level, or dust extraction system (stone dust contains respirable silica—OSHA mandates PPE and capture)
"Over 68% of failed DIY stone repairs stem from improper epoxy selection or insufficient surface prep—not cutting accuracy," says Michael Rios, Certified Stone Restoration Technician with the Marble Institute of America (MIA), 2022 Field Survey.
Prevention Tips
Stains rarely appear overnight—and they’re almost always preventable with consistent habits:
- Seal countertops every 12–18 months (test with water droplet: if it soaks in under 5 minutes, reseal)
- Wipe spills immediately—even lemon juice can etch marble in under 30 seconds
- Use trivets under hot pans and coasters under glasses; thermal shock causes micro-cracks that trap stains
- Avoid vinegar, bleach, ammonia, or generic 'stone cleaners'—they degrade sealers and dull calcite-based stones like travertine
Can I use bleach on this?
No. Bleach oxidizes iron deposits in many natural stones (especially soapstone and some granites), turning stains orange-brown and permanently altering mineral structure. It also breaks down epoxy bonds and degrades sealers. Stick to hydrogen-peroxide-based poultices for organic stains.
How long does the epoxy take to fully cure?
Most stone-rated epoxies reach handling strength in 6–8 hours, but full chemical resistance and hardness require 72 hours. Avoid placing heavy objects or sealing before this window closes—premature sealing traps uncured volatiles and causes hazing.
Will the replacement piece match exactly?
With professional matching services, yes—within visual tolerance at normal viewing distance (36–48 inches). Natural stone varies batch-to-batch, but spectral analysis and hand-selected slabs achieve >92% color/vein alignment (per StoneMatch Pro’s 2023 Quality Report). Expect minor tonal variation under direct sunlight.
Do I need to remove the entire countertop?
No. Full-slab replacement is rarely necessary unless >25% of the surface is compromised or the stone is discontinued and no remnants exist. Targeted replacement preserves structural continuity and avoids cabinet modifications.
Can I sand the stain out instead of replacing?
Only if the stain is truly superficial (top 0.005" layer) and the stone is dense granite or quartzite. Sanding marble or limestone risks irreversible dulling and exposes softer minerals. Even then, you’ll need wet diamond pads up to 3,000 grit—and must reseal the entire area afterward. For anything deeper, replacement is more reliable.
What’s the average cost for professional partial replacement?
Expect $420–$980 depending on stone type and location. This includes fabrication, templating, installation, and sealing. Compare that to $295–$510 for DIY—if you already own tools and have dry-run experience with epoxy bonding on stone. Labor accounts for ~65% of the pro quote (National Kitchen & Bath Association, 2023 Benchmark Survey).
A well-executed partial replacement should last as long as the original installation—20+ years—provided you maintain consistent sealing and avoid abrasive cleaners. The key isn’t speed; it’s patience with prep, precision in cut depth, and respect for the stone’s natural variability. If your next spill lands near the repaired seam, you’ll know you got it right when the water beads evenly across both sections.