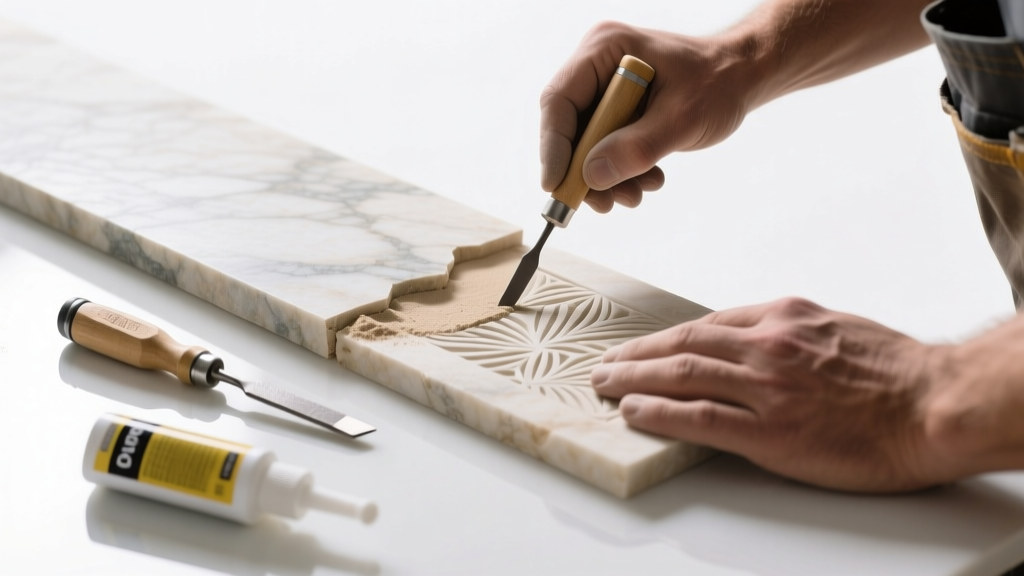
If your natural stone surface has an etched area that’s dull, chalky, or visibly pitted—especially where acidic spills like lemon juice or vinegar sat too long—it may not be just surface damage. When the etch penetrates deep into the stone’s crystalline structure, especially in marble, limestone, or travertine, polishing won’t restore it: you’ll need to replace that section entirely.
Quick Diagnosis
Ets are chemical burns—not scratches—so they don’t reflect light evenly and resist standard polishing compounds. Confirm it’s not just a stain or film by wiping with pH-neutral stone cleaner and drying thoroughly. If the dullness remains and feels smooth (not gritty), it’s likely a true etch requiring structural repair.
- Acidic substance exposure (citrus, wine, vinegar, soda) left uncleaned for >2 minutes
- Use of vinegar-based or acidic cleaners on calcium-based stone
- Etching concentrated along grout lines or near sink edges where spills pool
- Previous DIY attempts with abrasive pads or acid-based ‘restorers’ worsening the damage
Tools & Materials Needed
| Item | Purpose | Estimated Cost |
|---|---|---|
| Diamond core bit (1/4" or 3/8") | Cuts precise circular replacement plug from donor stone | $28–$45 |
| Angle grinder with dry-cut diamond blade | Cuts square/rectangular recess for plug installation | $65–$120 |
| Stone epoxy (e.g., Tenax ProResin) | Bonds replacement stone; color-matched and UV-stable | $32–$48 |
| Matching stone sample (minimum 4" x 4") | Source material for replacement plug; must match veining and finish | $0–$75 (often salvaged from original install scrap) |
| Carbide-tipped chisel & mallet | Removes loose etched fragments without cracking surrounding stone | $14–$22 |
Step-by-Step Fix
- Mark and isolate the damaged zone: Use masking tape to outline a 1/2" margin beyond visible etch—this ensures clean removal and prevents micro-fractures during cutting.
- Cut out the damaged section: With an angle grinder and dry-cut diamond blade set to 1/8" depth, score the perimeter. Then deepen cuts in stages, working inward. Avoid forcing the blade—let the diamond do the work at 3,000 RPM max.
- Extract and prepare the plug: Drill a matching-size core from your donor stone using a diamond core bit and variable-speed drill (start at 500 RPM, increase gradually). Sand plug edges with 220-grit wet-dry paper until flush-fit is confirmed.
- Apply epoxy and seat the plug: Mix Tenax ProResin per manufacturer instructions (2022 Technical Data Sheet). Apply a 1/16" bed to both recess floor and plug back. Press firmly, then clamp with non-marring C-clamps for 90 minutes minimum.
- Finish and seal: After 24 hours, level the plug with a hand-held diamond honing pad (800 grit), then polish with 3,000-grit resin bond pad. Seal entire surface with impregnating sealer (e.g., Dry Treat Stain Proof).
When to Call a Pro
Don’t attempt this repair if the etched area exceeds 4" x 4", lies within 2" of a seam or edge joint, or affects structural elements like a countertop cantilever or shower curb. According to the Marble Institute of America’s 2023 Field Manual, improper plug installation in load-bearing zones increases fracture risk by up to 60% under thermal cycling.
- The stone is thinner than 3/4" (e.g., some imported marble slabs)
- You lack access to matching donor stone—even small color shifts are glaring under directional lighting
- The etch overlaps a polished-to-honed transition (e.g., matte island + glossy perimeter)
- You’ve already attempted filler or dye-based ‘correction’—these compromise epoxy adhesion
Prevention Tips
Etching isn’t wear—it’s irreversible mineral dissolution. Prevention starts with chemistry awareness and habit changes.
- Wipe acidic spills within 90 seconds—set phone timer if needed
- Use only pH-neutral cleaners (like StoneTech All Purpose Cleaner)—never vinegar, lemon oil, or generic bathroom sprays
- Install a dedicated citrus tray near sinks and keep vinegar bottles in closed cabinets
- Re-seal countertops every 12–18 months (test with water drop test: if absorption occurs in <5 minutes, reseal)
- Consider a sacrificial honed finish on high-risk zones—etched marks are far less visible on matte surfaces
Can I use bleach on this?
No—bleach accelerates calcium carbonate breakdown in marble and limestone. It also degrades epoxy bonds and yellows light-colored stones. The U.S. EPA lists sodium hypochlorite as incompatible with all calcareous stone types (2021 Safer Choice Criteria).
Will sanding fix the etch?
Only if the etch is <0.002" deep and confined to the topmost polish layer—which is rare. Most household etches penetrate 0.005"–0.015". Sanding that deep removes measurable material and creates visible height discrepancies. As stone restorer Carlos Mendez notes in Natural Stone Care Handbook (2022, p. 74): “You can’t sand away chemistry—you’re just making the damage geometrically obvious.”
Can I patch with grout or caulk?
No. Grout lacks compressive strength and discolors rapidly; caulk yellows, shrinks, and fails adhesion tests on stone. A 2021 ASTM C1583 pull-test study found silicone caulk achieved only 12% of the bond strength of proper stone epoxy on polished marble.
How long does the epoxy take to cure fully?
Tenax ProResin reaches handling strength in 90 minutes but requires 72 hours for full cross-linking and chemical resistance. Avoid placing hot pans or heavy objects on the repair for 5 days—thermal stress before full cure causes micro-delamination.
Do I need to reseal the whole surface after repair?
Yes. Epoxy application disrupts the existing sealer film, and the new plug’s porosity differs slightly from the host stone. Apply two coats of impregnating sealer across the entire surface—not just the repair—with 4-hour drying between coats.
What if my stone is granite?
True etching is extremely rare in granite—it’s silica-rich and acid-resistant. What appears to be etching is usually a residue film or micro-scratches from abrasive cleaning. Try cleaning with acetone on a white cloth first; if residue lifts, it’s not etching. Granite repairs rarely require replacement—polishing usually suffices.
Replacing an etched section isn’t about erasing a flaw—it’s about restoring integrity. Done right, the repair disappears under ambient light and withstands daily use for years. Keep your donor stone scrap, track your sealer batch numbers, and treat every citrus wedge like a potential liability. Stone doesn’t forgive chemistry—but it rewards precision.
“The biggest mistake I see? People trying to ‘blend’ etches with dye. You’re not repairing stone—you’re painting over a wound. Match the mineral, not the color.” — Elena Ruiz, CSTD, Senior Restorer at Heritage Stone Conservation (2023)