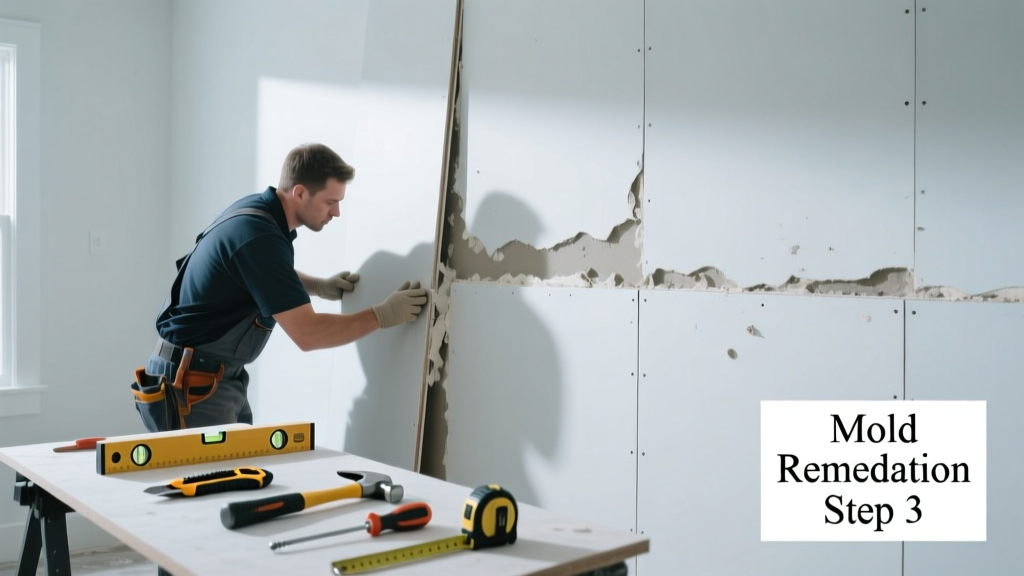
Mold on walls isn’t just unsightly—it’s a red flag that part of your wall assembly has failed and needs physical replacement, not just surface cleaning. When mold penetrates beyond the paint or paper layer into drywall, wood framing, or insulation, cutting out and replacing the compromised section is the only reliable fix. Ignoring it invites respiratory problems, material decay, and potential insurance claim denials.
Quick Diagnosis
Before grabbing tools, confirm whether replacement—not just cleaning—is truly needed. Mold that’s powdery, deeply embedded, or growing behind baseboards or inside stud cavities usually means structural components are compromised. Here are the most common root causes:
- Chronic condensation from poor ventilation (e.g., bathroom without exhaust fan)
- Undetected plumbing leak behind walls (toilets, supply lines, or shutoff valves)
- Roof or window flashing failure allowing rainwater infiltration
- Insufficient vapor barrier in cold-climate exterior walls
- Foundation moisture wicking up through concrete block or brick veneer
Tools & Materials Needed
| Item | Purpose | Estimated Cost |
|---|---|---|
| N95 respirator + goggles + nitrile gloves | Essential PPE to avoid inhaling spores or skin contact | $12–$25 |
| Utility knife & fresh blades | Cutting clean edges around affected drywall; prevents cross-contamination | $8–$15 |
| 16-gauge galvanized steel studs (if framing damaged) | Replacement for rotting or mold-infested wood or metal framing | $3.50–$6.00/ft |
| Type X fire-rated drywall (1/2" or 5/8") | Required for fire separation; resists moisture better than standard drywall | $14–$22/sheet |
| Mold-resistant joint compound & fiberglass mesh tape | Prevents regrowth at seams; avoids paper tape that feeds mold | $18–$28 per kit |
Step-by-Step Fix
Replacing mold-damaged wall sections requires containment, removal, and proper rebuild. Follow these five method-based steps—skip any only if your situation doesn’t apply (e.g., no framing damage = skip Step 3):
- Seal the work area: Tape 6-mil polyethylene plastic over doorways, vents, and adjacent rooms. Use a box fan with a MERV 13 filter taped to an exterior window as negative air pressure (not required for under 10 sq ft, but highly recommended).
- Cut and remove contaminated materials: Score drywall 6 inches beyond visible mold in all directions. Remove drywall, insulation, and backing paper in one piece. Bag immediately in 6-mil trash bags labeled "Biohazard" per EPA guidelines (2022 Mold Remediation in Schools and Commercial Buildings).
- Inspect and replace framing if needed: Probe studs with a screwdriver—if wood crumbles or feels soft, cut out and replace with pressure-treated or galvanized steel studs. Never sister moldy wood—you’re just preserving the problem.
- Install new insulation and drywall: Use closed-cell spray foam or rigid mineral wool (not fiberglass) in damp-prone areas. Hang Type X drywall with corrosion-resistant screws spaced 7 inches apart on edges, 12 inches in field.
- Finish with mold-resistant systems: Apply mold-inhibiting primer (e.g., Kilz Mold & Mildew Resistant Primer), then two coats of antimicrobial paint. Seal baseboards and trim with silicone caulk—not acrylic.
When to Call a Pro
DIY mold replacement crosses into dangerous territory when:
- The affected area exceeds 10 square feet (EPA recommends professional remediation above this threshold)
- Mold is growing inside HVAC ductwork or behind plaster lath—requires specialized containment and duct cleaning
- You discover black mold (Stachybotrys chartarum) on ceiling drywall with water staining above—often signals long-term roof or attic leakage
- Electrical boxes, outlets, or wiring are within or behind the affected zone (shock hazard + code violation risk)
- Your home was flooded with Category 2 or 3 water (e.g., sewage backup or river flood)—requires hazardous waste handling protocols
"Mold-damaged building materials aren’t salvageable—especially cellulose-based products like drywall, paper-faced insulation, and OSB sheathing. Cutting it out is the only code-compliant, health-protective solution." — Dr. Linda Stetzenbach, University of Nevada Reno, Indoor Air Quality Lab, 2021
Prevention Tips
Replacement fixes the symptom. Prevention stops recurrence. Focus on moisture control at the source:
- Install a hygrometer in mold-prone rooms (bathrooms, basements); keep RH below 50% year-round
- Add a timer or humidity-sensing switch to bathroom fans—run for at least 20 minutes post-shower
- Redirect downspouts at least 5 feet from foundation; grade soil away from walls at 1 inch per foot
- Replace single-pane windows with dual-glazed units featuring low-E coatings to reduce interior condensation
- Use a dehumidifier with auto-drain in crawlspaces or basements—set to 45–50% RH
Can I use bleach on this?
No—bleach only kills surface mold on non-porous surfaces and does nothing to stop growth inside drywall paper or wood fibers. The CDC explicitly advises against using bleach for mold remediation on porous materials (CDC, Guidelines for Mold Remediation, 2020). It also produces toxic fumes when mixed with other cleaners and accelerates drywall degradation.
How long does the replacement process take?
For a typical 4' x 8' section with no framing damage, plan for 2–3 days: Day 1 for containment and removal, Day 2 for framing/drywall install, Day 3 for taping, mudding, and priming. Add 1–2 extra days if you’re sanding and painting yourself. Rushing mud drying or skipping primer leads to yellowing and future mold at seams.
Do I need a permit for wall replacement?
In most U.S. jurisdictions, yes—if you’re removing more than one sheet of drywall and replacing framing, electrical, or insulation. Check with your local building department before starting. Permits ensure inspections verify fire-blocking, vapor barrier continuity, and proper fastener spacing—all critical for safety and resale value.
What type of drywall should I use in bathrooms?
Green board is outdated and insufficient. Use cement board behind tile and mold-resistant gypsum core drywall (e.g., USG Mold Tough or National Gypsum Gold Bond XP) everywhere else. These have fiberglass-reinforced cores and non-nutritive additives—unlike standard drywall, which contains starch that feeds mold.
Can I reuse the same insulation?
No—fiberglass, cellulose, and open-cell spray foam that contacted mold must be discarded. Even if it looks clean, mold spores embed deep into fibers and can aerosolize during future renovations. According to the Insurance Institute for Business & Home Safety’s 2023 Mold Mitigation Guide, insulation replacement is non-negotiable for any moisture event lasting over 48 hours.
Is mold testing necessary before replacement?
Not for small, visible areas. The EPA states that if you see or smell mold, you already know remediation is needed—testing rarely changes the response. Save money and time by focusing on fixing the moisture source and removing affected materials. Reserve lab testing for litigation, insurance disputes, or cases where occupants report unexplained health symptoms despite visible mold removal.
Replacing mold-damaged wall sections isn’t glamorous, but it’s one of the most consequential repairs you’ll make for long-term indoor air quality and structural integrity. Done right—with full containment, proper materials, and attention to moisture sources—it eliminates recurrence and adds real value. Pair this fix with routine humidity monitoring and seasonal visual checks behind furniture and along baseboards, and you’ll catch future issues while they’re still small. For related help, see our guides on how to fix a bathroom exhaust fan not venting and how to detect a hidden plumbing leak behind a wall.