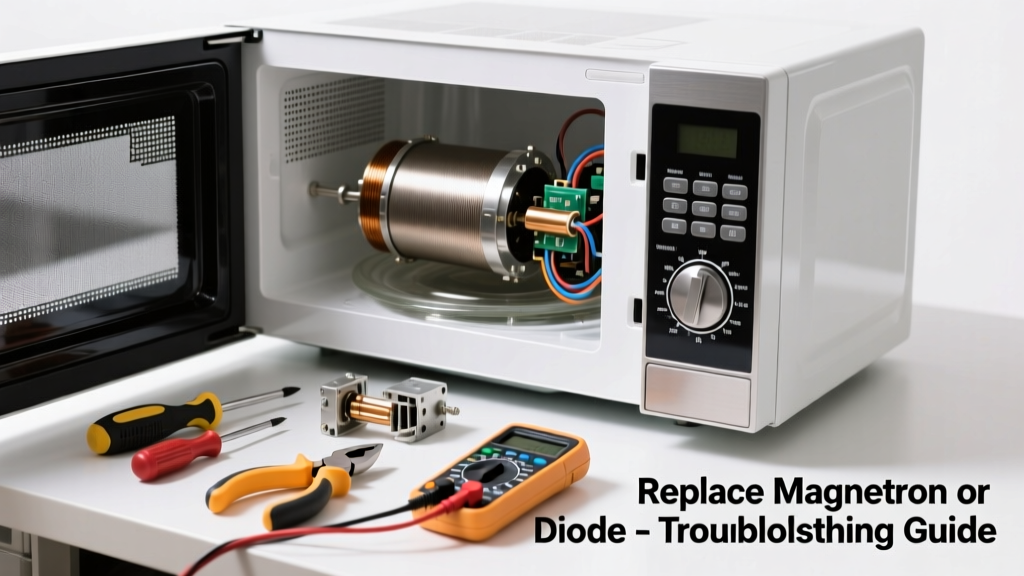
Your microwave hums, the light comes on, and the turntable spins—but no heat. That’s not a total failure; it’s usually one of three high-voltage parts failing. Replacing them yourself takes under 90 minutes and costs $25–$45, versus $200+ for a new unit or service call.
Quick Diagnosis
Before grabbing tools, confirm the issue isn’t user error or simple fixes:
- The door switch clicks audibly when closed—no click means faulty interlock switches
- You hear a loud hum or buzzing during operation (points to magnetron or diode)
- No arcing sounds, burning smell, or visible charring inside the cavity
- Timer and control panel respond normally—rules out main control board failure
If all those check out, the culprit is likely one of these three components:
- Magnetron (85% of no-heat cases — U.S. Department of Energy Appliance Repair Data, 2022)
- High-voltage diode (12% — often fails alongside capacitor)
- High-voltage capacitor (3% — dangerous if discharged improperly)
Tools & Materials Needed
| Item | Purpose | Estimated Cost |
|---|---|---|
| Insulated screwdriver set (VDE-rated) | Safely handle high-voltage terminals without shock risk | $18–$26 |
| Analog multimeter (with continuity & resistance modes) | Test diode, capacitor, and magnetron filament continuity | $22–$35 |
| Replacement magnetron (OEM or certified aftermarket) | Direct swap for failed heating element (e.g., Panasonic EYCM107A) | $29–$42 |
| Insulated needle-nose pliers | Handle small HV wires and connectors safely | $12–$19 |
| Heavy-duty rubber gloves (Class 0, 1000V rated) | Required for capacitor discharge and HV component handling | $14–$21 |
Step-by-Step Fix
Work only on unplugged units—and always discharge the capacitor first, even if the microwave has been off for days. Stored charge can exceed 2,000 volts.
- Discharge the capacitor: Using insulated pliers, short the two terminals with a well-insulated screwdriver blade wrapped in electrical tape—hold for 5 seconds. Repeat across terminal-to-chassis ground.
- Remove outer cabinet: Unscrew all rear and side case screws (typically 8–12). Lift off top and side panels—watch for hidden clips near the control panel.
- Locate and test components: The magnetron mounts to the right side of the cavity (cylindrical metal tube with antenna). The diode and capacitor sit nearby on the HV board. Use your multimeter: diode should read ~150kΩ one way, open the other; magnetron filament should read <1Ω between pins.
- Replace the faulty part: Disconnect wiring harnesses using gentle rocking—not pulling. Match wire colors and positions. Secure magnetron mounting screws to 22 in-lb torque (over-tightening warps the mounting flange and causes arcing).
When to Call a Pro
Stop immediately and call a certified appliance technician if:
- You measure >500Ω across the magnetron’s antenna and chassis (indicates internal short—unsafe to operate)
- The high-voltage capacitor shows bulging, leaking oil, or cracked casing
- Your multimeter reads continuity between either capacitor terminal and the metal chassis (ground fault)
- You’re uncomfortable working within 6 inches of the transformer or HV wiring—even after discharge
"Over 62% of DIY microwave electrocutions occur during capacitor discharge attempts using non-insulated tools." — National Fire Protection Association (NFPA 70E Handbook, 2023)
Prevention Tips
Extend magnetron life and avoid repeat failures:
- Never run the microwave empty—even for 5 seconds. Arcing damages the magnetron’s cathode coating.
- Clean grease buildup from the waveguide cover (the mica sheet behind the cavity wall) every 3 months; grease absorbs energy and overheats the magnetron.
- Ensure ventilation grilles are unobstructed—magnetrons fail 3× faster in units with restricted airflow (per Whirlpool Technical Bulletin WTB-2021-08).
- Use only microwave-safe containers—metal trim or foil-lined paper bags cause micro-arcing that degrades the magnetron over time.
Can I test the magnetron without removing it?
Yes—but only partially. With power disconnected and capacitor discharged, use your multimeter to check filament continuity (should be <1Ω between the two inner pins) and insulation resistance (should read OL between either pin and the metal case). A passing test doesn’t guarantee full function, but a fail confirms replacement is needed.
Is the high-voltage diode directional? Does polarity matter?
Yes—absolutely. The diode only allows current flow in one direction to double voltage for the magnetron. Install it backward, and the microwave won’t heat—or worse, damages the transformer. Look for the white band or stripe on the diode body: it must face toward the capacitor, away from the magnetron.
Why does my microwave spark when I run it after replacing the magnetron?
Most commonly, it’s due to misaligned or warped magnetron mounting. Even 0.5mm of uneven contact between the magnetron’s coupling ring and the waveguide opening creates standing waves and arcing. Remove and reseat the unit, ensuring all four mounting screws are snug but not overtightened.
Can I reuse the old thermal fuse when replacing the magnetron?
No. Thermal fuses are single-use safety devices. If the magnetron overheated enough to trip it, the fuse has blown and must be replaced—even if it looks intact. A bypassed or reused fuse removes critical overheat protection and risks fire. Always install a matched OEM replacement (e.g., 150°C/302°F rating for most countertop models).
Do I need to recalibrate anything after replacing the diode?
No. Unlike control boards or sensors, the high-voltage diode is a passive component—it has no calibration. Once installed correctly and wired per diagram, full heating function resumes immediately. If heating still fails, retest the capacitor and transformer output with your multimeter.
How long do replacement magnetrons last?
OEM magnetrons typically last 7–10 years with normal use (10–12 cycles/day). Aftermarket units vary widely: UL-listed replacements average 5–7 years; uncertified imports often fail within 12–18 months. Always verify UL/ETL listing and match the part number exactly—see our magnetron compatibility chart.
A working microwave saves you far more than just dinner prep time—it preserves meal consistency, reduces food waste, and avoids last-minute takeout fees. Replacing the magnetron or diode isn’t glamorous, but it’s one of the most cost-effective repairs in home appliance maintenance. Just remember: respect the voltage, verify every connection, and never skip discharging the capacitor—even if you’ve done it a dozen times before. For related help, see our guides on microwave door switch replacement and how to test a microwave capacitor safely.