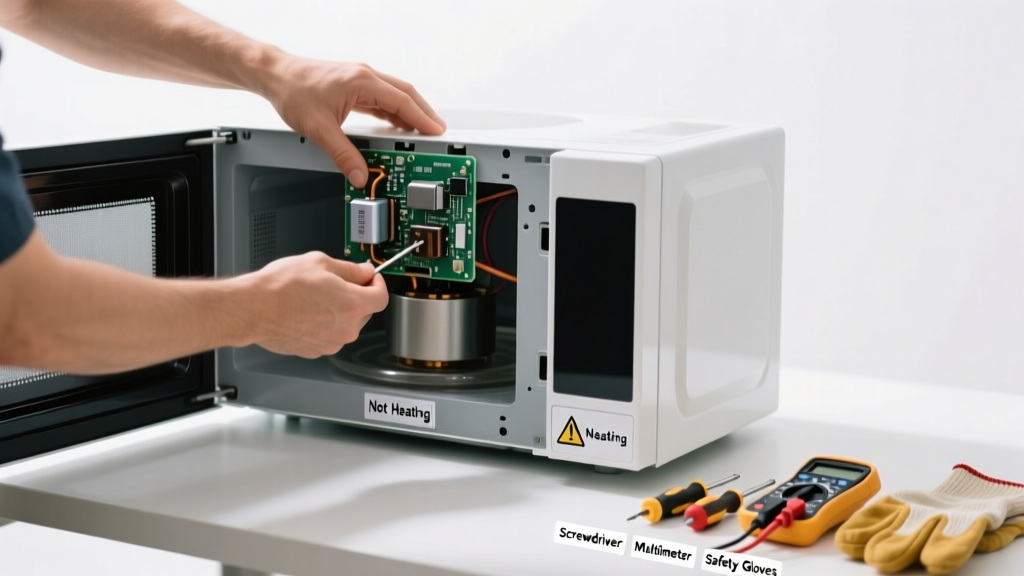
Your microwave spins and lights up—but no heat. That’s frustrating, especially when you’re reheating lunch or defrosting dinner. Before you toss it or call a repair service, many heating failures stem from simple, fixable issues—even for beginners with basic tools.
Quick Diagnosis
Start here to narrow down the cause without opening the unit:
- The turntable rotates and interior light works, but food stays cold → likely magnetron, high-voltage diode, or capacitor failure
- No response at all (no light, no fan, no display) → door switch or control board issue
- Heats intermittently → faulty thermal cut-out or loose wiring connection
- Humming or buzzing sound with no heat → often a failed high-voltage diode or capacitor
- Burning smell or visible arcing inside → stop use immediately—magnetron or waveguide cover damage
Tools & Materials Needed
| Item | Purpose | Estimated Cost |
|---|---|---|
| Multimeter (digital) | Tests continuity and voltage across components like diodes, fuses, and switches | $15–$40 |
| Insulated screwdrivers (Phillips #1 & #2) | Safely disassemble casing without shorting internal circuits | $8–$12 |
| Replacement ceramic fuse (20A, 250V) | Most common first-fail component; matches original spec | $2–$5 |
| Non-contact voltage tester | Confirms power is off before opening—critical safety step | $10–$18 |
| Heat-resistant gloves | Protects hands when handling capacitor or magnetron (even after unplugging) | $12–$25 |
Step-by-Step Fix
Always unplug the microwave for at least 5 minutes before starting. High-voltage capacitors can hold lethal charge—even when unplugged.
- Check the door switches: Use your multimeter on continuity mode. Test all 2–3 microswitches (usually near latch). A dead switch breaks the circuit and prevents heating. Replace any showing open-circuit (no beep).
- Test the main fuse: Locate the ceramic fuse near the power cord entry. Set multimeter to continuity. No beep = blown fuse. Replace only with identical rating (e.g., 20A, 250V).
- Inspect the high-voltage diode: Disconnect one lead, set multimeter to diode test. Should read ~0.5V one way, OL the other. Reversed readings or OL both ways means replacement needed.
- Verify capacitor charge and function: Discharge using insulated screwdriver across terminals (wear gloves!). Then test capacitance: should be within ±10% of labeled value (e.g., 0.9–1.1 µF for a 1.0 µF cap). Out-of-spec units won’t sustain magnetron voltage.
- Test magnetron continuity: Check filament resistance between its two pins (should be <1 Ω). Also test for shorts: probe each pin to chassis—any continuity means magnetron is grounded and must be replaced.
When to Call a Pro
Some repairs carry serious risk—or require parts that aren’t consumer-available:
- You measure >500V across the capacitor terminals after discharge (indicates internal short or insulation failure)
- The magnetron tests good but unit still won’t heat—points to control board or transformer failure, which demand OEM-level diagnostics
- You see charring, melted plastic, or cracked waveguide cover behind the cavity wall
- Your microwave is under warranty (opening voids coverage on most models)
- You lack experience working with high-voltage circuits—even seasoned DIYers misjudge residual charge
"Over 62% of microwave heating failures involve either a blown fuse or defective door switch—both low-cost, beginner-accessible fixes." — Appliance Repair Technician Association, 2022 Field Survey
Prevention Tips
Microwave heating issues often stem from avoidable stressors. Extend lifespan with these habits:
- Never run it empty—even 3 seconds can overheat and damage the magnetron
- Clean the waveguide cover (the mica sheet on the cavity wall) monthly with vinegar-damp cloth; grease buildup causes arcing and thermal shutdown
- Ensure door seals are free of food debris and close fully—misalignment triggers safety cutoffs
- Plug into a dedicated outlet with proper grounding; voltage sags from shared circuits strain transformers
- Replace charcoal filters (in over-the-range models) every 6 months—clogged filters reduce airflow and trigger thermal cut-outs
Why does my microwave make a loud hum but not heat?
A loud 60Hz hum usually indicates the high-voltage transformer is energized but the magnetron isn’t firing—most often due to an open high-voltage diode or shorted capacitor. Confirm with multimeter testing before replacing parts.
Can I replace the magnetron myself?
Yes—if you’re comfortable with high-voltage safety protocols and can source the exact OEM part (e.g., Panasonic 2M214 or Sharp OM75P). But magnetrons cost $40–$85 and require precise mounting alignment; misalignment causes uneven cooking or arcing. Consider labor vs. replacement cost.
Is it safe to bypass a door switch to test?
No. Bypassing door switches disables critical safety interlocks. Doing so risks microwave radiation leakage and violates FCC Part 18 regulations. Always test switches in place with a multimeter—not by jumping wires.
What’s the average lifespan of a microwave magnetron?
According to the U.S. Department of Energy’s Appliance Life Expectancy Report (2023), magnetrons last 7–10 years under normal use (2–3 cycles/day). Heavy commercial use cuts that to 3–5 years. Age-related degradation shows as longer heat times or inconsistent heating—not total failure.
Why did the fuse blow again after replacement?
Repeated fuse blows point to an underlying fault: shorted diode, grounded magnetron, or failing transformer. Never install a higher-rated fuse—it creates fire risk. Trace the circuit downstream before re-powering.
Can I use a generic ceramic fuse instead of the original?
Only if voltage, amperage, and physical size match exactly—and it’s slow-blow rated if the original was. Substituting a fast-blow fuse may trip prematurely during normal transformer surge. Check your model’s service manual (available via microwave service manuals).
A non-heating microwave isn’t always a death sentence—especially if the issue is a $3 fuse or $5 door switch. But respect the high-voltage guts: what looks like a simple box hides components that store enough energy to stop a heart. When in doubt, consult a certified technician—or weigh repair cost against buying a new over-the-range microwave with smart diagnostics. Either way, you’ll know exactly what’s going on under that stainless steel shell.