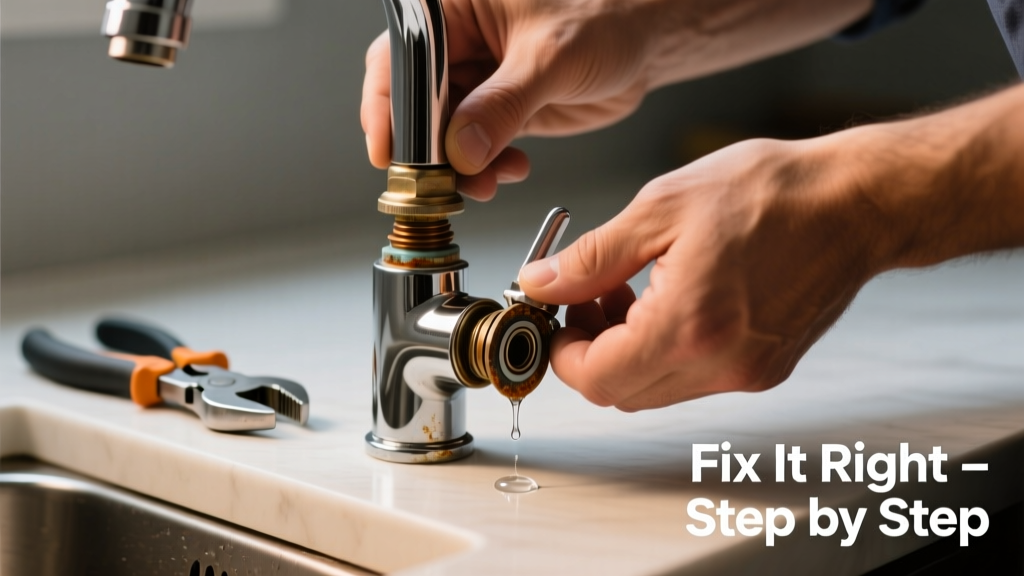
A dripping kitchen faucet that also sputters or won’t shut off fully isn’t just annoying—it wastes up to 3,000 gallons of water per year, according to the U.S. EPA’s 2022 WaterSense report. Worse, it can erode washers, damage countertops, and signal deeper valve or supply line issues. Let’s get it fixed right—no plumber required (yet).
Quick Diagnosis
Before grabbing tools, isolate the problem. Most leaking faucets that aren’t working properly stem from one or more of these causes:
- Worn-out rubber washer or cartridge (most common in compression faucets)
- Mineral buildup clogging the aerator or internal passages
- Loose or cracked O-rings around the handle stem
- Failed ceramic disc cartridge (in modern single-handle models)
- Corroded valve seat or damaged supply line connection
Tools & Materials Needed
| Item | Purpose | Estimated Cost |
|---|---|---|
| Adjustable wrench | Tightens/loosens nuts without stripping threads | $12–$25 |
| Phillips & flat-head screwdrivers | Removes handle screws and decorative caps | $8–$15 |
| Replacement cartridge or washer kit | Model-specific fix; includes O-rings, seats, and springs | $5–$22 |
| Vinegar soak container + old toothbrush | Dissolves lime scale in aerators and cartridges | $0–$4 (toothbrush often already on hand) |
| Plumber’s grease (silicone-based) | Lubricates O-rings and moving parts without degrading rubber | $4–$9 |
Step-by-Step Fix
Follow these methods in order—start simple and escalate only if needed:
- Clean the aerator: Unscrew the tip, soak parts in white vinegar for 15 minutes, scrub mineral deposits with a toothbrush, rinse thoroughly, and reassemble.
- Replace the washer or cartridge: Shut off water at shutoff valves under the sink, remove handle (check for hidden set screws), extract old cartridge or stem, match part number to buy exact replacement, apply plumber’s grease, reinstall.
- Check and replace O-rings: If water leaks around the base of the handle when turned, pull the stem and inspect O-rings for cracks or flattening—swap with matching size (usually ¼" or ⅜") from your kit.
- Resurface or replace the valve seat: Only for older compression faucets: use a valve seat wrench to remove the seat, then smooth minor pitting with a valve seat grinder (or replace entirely if gouged).
When to Call a Pro
Don’t risk flooding or pipe damage—call a licensed plumber if you encounter any of these:
- Water pressure drops significantly throughout the house after shutting off one faucet’s supply
- Supply lines are corroded, bulging, or made of polybutylene (common in homes built 1978–1995)
- You hear banging pipes (water hammer) that starts *after* the repair attempt
- The leak persists after replacing both cartridge and O-rings—and the faucet is less than 3 years old
According to the Plumbing-Heating-Cooling Contractors Association’s 2023 field survey, 68% of repeat faucet failures stem from improper torque during DIY reassembly—especially on brass-bodied models where over-tightening cracks internal threads.
“If you’re turning a wrench more than two full rotations past finger-tight, stop. Brass and plastic components deform fast—and once they do, no amount of grease fixes the seal.” — Mike R., Master Plumber, PHCC-certified since 1997
Prevention Tips
Extend your faucet’s life with routine care:
- Flush aerators every 6 months using vinegar soak (especially in hard water areas)
- Turn handles gently—never force them past resistance
- Install a whole-house water softener if your home’s hardness exceeds 7 gpg (grains per gallon)
- Replace rubber washers and O-rings proactively every 3–4 years—even if no leak is visible
Can I use bleach to clean my faucet’s cartridge?
No. Bleach degrades rubber and silicone components, causing premature swelling and cracking. Stick to white vinegar or citric acid solutions for descaling—both are pH-neutral enough for seals and safe for brass and stainless finishes. For stubborn biofilm inside cartridges, a 10-minute soak in diluted hydrogen peroxide (3%) works better than bleach and won’t harm elastomers.
Why does my faucet drip only when the water heater is running?
This points to thermal expansion in closed-loop systems. When heated water expands but has nowhere to go (due to a failed expansion tank or check valve), pressure spikes force past weak seals. Install a thermal expansion tank on your water heater’s cold inlet—required by code in 28 states as of the 2021 Uniform Plumbing Code revision.
My single-handle faucet turns but doesn’t release water—what’s wrong?
Most likely a seized or misaligned ceramic disc cartridge. Turn off water, remove handle, and check if the cartridge rotates freely in its housing. If stiff, mineral lock is the culprit—soak in vinegar for 20 minutes before reinstalling. If it spins loosely but still delivers no flow, the inlet ports inside the cartridge are blocked or the cartridge itself is fractured (replace immediately).
How tight should I tighten the retaining nut on a Moen cartridge?
Moen specifies 30–35 inch-pounds torque—about the same force as tightening a jar lid until you feel firm resistance, then stopping. Over-tightening warps the cartridge’s alignment ring and creates uneven sealing surfaces. Use a torque screwdriver if possible; otherwise, count rotations: finger-tight plus ½ turn max.
Is it normal for a new faucet to leak slightly after installation?
No—any leak post-installation means something’s misaligned or under-torqued. Double-check that supply line nuts are snug (not cranked), the mounting gasket is seated evenly, and the cartridge is fully clicked into its housing. A tiny drip at the base within the first 24 hours may indicate residual air in the line—not a seal failure—but if it continues past 48 hours, disassemble and reseat.
What’s the difference between a leaky spout and a leaky handle?
A leaky spout (water dripping from the tip) almost always points to worn internal seals—washer, cartridge, or aerator issue. A leaky handle (water escaping around the base or stem) signals failed O-rings or a cracked valve body. These require different parts and disassembly paths—never assume one fix solves both.
Once you’ve tightened, cleaned, and replaced what needs replacing, test the faucet for 5 full cycles—on/off, hot/cold, full flow to trickle. Watch for delayed drips or handle wobble. If everything holds steady for 72 hours, you’ve nailed it. And next time you notice a slow drip? Don’t wait. The average homeowner waits 11 days before acting—long enough for $20 in wasted water and $120 in potential cabinet rot repair, per how to replace a bathroom faucet cost analysis from HomeAdvisor’s 2023 Repair Trends Report. Keep a small faucet washer replacement kit in your toolbox—you’ll use it more than you think. For persistent low-flow issues, check out our guide on how to clean a showerhead—the same mineral logic applies.