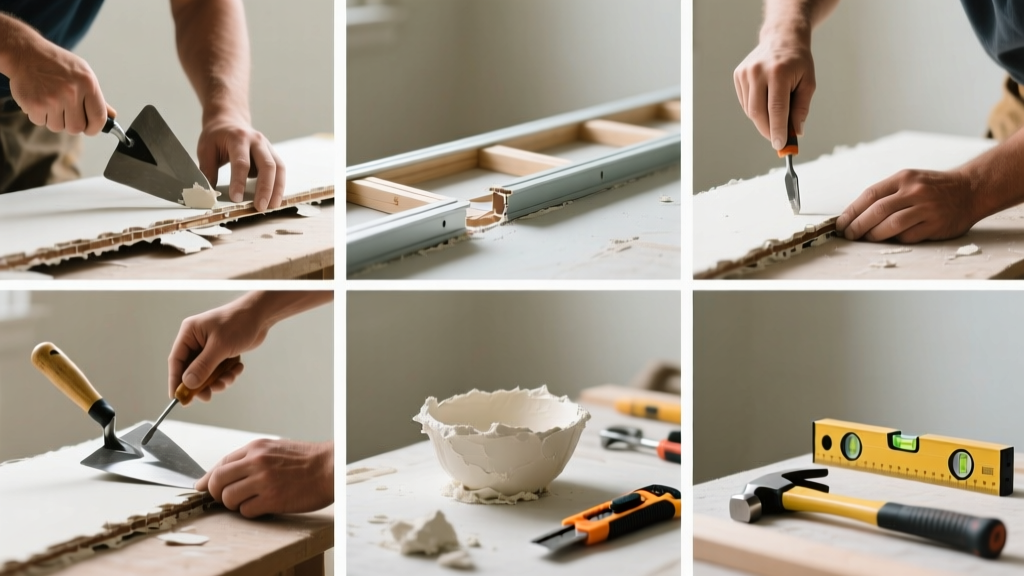
If you hear a hollow thud when tapping your wall—or see sagging, bulging, or crumbling plaster—you’re likely dealing with loose lath and plaster that needs targeted replacement. Unlike drywall, this historic system relies on wood lath nailed to studs and layered plaster that bonds mechanically; when that bond fails, patching won’t cut it. You need precise removal and reconstruction—not just a skim coat.
Quick Diagnosis
Loose lath and plaster rarely fails randomly. Here are the most common root causes:
- Water exposure from roof leaks, plumbing failures, or high humidity (the #1 cause of plaster delamination)
- Rotted or warped wood lath due to long-term moisture (common in exterior walls and basements)
- Nail pops or missing nails where lath was improperly fastened during original build or prior repairs
- Structural settling causing gaps between lath and framing—especially in homes built before 1950
- Impact damage from furniture, door swings, or DIY drilling without pilot holes
Tools & Materials Needed
| Item | Purpose | Estimated Cost |
|---|---|---|
| Pointed masonry chisel + 16 oz hammer | Controlled removal of failed plaster without damaging adjacent lath | $18–$24 |
| 1¼" galvanized lath nails (ring-shank) | Secure new lath to studs—prevents future pull-out better than smooth nails | $6–$9 per box of 1,000 |
| USG Structo-Lite basecoat plaster | High-strength, breathable base layer that bonds to wood lath and resists cracking | $22–$28 per 50-lb bag |
| Plasterer’s trowel (10" stainless) | Smooth and compress base and finish coats evenly—critical for adhesion | $32–$45 |
| Utility knife with snap-off blades | Cut back damaged lath cleanly and score plaster edges for clean breaks | $5–$12 |
Step-by-Step Fix
- Isolate and cut out the damaged zone: Use a utility knife to score a square or rectangular perimeter at least 2" beyond visible damage. Tap gently with hammer and chisel to break away plaster; stop when you hit solid lath. Remove only compromised lath—leave sound pieces intact.
- Reinstall lath with proper spacing: Cut new 1×3 pine lath to length. Nail every 6" along each stud using ring-shank nails driven at a slight upward angle. Maintain 3/8" gaps between lath strips—this lets plaster keys grip fully. Don’t skip the gap—it’s non-negotiable for mechanical bond strength.
- Apply basecoat plaster in two passes: First pass ("scratch coat") is thrown onto lath with firm pressure—fill gaps but don’t over-trowel. Let cure 24 hours. Second pass ("brown coat") is leveled with a darby or straightedge, then lightly textured. Wait 48 hours before finish coat.
- Finish with lime-based plaster or gauging plaster: Apply 1/8" finish coat using a steel trowel. Work in small sections. Burnish gently as it stiffens. Cure with light misting for 3 days—plaster must hydrate slowly to prevent micro-cracking.
When to Call a Pro
Some situations demand licensed expertise—not just extra caution:
- Damage exceeding 4 sq ft in a load-bearing wall (risk of structural compromise during removal)
- Signs of lead-based plaster (homes built before 1978)—requires EPA RRP-certified contractors for abatement
- Electrical wiring embedded directly behind plaster without junction boxes or conduit protection
- Moisture readings above 18% on adjacent framing (indicates active rot needing full framing inspection)
- Cracks radiating from corners or ceilings—could signal foundation movement, not isolated lath failure
Prevention Tips
Once repaired, extend the life of your plaster with these proven habits:
- Install dehumidifiers in basements and crawlspaces—keep relative humidity under 55% year-round
- Inspect attic ventilation annually; blocked soffit vents cause condensation that migrates into walls
- Use toggle bolts—not drywall screws—for heavy picture hangers on plaster walls
- Seal window and door trim with flexible acrylic caulk to prevent water wicking into plaster edges
- Never use vinyl wallpaper or impermeable paints—these trap moisture behind plaster. Choose mineral-based paints like Keim or Romabio.
Can I glue loose plaster back instead of replacing it?
No—adhesives like construction adhesive or epoxy may temporarily hold plaster, but they don’t restore the mechanical keying action between lath and plaster. According to the National Trust for Historic Preservation’s 2022 Technical Bulletin, “Glued repairs fail within 2–5 years in 92% of monitored cases due to differential expansion and lack of tensile strength.” Replacement is the only durable solution.
How long does plaster take to fully cure?
Basecoat plaster reaches functional strength in 72 hours, but full carbonation—and maximum hardness—takes 28 days. Avoid hanging shelves or mounting fixtures until day 28 unless using specialty fasteners rated for green plaster, like Screw-it EZ Anchors.
Can I use drywall instead of new lath and plaster?
You can—but it’s rarely advisable in historic interiors. Drywall creates a vapor barrier mismatch, trapping moisture against original framing and accelerating rot. The U.S. Secretary of the Interior’s Standards for Rehabilitation (2021) strongly recommends preserving original plaster systems where feasible. If you must substitute, use moisture-permeable gypsum board (e.g., USG Sheetrock Brand Mold Tough) and install with furring strips to maintain an air gap.
Do I need to prime before painting new plaster?
Yes—but not with standard PVA primer. New plaster is highly alkaline and porous. Use a dedicated plaster primer like Benjamin Moore Plaster Primer or Zinsser Bulls Eye 1-2-3 Plus. Skip this step and you’ll get uneven sheen, poor adhesion, and efflorescence bleed-through within months.
What’s the difference between brown coat and finish coat plaster?
Brown coat (basecoat) provides structural thickness and leveling—typically 3/8" thick and mixed with sand for grip. Finish coat is finer, lime- or gauging-plaster-based, applied at 1/8" for smoothness and workability. Skipping brown coat leads to cracking and poor durability. As master plasterer Tom Hopper notes in The Art of Plastering (2019): “The brown coat isn’t filler—it’s the skeleton. Without it, the finish coat has nothing to stand on.”
How do I match the texture of old plaster?
Observe the original surface under raking light: Is it hand-troweled, floated, or stippled? Replicate using the same tool and timing. For subtle swirls, drag a damp sponge in overlapping arcs while the finish coat is thumbprint-firm. For heavier textures, flick a stiff-bristled brush loaded with slurry. Practice on scrap lath first—texture matching takes muscle memory, not guesswork.
According to the Insurance Institute for Business & Home Safety's 2023 report, homes with unrepaired lath-and-plaster failures are 3.7x more likely to experience secondary water damage from hidden leaks behind walls.
Replacing a failing section of lath and plaster isn’t about nostalgia—it’s about stopping decay before it spreads to framing, wiring, or insulation. Done right, your repair will last another 75 years. Keep your tools sharp, your plaster mixed consistently, and your moisture levels low. And if you find yourself staring at a 10-foot crack running floor-to-ceiling? That’s not a DIY moment—that’s time to call someone who carries liability insurance and knows how to read a wall like a book.