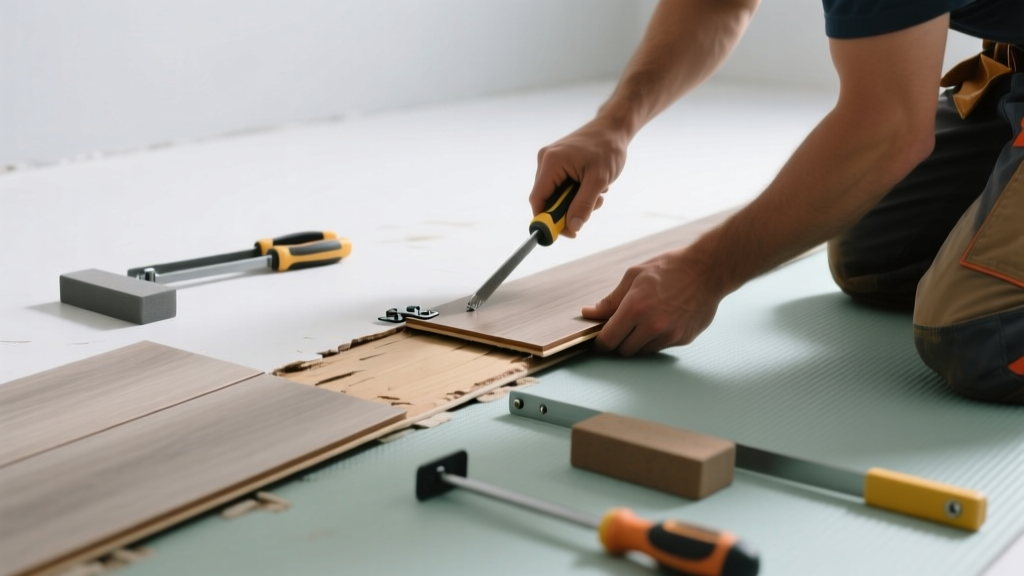
Laminate floor peaking—where planks lift at the edges, forming ridges or tent-like bumps—is rarely a full-floor failure. More often, it’s one or two damaged planks reacting to moisture, poor subfloor prep, or impact damage. The good news? You usually don’t need to rip up the whole room—just swap the faulty section.
Quick Diagnosis
Before grabbing tools, confirm the cause. Peaking isn’t always about the plank itself—it’s often a symptom. Here are the most common culprits:
- Moisture intrusion beneath the plank (from leaks, high humidity, or improper vapor barrier)
- Subfloor unevenness or debris trapped under the plank during installation
- Missing or compressed expansion gap along walls (less than 3/8″)
- Impact damage causing internal core swelling (e.g., dropped appliance or furniture leg)
- Manufacturing defect in the locking mechanism or HDF core density
Tools & Materials Needed
| Item | Purpose | Estimated Cost |
|---|---|---|
| Laminate removal tool (or pry bar + scrap wood) | Protects adjacent planks while prying up damaged piece | $12–$28 |
| Replacement plank (same batch if possible) | Ensures color, texture, and locking profile match exactly | $2.50–$6.99 per plank |
| Utility knife & straightedge | Cuts away swollen core or trims for tight fits | $5–$15 |
| Tap block & rubber mallet | Seats new plank without damaging surface or locking tongue | $8–$22 |
| Moisture meter (optional but recommended) | Verifies subfloor moisture is ≤75% RH before reinstallation | $45–$120 |
Step-by-Step Fix
Replacing a peaked plank requires careful disassembly—not brute force. Follow these steps in order:
- Locate and isolate the damaged plank: Identify the highest point of the peak, then trace back to the nearest accessible edge (usually near a wall or doorway). If it’s an interior plank, you’ll need to unclick rows—start from the nearest loose edge or remove baseboard.
- Remove adjacent planks to access the damaged one: Work backward row-by-row using a laminate removal tool. Place scrap wood against the plank edge to prevent chipping, then gently lever upward. Keep all removed planks in order—they’ll go back exactly as they came out.
- Extract the peaked plank: Once exposed, use the utility knife to score and carefully break away any swollen core material. Lift the plank straight up—don’t twist—to avoid damaging the locking groove on neighboring pieces.
- Inspect and prep the subfloor: Check for moisture stains, debris, or height variations. Sand down minor ridges; replace damp underlayment. According to the National Wood Flooring Association’s 2022 Installation Guidelines, subfloor flatness must be within 3/16″ over 10 feet.
- Install the replacement: Slide the new plank into place using the tap block and mallet. Ensure the tongue fully engages the groove—listen for the ‘click’ and verify no gaps remain. Reassemble surrounding rows in reverse order.
When to Call a Pro
Some peaking situations go beyond simple plank replacement—and attempting DIY can worsen structural issues or void warranties. Call a certified installer if:
- The peaking spans more than three consecutive rows or covers >12 sq ft
- You detect standing water, mold odor, or subfloor rot beneath the flooring
- The entire room lacks expansion gaps—or baseboards were nailed directly through the floor
- Your home was built before 2005 and has particleboard subflooring (prone to irreversible swelling)
"Over 68% of laminate floor failures traced to moisture exposure originate from plumbing leaks behind walls or under appliances—not surface spills." — Insurance Institute for Business & Home Safety, 2023 Residential Flooring Report
Prevention Tips
Once repaired, protect your investment with these proven strategies:
- Maintain indoor relative humidity between 35–55% year-round using a hygrometer and dehumidifier/humidifier as needed
- Install moisture barriers rated for concrete slabs (e.g., 6-mil poly with taped seams) before floating floors
- Leave consistent 3/8″ expansion gaps around all vertical surfaces—and cover them with quarter-round or T-molding where transitions occur
- Use felt pads under all furniture legs and avoid dragging heavy items across the floor
Can I glue down a peaked laminate plank instead of replacing it?
No—laminate flooring is designed as a floating system. Gluing restricts natural expansion and contraction, worsening peaking and potentially cracking the wear layer. Adhesives also void most manufacturer warranties and make future repairs impossible.
What if my replacement plank doesn’t match the existing floor?
Color shift is common after 12+ months of UV exposure and foot traffic. Try rotating the new plank 180° or installing it in a low-visibility area (e.g., under a rug or cabinet). For exact matches, contact the manufacturer with your lot number—many keep stock for 5 years. See our guide on laminate floor color matching.
Do I need to remove baseboards to fix interior peaking?
Often yes—if the peaked plank isn’t near an edge. Baseboards conceal the required expansion gap, and removing them gives access to the first row. Use a stiff putty knife and gentle prying—most spring-clamp baseboards reinstall cleanly. Watch our how to remove baseboards without damage tutorial for technique tips.
Can I reuse the old planks after removal?
Only if they’re undamaged and haven’t been exposed to moisture. Inspect each plank’s locking edges for chips, warping, or residue. A single compromised tongue or groove can cause clicking noises or future gapping. When in doubt, replace the entire affected row—especially if it’s near a high-traffic zone.
How long should I wait before walking on the repaired area?
You can walk on it immediately—laminate doesn’t require curing time. However, avoid placing heavy furniture or area rugs for 24 hours to let the interlocking joints fully settle and equalize pressure across the seam.
Is peaking covered under my laminate warranty?
Most major brands (e.g., Mohawk, Shaw, Pergo) exclude peaking caused by improper installation, moisture exposure, or lack of expansion gaps—even if the plank itself is defective. Review your warranty’s ‘exclusions’ section carefully. Documentation like moisture meter readings and photos taken before repair strengthen claims. Learn more in our laminate floor warranty claims checklist.
A single peaked plank doesn’t mean your floor is failing—it means your repair skills are about to level up. With the right tools, attention to subfloor conditions, and patience during reassembly, you’ll restore smooth, stable footing in under half a day. And next time you spot that telltale ridge, you’ll know exactly which plank to pull—not which contractor to call.