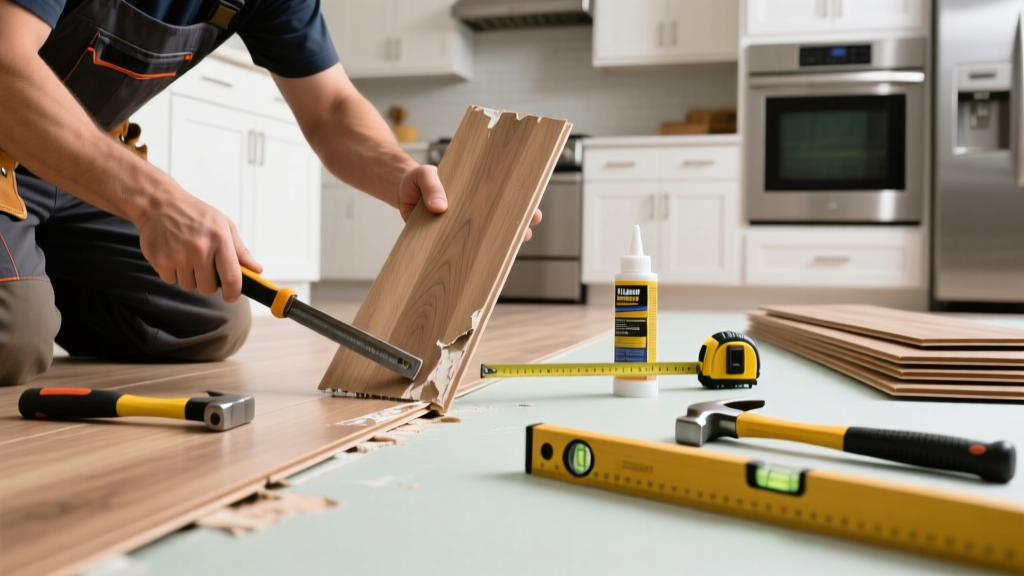
Laminate floor peaking in your kitchen isn’t just unsightly—it’s a red flag that something’s off with moisture control, installation, or subfloor stability. Unlike other rooms, kitchens see frequent spills, temperature swings, and heavy foot traffic, making them hotspots for this frustrating buckling issue. Ignoring it risks permanent damage to planks, mold growth beneath the floor, or tripping hazards.
Quick Diagnosis
Before grabbing tools, identify the root cause. Peaking usually stems from one (or more) of these:
- Insufficient expansion gap around perimeter walls (less than 3/8" is common in older installs)
- Moisture intrusion from leaks under the sink, dishwasher, or refrigerator drip pan
- Subfloor warping or high spots due to water exposure or poor leveling during install
- Plank locking system failure—especially near doorways or transitions where stress concentrates
- Humidity spikes above 60% RH without proper acclimation before installation
Tools & Materials Needed
| Item | Purpose | Estimated Cost |
|---|---|---|
| 5-in-1 pry bar | Removes baseboard and gently lifts peaked planks without cracking edges | $8–$15 |
| Moisture meter (pin-type) | Measures subfloor and plank moisture content—critical before repair | $45–$90 |
| 3/8" spacers | Ensures proper expansion gap when reinstalling planks | $3–$7 |
| Construction adhesive (waterproof, flexible) | Bonds warped planks to subfloor where full replacement isn’t needed | $12–$22 |
| Weighted sandbags or books | Holds planks flat while adhesive cures (24–48 hrs) | $0–$10 (repurpose household items) |
Step-by-Step Fix
Choose the method based on severity and cause. Start with the least invasive option:
- Assess moisture first: Use a pin-type moisture meter on both the peaked plank and subfloor. If readings exceed 12% MC (per ASTM D4216-22), stop and address the water source—find and fix the leak before proceeding.
- Relieve pressure at the peak: Remove baseboard along the affected wall using a pry bar. Check for debris or drywall compound blocking the expansion gap. Vacuum thoroughly, then insert 3/8" spacers and gently tap planks back toward the wall with a rubber mallet.
- Re-adhere warped planks: For mild peaks (<1/8" height), lift the leading edge of the plank, apply waterproof flexible adhesive to the subfloor, press down, and weigh with sandbags for 48 hours. Avoid walking on it during cure time.
- Replace damaged planks: If peaking exceeds 1/4" or planks are cracked, cut out the damaged section using a jigsaw with a fine-tooth blade, replace with matching planks, and relock carefully—follow our kitchen-specific replacement guide.
When to Call a Pro
DIY can backfire if structural or environmental issues are involved. Call a certified flooring contractor if:
- You detect >15% moisture in the subfloor (indicating chronic water intrusion)
- The peak spans more than three rows or runs continuously across cabinets or appliances
- There’s visible mold growth underneath or musty odors near the floor
- Your home was built before 1990 and you suspect asbestos-containing adhesive or subfloor material
According to the National Wood Flooring Association’s 2023 Installation Guidelines, “peaking affecting over 10% of a room’s surface area requires professional evaluation—not patch-and-pray fixes.”
Prevention Tips
Stop future peaking before it starts:
- Maintain indoor humidity between 35–55% year-round using a dehumidifier or HVAC humidistat
- Install a moisture barrier underlayment rated for wet areas—even with ‘water-resistant’ laminate
- Check under-sink supply lines and dishwasher hoses every 6 months for cracks or corrosion
- Always leave a minimum 3/8" expansion gap at all walls, cabinets, and fixed objects—use spacers, not guesswork
- Acclimate new laminate for 48–72 hours in the kitchen (not garage or basement) before installing
Can I use a steam mop on laminate floors in the kitchen?
No. Steam mops force superheated vapor into seams, accelerating swelling and peaking. The U.S. EPA estimates that 14% of household water usage is from leaks—including those caused by improper cleaning methods. Stick to microfiber mops dampened with pH-neutral cleaner.
Will cutting a relief slit in the peak fix it?
Avoid slitting planks—it compromises structural integrity and invites moisture penetration. Relief cuts may temporarily flatten the peak but rarely solve the underlying pressure or moisture issue, and they’re nearly impossible to hide aesthetically.
How long does laminate need to acclimate before installing in a kitchen?
Minimum 48 hours in the actual kitchen space, unopened and laid flat, per the North American Laminate Flooring Association (NALFA) 2022 standards. Kitchens fluctuate more than living rooms—so don’t skip this step, even if the box says “24-hour acclimation.”
Can I glue down floating laminate to stop peaking?
No—gluing defeats the purpose of a floating floor. Laminate is designed to expand and contract freely. Adhering it creates internal stress points that worsen peaking over time. If you need a glued-down solution, consider luxury vinyl plank (LVP) instead.
Does underlayment thickness affect peaking risk?
Yes. Underlayment thicker than 3 mm compresses unevenly under cabinet weight and appliance loads, creating localized pressure points. Use only 2 mm foam or cork underlayment rated for high-traffic, moisture-prone areas like kitchens.
What’s the best way to clean up a small spill under cabinets without removing flooring?
Use a shop vac with a crevice tool and moisture-absorbing towels. Pull out the toe-kick panel first (if accessible), then vacuum aggressively. Follow up with a pin-type moisture meter to confirm subfloor readings are below 12%—see our subfloor testing protocol.
Peaking isn’t inevitable—it’s a signal your floor is trying to tell you something about moisture, fit, or foundation. With the right diagnosis and careful execution, most kitchen laminate peaking can be reversed without ripping up the whole floor. And remember: fixing the cause matters more than flattening the symptom. A little patience now saves you hundreds later—and keeps your kitchen safe, level, and looking sharp.