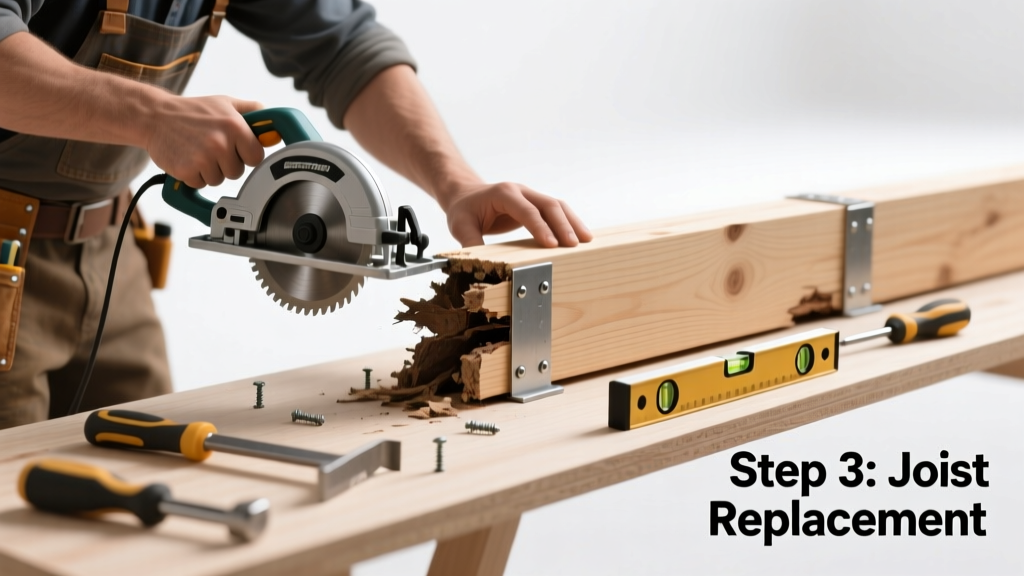
If your floor feels bouncy, squeaks underfoot, or shows visible dips near walls or plumbing stacks, you may have localized joist damage—not full replacement. Unlike whole-joist failure, this fix targets only the compromised segment: rot, termite tunnels, or notches that exceed code limits (like a 1.5" deep cut in a 2×10). Fixing it right prevents progressive sag and avoids unnecessary demolition.
Quick Diagnosis
Before cutting anything, confirm the cause—not just the symptom. Sag alone doesn’t mean replacement is needed; sometimes shimming or blocking solves it. But if you find any of these during inspection, partial replacement is likely required:
- Soft, crumbly wood when probed with a screwdriver (indicating advanced rot)
- Termite galleries or frass concentrated in one 12–24" span
- A notch or hole exceeding 25% of joist depth (e.g., >2.5" in a 2×10)
- Multiple nail holes clustered where plumbing or wiring was added haphazardly
- Visible cracks running parallel to grain over 6" length
Tools & Materials Needed
| Item | Purpose | Estimated Cost |
|---|---|---|
| Reciprocating saw with carbide-tipped blade | Cuts through nails and compromised wood cleanly without splintering adjacent framing | $85–$120 |
| 2×10 pressure-treated lumber (same species & grade) | Replacement section must match original strength and moisture resistance | $4.20–$6.80/8' |
| 16d galvanized sinker nails or 3" structural screws | Code-compliant fasteners for load-bearing sistering | $12–$18/box |
| Hydraulic floor jack with 3-ton capacity | Lifts floor gradually—never use car jacks or cinder blocks | $95–$145 |
| 10' level and laser line level | Verifies lift accuracy; critical to avoid over-lifting and cracking drywall | $35–$75 |
Step-by-Step Fix
Work from below (basement/crawlspace) whenever possible. If access is limited, remove flooring only where necessary—and only after confirming joist layout with a stud finder and tapping test.
- Support first, cut second: Position hydraulic jacks on solid footings under adjacent joists (not the damaged one). Raise floor slowly—no more than 1/8" per hour—to prevent sheetrock cracks or door binding.
- Mark and cut: Measure 12" beyond visible damage on both sides. Score cut lines with a utility knife, then use reciprocating saw to remove the compromised 24–36" section. Leave at least 1.5" of intact wood at each end for nailing surface.
- Sister and secure: Fit new 2×10 section flush against the remaining ends. Clamp in place, then toenail with three 16d nails per side every 6", or drive 3" structural screws at 45° angles. Add adhesive (e.g., PL Premium) before clamping for 25% higher shear resistance.
- Reinforce connections: Install 2×6 blocking between the repaired joist and its neighbors at 16" o.c. Use 3" screws—this redistributes load and stops lateral twist.
When to Call a Pro
Some joist issues look local but hide systemic problems. Stop and consult a licensed structural engineer or certified framing contractor if:
- The sag exceeds 1.5" over a 10-foot span (per IRC R502.3.2 deflection limits)
- You discover two or more adjacent joists with similar damage
- The affected joist supports a bearing wall, fireplace chimney, or HVAC unit
- Your home was built pre-1950 with balloon framing or uses 2×6 joists spaced 24" o.c.—these require engineered solutions
"Over 62% of floor-sag complaints in homes older than 30 years stem from localized decay—not global undersizing," states the American Wood Council’s 2022 Residential Structural Inspection Guide.
Prevention Tips
Moisture is the top enemy of joists. Prevent recurrence with targeted interventions:
- Install rigid foam insulation (R-10 minimum) between joists in unconditioned crawlspaces to reduce condensation
- Route downspout extensions at least 5 feet from foundation walls
- Use dehumidifiers in basements maintaining ≤55% RH year-round
- Inspect joist ends annually where they rest on mudsills—look for fungal staining or powder post beetle exit holes
Can I sister only part of the joist instead of replacing?
No—if the wood is structurally compromised (rot, insect damage, or oversized notches), sistering over the bad section transfers stress to weak material and risks sudden failure. Replacement of the damaged segment is required by IRC Section R502.3.1.
Do I need a permit for this repair?
Yes—in 42 states, any structural framing modification requires a building permit and third-party inspection. Contact your local municipality before lifting or cutting. Unpermitted work voids insurance coverage for collapse-related claims (Insurance Institute for Business & Home Safety, 2023).
What’s the strongest wood species for replacement joists?
For residential floors, Southern Yellow Pine (SYP) #2 or better offers highest bending strength (Fb = 1,500 psi) and stiffness (E = 1.6 million psi) among common species. Douglas Fir-Larch is close behind and often easier to source in the Pacific Northwest. Avoid Hem-Fir for high-load spans unless engineered.
How long does the adhesive take to cure before walking on the floor?
PL Premium reaches 80% bond strength in 24 hours at 70°F and 50% RH—but full structural capacity takes 7 days. Wait at least 48 hours before reinstalling flooring, and avoid heavy furniture placement for one week. Temperature below 40°F delays cure time by 2–3x.
Can I use construction adhesive alone without nails or screws?
No. Adhesive enhances connection but does not replace mechanical fasteners in load-bearing applications. IRC R602.3 mandates minimum fastener schedules—even with adhesive, you must meet nail/screw spacing and embedment requirements.
Is it safe to jack up a floor with ceramic tile above?
Risk is high. Tile and thinset are brittle and crack easily under differential movement. If tile is present, hire a pro who uses precision laser leveling and micro-adjustment jacks—standard hydraulic jacks often induce hairline fractures within 48 hours.
A properly repaired joist section restores floor rigidity and buys decades of service—if moisture control and load management stay consistent. Check the repair quarterly for new squeaks or gaps at the sister joint, and re-tighten screws if needed. For deeper guidance on subfloor prep, see our how to level a sagging floor article. And if you're dealing with moisture behind walls, our dry out water-damaged studs guide walks through mold-safe drying protocols.