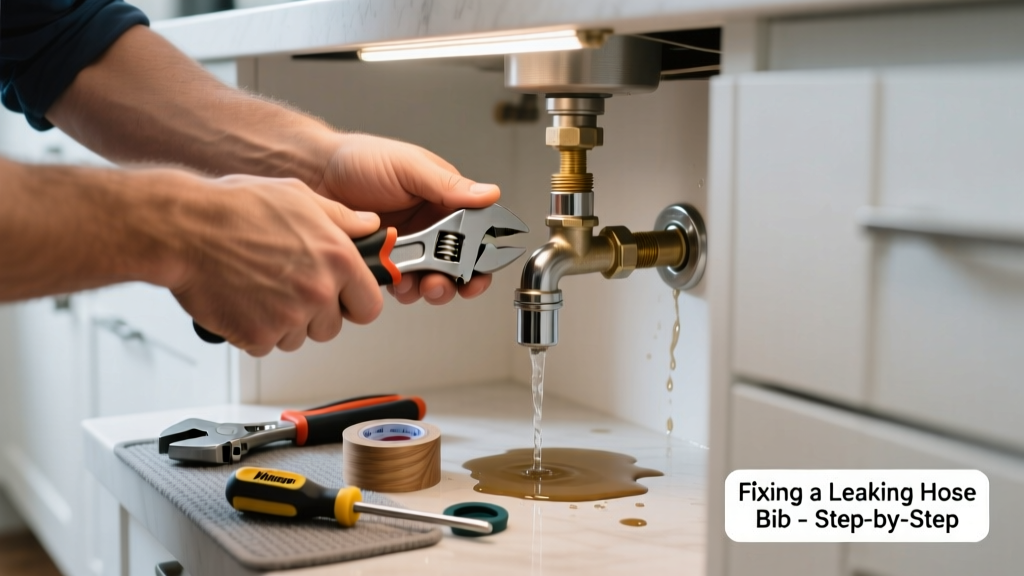
A dripping hose bib under your kitchen sink isn’t just annoying—it’s wasting water, raising your bill, and risking cabinet rot or mold behind the wall. Unlike outdoor spigots, kitchen hose bibs (often connected to portable dishwashers, ice makers, or RV-style hookups) face constant vibration, temperature swings, and cramped access. Most leaks here stem from worn internal parts—not pipe corrosion—so a $5 washer or $12 cartridge swap usually solves it.
Quick Diagnosis
Before grabbing tools, isolate where the leak originates:
- At the handle base: Worn stem packing or O-ring
- From the spout while open: Worn seat washer or corroded valve seat
- Dripping when fully closed: Failed cartridge or cracked valve body
- Leak behind the wall or at supply line connection: Loose compression nut or deteriorated braided supply hose
Tools & Materials Needed
| Item | Purpose | Estimated Cost |
|---|---|---|
| Adjustable wrench (10-inch) | Tightens supply line nuts and faucet mounting hardware without marring chrome | $12–$22 |
| Phillips and flat-head screwdrivers | Removes handle screws and escutcheon plates in tight cabinet spaces | $8–$15 |
| Replacement stem washer kit (brass, 1/4"–3/8") | Fits most compression-type kitchen hose bibs; includes multiple sizes and seats | $4–$9 |
| Cartridge puller (if cartridge-style) | Extracts stuck ceramic cartridges without damaging valve body | $10–$18 |
| Plumber’s grease (silicone-based) | Lubricates new O-rings and stems; prevents future seizing | $3–$7 |
Step-by-Step Fix
Most kitchen hose bibs are either compression or cartridge types. Follow these methods in order of likelihood:
- Shut off the dedicated shutoff valve (usually under the sink or in a basement utility panel). Open the bib to relieve pressure. Confirm flow stops completely—don’t rely on the main house shutoff alone.
- Remove the handle and escutcheon: Unscrew the decorative cap (pry gently with a flathead), then the handle screw. Pull off the handle and metal plate. Note orientation—some stems have directional slots.
- For compression types: Use an adjustable wrench to loosen the packing nut. Pull out the stem, replace the rubber washer (match thickness and diameter), inspect the valve seat for pits (file smooth or use a valve seat reconditioning tool), and reinstall with fresh plumber’s grease on threads and stem.
- For cartridge types: Remove retaining clip with needle-nose pliers. Use a cartridge puller to extract the unit. Match old cartridge part number (e.g., Moen 1222, Delta RP50587) at the hardware store. Insert new cartridge fully before reassembling.
- Test slowly: Turn shutoff back on, open bib gradually, check for drips at handle base and spout. Tighten packing nut only until drip stops—overtightening cracks brass bodies.
When to Call a Pro
DIY ends where safety or structural risk begins. Call a licensed plumber if:
- The leak persists after replacing both washer and cartridge—and you’ve verified proper seating and torque
- You detect moisture in wall cavities, warped cabinet bases, or musty odors (signs of hidden mold or rot)
- The bib is soldered directly to copper pipe (no shutoff valve nearby) and you lack torch experience
- Your home has polybutylene pipes (common in homes built 1978–1995); cutting or crimping requires specialized tools and insurance-approved repairs
"Over 60% of kitchen hose bib failures occur within 7 years of installation due to repeated thermal cycling and undersized replacement parts," notes the Plumbing-Heating-Cooling Contractors Association’s 2022 Field Service Survey.
Prevention Tips
Extend your hose bib’s life with proactive habits:
- Turn off the dedicated shutoff valve when the bib isn’t in use for >48 hours (e.g., during vacations)
- Replace braided stainless supply lines every 5 years—even if they look fine (internal liner fatigue causes sudden bursts)
- Apply silicone plumber’s grease to O-rings and stems during every repair—not petroleum-based grease, which degrades rubber
- Install a pressure regulator if your home’s water pressure exceeds 70 psi (check with a water pressure test kit)
Can I use Teflon tape on the hose bib threads?
Yes—but only on male pipe threads connecting the bib to the supply line (not on compression fittings or cartridge stems). Wrap clockwise 3–4 layers, leaving the first thread bare to avoid tape shearing into the valve. Over-taping causes cross-threading or cracked fittings in confined cabinet spaces.
Why does my hose bib leak only when I turn it off?
This points to a failing valve seat or washer that doesn’t seal under residual pressure. The rubber compresses when open but rebounds imperfectly when closed. Replace the washer and lightly lap the seat with a valve seat grinder—don’t sandpaper it, which leaves abrasive grit inside the valve.
Is it safe to tighten the packing nut with channel locks?
No. Channel locks crush soft brass packing nuts and deform stems. Use a properly sized adjustable wrench with smooth jaws—or better, a basin wrench for deep cabinet access. If the nut spins freely without tightening, the valve body may be cracked and needs full replacement.
How do I know if my kitchen hose bib is compression or cartridge?
Remove the handle: If you see a long threaded brass stem with a rubber washer at the tip, it’s compression. If you see a cylindrical plastic or ceramic unit held by a small clip or screw, it’s cartridge. No visible stem? It’s likely a ceramic-disk or ball-valve type—consult the manufacturer’s model number etched on the escutcheon.
Can I replace just the handle without shutting off water?
Only if the bib has a positive shut-off (like a quarter-turn ball valve) and you’re certain it seals fully. Most kitchen hose bibs don’t—so always shut off the local valve first. A failed handle replacement under pressure can spray water into electrical junction boxes behind cabinets.
What’s the average lifespan of a kitchen hose bib?
Compression types last 8–12 years with annual maintenance; cartridge models last 10–15 years if kept lubricated and operated smoothly. According to the U.S. EPA, 14% of household water usage is from leaks—including undetected slow drips from aging hose bibs.
A well-maintained kitchen hose bib shouldn’t surprise you with a puddle at 2 a.m. Regular inspection takes 90 seconds: wipe the base dry, operate the handle 3 times, and watch for seepage. When you catch wear early, a $6 washer saves you $200 in cabinet repair—and keeps your water bill honest. Keep spare washers and a mini basin wrench taped to the inside of your sink cabinet door. It’s the kind of prep that turns panic into a 12-minute fix.