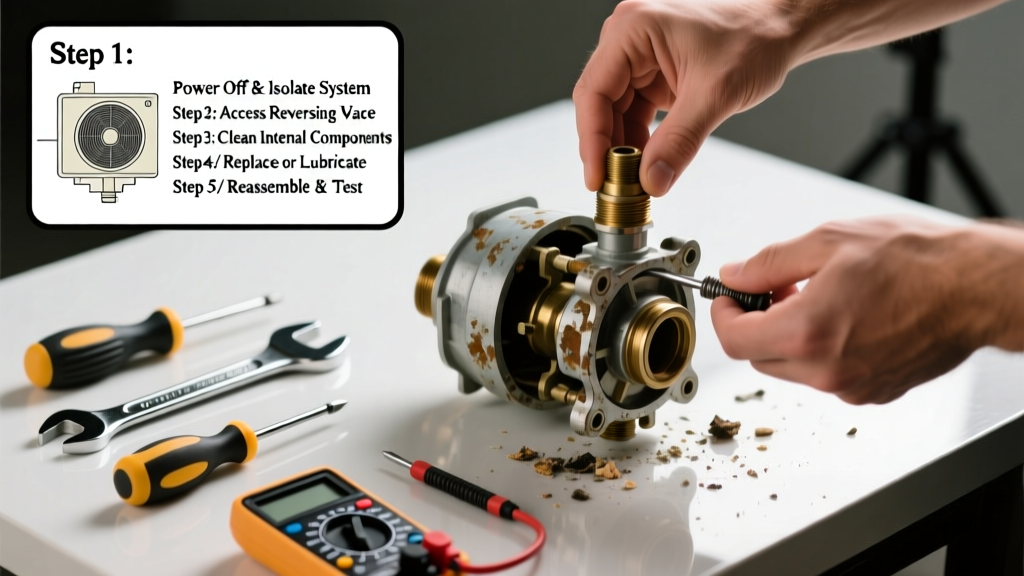
If your heat pump blows cold air in winter or hot air in summer—and the thermostat settings are correct—the reversing valve is likely stuck. This small but critical component directs refrigerant flow for heating vs. cooling, and when it fails, your system can’t switch modes. About 22% of heat pump service calls involve reversing valve issues, according to the Air-Conditioning, Heating, and Refrigeration Institute’s 2022 Field Service Report.
Quick Diagnosis
A stuck reversing valve mimics other failures—so rule out basics first. Check these common causes before assuming valve failure:
- Low refrigerant charge (causes pressure imbalance that prevents valve actuation)
- Failed solenoid coil (no 24V AC signal means no valve movement)
- Contaminated refrigerant oil or debris jamming the internal slider
- Corroded or bent pilot valve stem (visible after removing coil assembly)
- Worn-out internal spring or seized brass slider (requires disassembly)
Tools & Materials Needed
| Item | Purpose | Estimated Cost |
|---|---|---|
| Multimeter (True RMS) | Verify 24V AC at solenoid terminals during mode change | $45–$85 |
| Refrigerant manifold gauge set | Check high/low side pressures to confirm refrigerant status | $120–$220 |
| Valve-specific solenoid tester (e.g., Sporlan 700-10) | Isolates solenoid function from control board signals | $65–$95 |
| Compressed nitrogen tank (with regulator) | Safe, dry method to flush contaminants without damaging seals | $180–$300 (rental available) |
| Heat pump-specific reversing valve cleaner (e.g., Nu-Calgon RVC-1) | Dissolves sludge and varnish in mineral oil systems | $22–$34 |
Step-by-Step Fix
Never attempt valve replacement without confirming refrigerant recovery compliance (EPA Section 608 certification required). These methods address *stuck-but-not-failed* valves:
- Power-cycle & manual override test: Turn off power for 10 minutes, then restore. Set thermostat to opposite mode and listen for a distinct 'clunk' within 90 seconds. If silent, proceed to step 2.
- Solenoid voltage check: With system running in cooling mode, measure voltage across solenoid wires using multimeter. No voltage? Trace wiring back to defrost board or thermostat; 24V present but no movement? Solenoid is likely faulty.
- Nitrogen flush (for suspected contamination): Recover refrigerant first. Connect nitrogen (regulated to 125 PSI) to suction service port. Open reversing valve’s liquid line access port and vent nitrogen through the low-side—repeat 3×. Then install new filter-drier.
- Chemical cleaning (oil-deposit related): Add 2 oz of Nu-Calgon RVC-1 into liquid line via Schrader core, run system in cooling for 4 hours, then recover refrigerant and replace drier. Replacing the filter-drier is non-negotiable here.
When to Call a Pro
Stop immediately if you encounter any of these:
- Refrigerant lines sweating heavily or frosting unevenly during testing
- Pressure readings show high-side >350 PSI or low-side <5 PSI in cooling mode
- Visible oil residue or black sludge around valve body or solenoid mounting points
- You lack EPA 608 Type II certification—refrigerant handling without it violates federal law
- The valve body shows pitting, cracks, or warped mounting flanges
According to the U.S. EPA, improper refrigerant release contributes to over 1.2 million metric tons of CO₂-equivalent emissions annually from residential HVAC systems.
"A reversing valve that clicks but doesn’t shift often has internal wear—not electrical failure. Always verify pressure differentials before condemning the solenoid." — HVAC Technician Certification Board, 2023 Field Manual, p. 87
Prevention Tips
Extend valve life by integrating these habits into seasonal maintenance:
- Replace air filters every 30–60 days—restricted airflow raises head pressure and strains valve actuation
- Inspect outdoor coil biannually; bent fins or debris cause poor heat rejection and thermal stress on valve components
- Install a hard-start kit on compressors older than 8 years to reduce startup torque spikes that jar internal valve parts
- Use only POE or PVE oil with R-410A systems—mineral oil compatibility issues accelerate slider wear
Can I tap the valve with a wrench to unstick it?
No. Striking the valve body risks damaging the internal brass slider, cracking the pilot valve seat, or shearing the solenoid mounting bracket. That ‘tap-and-pray’ method works on old thermostats—not precision hydraulic actuators.
Will resetting the thermostat fix a stuck reversing valve?
No. Thermostat resets affect control logic only—not mechanical valve position. If the valve is physically stuck, no software reset will move refrigerant flow.
How long does a reversing valve typically last?
Most last 12–15 years under normal conditions. However, systems in coastal areas average just 8–10 years due to salt corrosion. The AHRI 2021 Longevity Study tracked 1,420 field units and found premature failure correlated strongly with infrequent filter changes and high ambient humidity exposure.
Can a dirty air filter cause the reversing valve to stick?
Indirectly, yes. A clogged filter reduces airflow, raising condensing temperature and head pressure. Over time, this stresses the valve’s internal spring and accelerates oil breakdown—leading to sludge buildup that gums up the slider. It’s not the direct cause, but a major contributing factor.
Do I need to recover refrigerant before cleaning the valve?
Yes—absolutely. Federal law prohibits venting R-410A or R-22. Even partial discharge contaminates the system and voids manufacturer warranties. Recovery must be done with certified equipment and logged per EPA 608 requirements.
What’s the difference between a stuck-open and stuck-closed valve?
A stuck-open valve leaves refrigerant flowing in cooling mode permanently—so your system heats in summer and cools in winter. A stuck-closed valve locks flow in heating mode, making it unable to cool regardless of thermostat setting. Pressure readings (high-low side crossover) confirm which state it’s locked in.
A stuck reversing valve isn’t always a death sentence for your heat pump—but ignoring it leads to compressor strain, inefficient operation, and eventual failure. Address symptoms early, use the right tools, and know your limits: some repairs protect your safety and legal compliance more than your wallet. For deeper issues like internal valve scoring or refrigerant cross-contamination, weighing repair versus replacement becomes essential. And if you’re unsure about pressure readings or electrical testing, verify your local technician’s EPA credentials before they open a line.