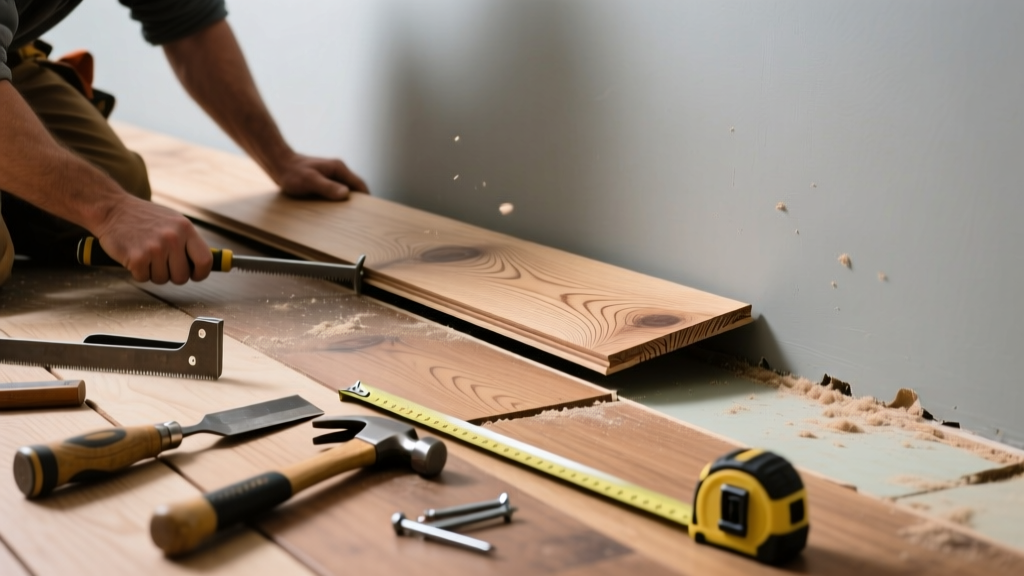
If you’ve noticed a stubborn gap widening near one specific board—or worse, a board that’s cupped, cracked, or loose underfoot—it’s likely not humidity alone. That board itself has failed structurally and needs targeted replacement, not just sanding or filler. Ignoring it invites moisture intrusion, squeaking, and further damage to adjacent planks.
Quick Diagnosis
Before grabbing tools, confirm the issue isn’t environmental. Use a hygrometer to check indoor relative humidity: ideal is 35–55%. If readings are stable but one board still gapes, lifts, or feels spongy, the culprit is localized failure. Common root causes include:
- Water exposure from a leaky pipe or spill that went unaddressed for >48 hours
- Subfloor moisture wicking up through an improperly sealed concrete slab (common in basements)
- Manufacturing defect in the board—look for inconsistent grain, voids, or premature checking on the underside
- Mechanical damage from heavy furniture drag or dropped tools creating microfractures
Tools & Materials Needed
| Item | Purpose | Estimated Cost |
|---|---|---|
| Fein Multimaster or oscillating tool with flush-cut blade | Cuts damaged board without damaging neighbors or subfloor | $129–$189 |
| Wood chisel (3/8" and 1/2") | Removes remaining tongue/groove remnants cleanly | $12–$24 |
| Hardwood replacement plank (same species, width, thickness, finish) | Must match existing floor within ±1/32" width and same milling profile | $8–$22 per linear foot |
| Wood glue (Titebond III or equivalent) | Water-resistant adhesive for structural bond to subfloor and adjacent boards | $6–$11 |
| Clamps (bar or parallel-jaw, 24" minimum) | Holds new board tight while glue cures; prevents telegraphing | $22–$48 |
Step-by-Step Fix
Replacing a single board requires precision—not brute force. Follow these methods in order:
- Mark and cut: Score along both edges of the damaged board using a straightedge and utility knife. Then, use the oscillating tool to cut vertically down the center line—stopping 1/8" above the subfloor. Make two more cuts 1/4" inside each edge, creating three narrow strips.
- Remove fragments: Pry out center strip first with a stiff putty knife, then work outward. Use chisels to clean residual tongue/groove from adjacent boards—don’t gouge the groove walls.
- Prepare replacement: Sand the back of the new board lightly to remove mill glaze. Test-fit it dry: it should slide in snugly but not require hammering. Trim width only if needed—use a table saw, not a hand plane.
- Glue and clamp: Apply Titebond III to the subfloor contact area and both groove faces. Tap board fully home with a scrap wood block and mallet. Clamp across the board’s width, alternating pressure to avoid cupping.
- Cure and finish: Let glue cure 24 hours before walking. Lightly scuff-sand the seam with 220-grit, then apply matching finish (e.g., Bona Traffic HD) with a foam brush—only over the seam and 1/2" beyond.
When to Call a Pro
DIY replacement crosses into risky territory when:
- The gap exceeds 3/8" and involves more than two adjacent boards—this signals subfloor movement or joist deflection
- You’re working with nail-down solid oak over 3/4" plywood on a second-story floor with visible ceiling cracks below
- The damaged board is within 6 inches of a load-bearing wall or fireplace hearth where expansion space is engineered
- Your home was built before 1978 and you suspect asbestos-laden mastic or subfloor adhesive—disturbing it requires abatement certification
"Over 68% of hardwood floor callbacks in the first year stem from improper board replacement—not material defects," says flooring contractor Mark Delaney in Flooring Contractor Magazine (2022).
Prevention Tips
Long-term stability starts with moisture control and mindful maintenance:
- Install a dehumidifier in basements or crawlspaces where RH regularly exceeds 60%
- Use felt pads on all furniture legs—and replace them every 6 months, especially under rolling chairs
- Wipe spills within 90 seconds; never let standing water sit longer than 2 minutes on hardwood
- Inspect baseboard expansion gaps twice yearly—vacuum debris and ensure they remain ≥3/8" wide
Can I reuse the old board after removing it?
No—once a board has warped, cracked, or lost structural integrity due to moisture or impact, its dimensional stability is permanently compromised. Even if it looks intact, internal fiber separation reduces its ability to hold fasteners or resist future movement. Always source a fresh replacement.
What if I can’t find an exact match for my 20-year-old floor?
Contact the original manufacturer first—they often keep archives. If unavailable, search specialty salvage dealers like Hardwood Floor Salvage or use a local mill to replicate the profile. Avoid staining mismatched wood; instead, consider blending with a custom-dyed filler and clear topcoat.
Do I need to acclimate the replacement board?
Yes—even for a single board. Place it in the room for 72 hours at normal living conditions (temperature and humidity). Unacclimated wood may swell or shrink post-installation, reopening the gap or buckling.
Can I skip the glue and just face-nail the new board?
No. Face-nailing creates visible holes, risks splitting the board, and doesn’t address lateral movement. Glue bonds the board to the subfloor and locks it between neighbors—critical for resisting seasonal expansion. If nailing is unavoidable (e.g., very thick exotic hardwood), use 18-gauge cleats angled at 15° and fill holes with matching wood putty.
How long before I can refinish the entire floor?
Wait at least 30 days after replacement. This allows the new board’s moisture content to equalize with surrounding planks. Refinishing too soon traps differential moisture, leading to uneven wear or new gaps. For guidance, see our hardwood floor refinishing timeline.
Is this fix covered by my homeowner’s insurance?
Rarely. Most policies exclude wear-and-tear or gradual damage like gapping. However, if the board failed due to a sudden, covered event—like a burst pipe—you may file a claim. Document everything: take timestamped photos before and after removal, and keep receipts for materials and moisture readings. Review your policy’s ‘dwelling coverage’ section carefully.
A well-executed single-board replacement restores both function and appearance—without the cost or disruption of a full re-sand. It’s one of the most satisfying DIY floor repairs because the result is invisible to everyone except you… and maybe your overly observant neighbor. Keep your humidity meter calibrated, inspect expansion gaps seasonally, and treat your floor like the investment it is—not just a surface to walk on.