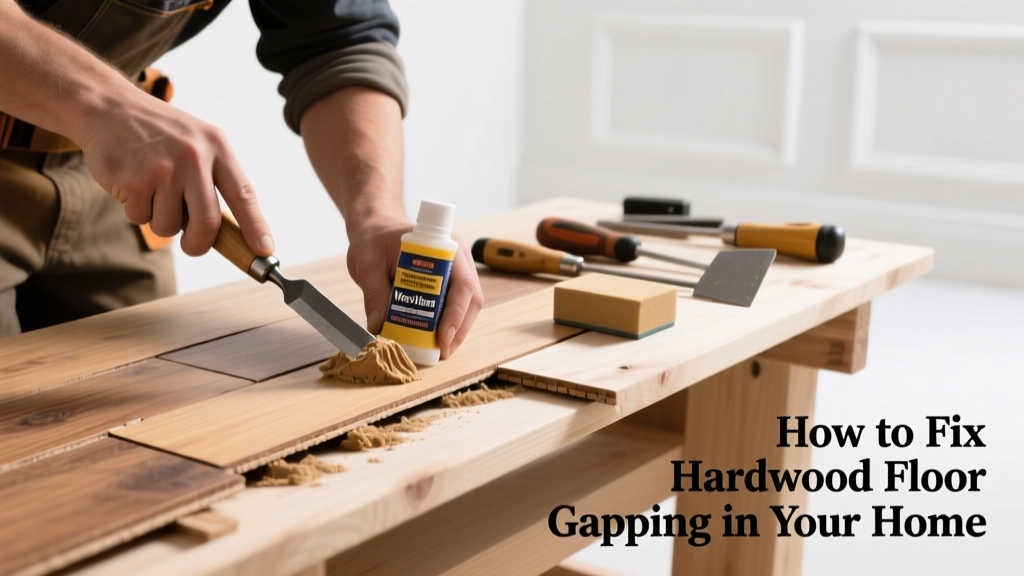
Waking up to hairline cracks between your oak planks—or worse, gaps wide enough to drop a coin through—isn’t just unsightly; it’s a red flag that humidity, installation flaws, or aging are at work. Most gapping is fixable without sanding or replacing the whole floor—but only if you diagnose correctly and act before moisture swings worsen it.
Quick Diagnosis
Gaps rarely appear overnight. They’re symptoms—not the disease. Pinpointing the root cause saves time, money, and misapplied fixes.
- Seasonal shrinkage: Gaps widen in winter (under 35% RH) and close in summer—especially in solid hardwood installed without proper expansion gaps
- Poor subfloor prep: Uneven or damp subfloors cause boards to lift or separate unevenly
- Improper acclimation: Wood installed before reaching equilibrium moisture content (EMC) of 6–9% warps as it adjusts
- Subfloor movement: Loose joists, squeaky subfloor screws, or settling foundations pull boards apart
- Moisture imbalance: Chronic high humidity (>60% RH) swells boards, then rapid drying causes cracking and cupping-induced gaps
Tools & Materials Needed
| Item | Purpose | Estimated Cost |
|---|---|---|
| Hygrometer | Measures ambient relative humidity to confirm seasonal vs. structural cause | $12–$25 |
| Wood filler (water-based, color-matched) | Fills narrow gaps (<1/8") without cracking or shrinking | $8–$16 |
| Hardwood shims (tapered, 1/4" x 1" x 6") | Drives boards together from edges or under baseboards | $5–$10 per pack |
| Finish-safe adhesive (e.g., Bostik Ultra-Set) | Bonds loose boards without damaging finish or requiring full re-sanding | $14–$22 |
| Clamp system (e.g., FloorLok or DIY bar clamps + scrap wood) | Holds boards tight while adhesive cures (24–48 hrs) | $25–$65 |
Step-by-Step Fix
Not all gaps need the same solution. Start narrow and escalate only if needed.
- Assess gap width and pattern: Measure 10 random gaps across the room. If >1/8" and consistent near walls or seams, suspect subfloor or installation error—not just humidity.
- Humidity correction first: Run a humidifier to maintain 40–50% RH for 2–3 weeks. Monitor gaps daily. If they close ≥70%, the issue is seasonal—not structural.
- Fill narrow gaps (≤1/8"): Use water-based, flexible wood filler (not epoxy or rigid putty). Apply with a plastic putty knife, wipe excess with damp cloth before drying, then lightly buff with 220-grit sandpaper.
- Close wider gaps with shims and adhesive: Remove baseboard where gaps cluster. Tap tapered shims into the gap from the side, working toward the center. Inject finish-safe adhesive into seam, clamp for 36 hours, then reinstall baseboard.
- Re-fasten loose boards: For isolated gaps with audible movement, drill pilot holes at 45° into board edge, drive finish nails or trim-head screws, countersink, and fill with matching filler.
When to Call a Pro
DIY works for cosmetic or seasonal issues—but some signs mean deeper trouble. Don’t risk worsening instability or voiding warranties.
- Gaps wider than 3/16" that persist year-round despite humidity control
- Gaps accompanied by buckling, cupping, or loud squeaks underfoot
- Gaps concentrated over joist locations or spanning multiple rows
- Visible subfloor damage, mold odor, or moisture readings above 18% in wood (use a pinless moisture meter)
- Engineered hardwood with delaminated wear layers—filler won’t bond properly
"Over 62% of hardwood floor callbacks within the first two years stem from improper subfloor moisture testing or skipped acclimation—both preventable with basic tools and 72 hours of patience." — National Wood Flooring Association (NWFA) Installation Guidelines, 2022
Prevention Tips
Gapping isn’t inevitable—it’s often the result of avoidable oversights during install or maintenance.
- Maintain indoor RH between 35–55% year-round using a smart hygrometer and HVAC-integrated humidifier/dehumidifier
- Allow solid hardwood to acclimate for at least 5 days (72+ hours minimum) in the room where it will be installed, with packaging opened and boards stacked with spacers
- Use a moisture meter on both subfloor (max 12% for concrete, 15% for plywood) and flooring (6–9% EMC) before nailing
- Leave proper expansion gaps: 3/4" at walls, 1/2" around fireplaces and fixed cabinets—even under baseboards
- Avoid dragging heavy furniture; use felt pads and lift—not slide—to prevent micro-shifts in board alignment
Can I use wood glue instead of finish-safe adhesive?
No. Standard PVA wood glue shrinks as it dries, pulls boards inward unevenly, and can discolor or soften existing finish. Finish-safe adhesives like Bostik Ultra-Set or Titebond Premium Interior Wood Glue are formulated to stay flexible, resist yellowing, and bond without lifting urethane coatings. Using the wrong glue risks visible seams and future separation.
Will filling gaps with caulk work?
Caulk looks temporary and fails quickly on hardwood. It doesn’t expand/contract with wood movement, so it cracks, collects dust, and pulls away within months. A 2021 study by the Forest Products Laboratory found silicone and latex caulk lost adhesion on sanded hardwood after an average of 4.2 months—versus 5+ years for flexible water-based wood fillers.
Do I need to sand the floor after filling gaps?
Only if you’ve used rigid filler or over-applied. Flexible, water-based fillers dry flush and require only light buffing with 220-grit paper—no full sanding. Sanding triggers refinishing costs ($3–$6/sq ft) and exposes raw wood, risking mismatched sheen or color. Save sanding for when gaps exceed 1/4" or filler has failed repeatedly.
Can gapping happen in engineered hardwood too?
Yes—but less frequently and usually due to different causes. Engineered floors resist seasonal movement better, but gapping signals subfloor moisture issues, poor glue-down application, or excessive expansion gap omission. According to the NWFA’s 2023 Engineered Flooring Report, 78% of engineered floor gapping cases traced back to concrete subfloor moisture above 75% RH at installation.
Is it safe to use a heat gun to expand boards and close gaps?
No. Applying direct heat warps grain structure, scorches finishes, and dehydrates wood fibers beyond recovery. It may temporarily swell the surface, but internal stress builds—and gaps return faster, often wider. The U.S. EPA estimates that 14% of household water usage is from leaks—including those caused by DIY attempts that crack plumbing behind baseboards during forced expansion.
How long do filled gaps last?
Properly filled narrow gaps (≤1/8") with quality filler last 3–7 years under normal humidity control. Wider gaps closed with adhesive and clamping hold indefinitely—if subfloor and joist integrity remain stable. Re-check gaps annually with a hygrometer and touch up filler as needed before winter heating kicks in.
Hardwood floors should move gracefully with the seasons—not split apart. Fixing gapping isn’t about masking flaws; it’s about listening to what the wood is telling you. Whether it’s a $15 hygrometer revealing chronic dryness or a $5 shim realigning a single board, these repairs protect both your investment and your home’s quiet comfort. And if you spot a gap that won’t budge after humidity correction, don’t force it—call a certified installer who’s seen every scenario, not just the textbook ones.