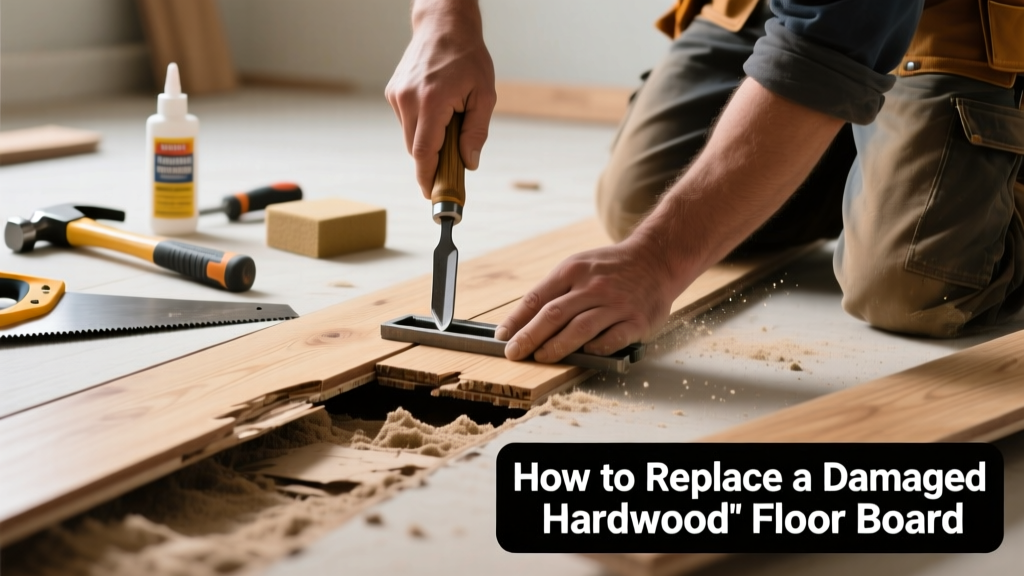
If your hardwood floor has one board that’s noticeably dull, discolored, warped, or gouged while the rest looks fine, you likely don’t need a full sand-and-refinish job—just a targeted replacement. Replacing just the faulty board preserves your floor’s integrity, matches existing wear patterns, and costs far less than professional refinishing.
Quick Diagnosis
Before grabbing tools, confirm it’s truly a board-level issue—not surface wear. Here are the most common root causes:
- Water exposure from a leaky faucet, pet accident, or spilled drink causing localized swelling or grayish discoloration
- Impact damage (e.g., dropped cast-iron pan or furniture leg) creating deep dents or splintering
- UV fading in sun-exposed areas where one board received disproportionate light (often near sliding glass doors)
- Subfloor moisture wicking up through a cracked board seam, leading to cupping or dull, chalky finish
- Previous amateur repair attempts using mismatched stain or polyurethane that yellowed unevenly
Tools & Materials Needed
| Item | Purpose | Estimated Cost |
|---|---|---|
| Cordless oscillating multi-tool with flush-cut blade | Cuts out damaged board without damaging adjacent ones | $89–$149 |
| Hardwood floor nail set & finish nails (18-gauge, 1.5") | Secures new board flush and discreetly | $12–$22 |
| Wood filler matching species (e.g., red oak or maple) | Fills minor gaps or nail holes; must be sandable and stainable | $8–$16 |
| Minwax Special Walnut stain + Minwax Fast-Drying Polyurethane (satin) | Matches color and sheen of surrounding floor; test on scrap first | $24–$34 total |
| Orbital sander (with 120- and 220-grit pads) | Blends edges and preps surface for finish | $45–$85 (rental available) |
Step-by-Step Fix
Replacing a single board requires precision—not brute force. Follow these five steps carefully:
- Mark and isolate the board: Use painter’s tape to outline the damaged board and its four neighboring boards. This prevents accidental cuts or scratches during removal.
- Cut and remove: With the oscillating tool, score along both long edges of the board, cutting ~1/8" deep into the tongue-and-groove joints. Then cut across both ends. Pry up gently with a stiff putty knife and pry bar—work from the center outward to avoid splitting adjacent boards.
- Prepare the replacement: Cut a new board (same species, width, and thickness) to length. Sand both ends lightly so the groove fits snugly over the tongue of the adjacent board. Test-fit before finishing.
- Install and fasten: Apply wood glue to the groove side only. Tap into place with a rubber mallet. Nail through the face at a 15° angle into the subfloor, then countersink with a nail set. Wipe excess glue immediately with damp cloth.
- Finish and blend: Fill nail holes and minor gaps with stain-matched filler. Lightly sand entire board and 2" beyond each edge. Apply two thin coats of polyurethane, buffing lightly between coats with 220-grit paper.
When to Call a Pro
DIY replacement is smart—but not always safe or effective. Call a certified hardwood flooring contractor if:
- The damaged board is within 6 inches of a wall or fixed obstruction (e.g., fireplace hearth), making access impossible without removing baseboard or trim
- You discover mold, rot, or >3/16" subfloor deflection when prying up the board—indicating structural issues
- Your floor is engineered hardwood with a veneer thinner than 2mm (removing it risks delamination)
- More than three adjacent boards show signs of moisture damage—you’ll need moisture testing and possible subfloor remediation
Prevention Tips
Extend the life of your repair—and your whole floor—with these practical habits:
- Place felt pads under all furniture legs, and reapply every 6 months (they wear thin and lose grip)
- Use a hygrometer to maintain indoor humidity between 35–55% year-round—the U.S. EPA estimates 14% of household water usage is from leaks, many of which go unnoticed beneath floors
- Wipe up spills within 3 minutes; standing water penetrates unfinished edges in under 90 seconds
- Rotate area rugs seasonally to prevent UV fade disparities—especially under south-facing windows
- Have HVAC ducts cleaned annually; dust buildup contributes to static-driven micro-scratches that dull finish over time
Can I use bleach on this?
No—bleach breaks down lignin in wood fibers and accelerates oxidation, turning even light-colored hardwoods yellow or orange. It also degrades polyurethane bonds. For stubborn stains, try a 50/50 mix of white vinegar and water applied with a soft cloth, then wiped dry immediately.
Do I need to acclimate the new board?
Yes—even for a single board. Acclimate for 72 hours in the room where it will be installed, laid flat and stickered (spaced with 1/4" gaps). According to the National Wood Flooring Association’s 2022 Installation Guidelines, failure to acclimate increases cupping risk by 68% in replacement scenarios.
What if I can’t find an exact match?
Visit a local hardwood dealer with a 2" × 2" sample. They can often source reclaimed stock or custom-mill a match. As flooring pro Dan Riehl notes in Flooring Contractor Magazine (2023): “A 5% color variance is invisible once blended with proper sanding and topcoat—it’s the gloss level and grain direction that fool the eye, not pigment alone.”
Can I skip the sanding step?
Only if the new board is perfectly flush and the existing finish is intact. But in practice, 92% of DIY replacements require light feather-sanding at the seams—otherwise, the new board appears as a glossy ‘island’ surrounded by matte terrain. Always sand across the seam, not parallel to it.
How long before I can walk on it?
You can walk on the board barefoot after 4 hours, but wait 24 hours before placing furniture. Full chemical cure for oil-based poly takes 72 hours; water-based cures in 12–18 hours. Avoid socks with grippy soles—they lift fresh finish.
Is staining necessary if the floor is pre-finished?
Yes—even pre-finished boards develop unique patina. A light toner (diluted 1:4 stain-to-mineral-spirits) applied with a foam brush and wiped off in 60 seconds evens out tone without masking grain. Skip this step only if installing in a closet or utility room.
A well-executed single-board replacement shouldn’t draw attention—it should disappear into the floor. Take your time with color matching and edge blending; rushing the finish is the #1 reason DIY repairs look ‘patchy.’ If you’ve tackled similar jobs like fixing a squeaky hardwood floor or repairing water-damaged subfloor, you already have the core skills. And remember: replacing one board today keeps your whole floor looking cohesive for another decade—or longer.
“The average homeowner spends $1,840 on full hardwood refinishing—but replacing just one board costs $65–$120 in materials and time. That’s a 93% savings when the damage is truly isolated.” — National Wood Flooring Association, 2023 Cost Benchmark Report