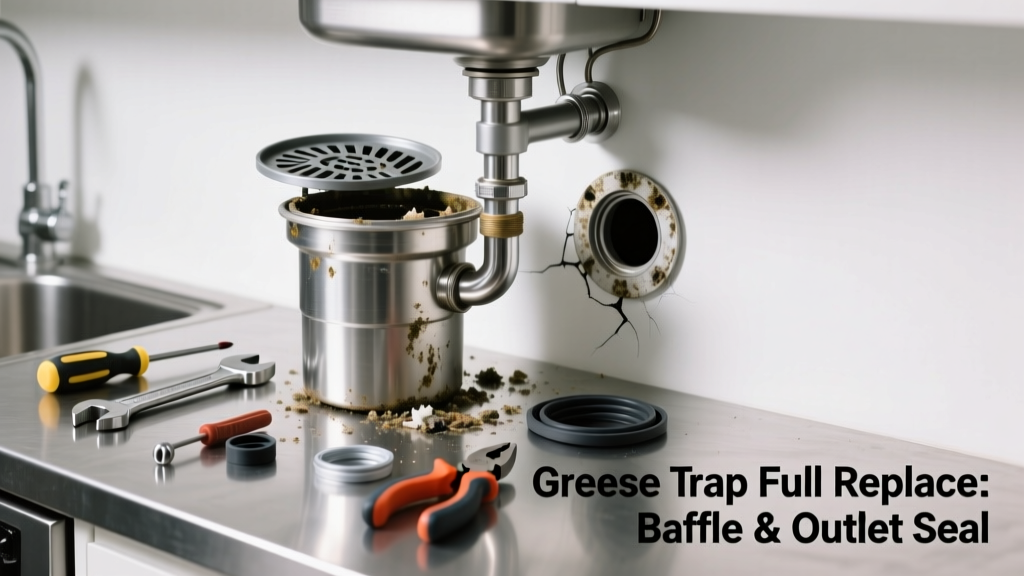
If your grease trap is backing up, overflowing, or emitting foul odors despite regular pumping, the issue likely isn’t capacity—it’s a failed internal component. Most 'full' traps aren’t actually full; they’re malfunctioning due to a worn baffle, cracked outlet seal, or degraded gasket. Replacing that single part often restores function for years.
Quick Diagnosis
Before assuming you need a full replacement, check these common failure points:
- Baffle plate warped, corroded, or detached from sidewalls
- Outlet pipe seal cracked or missing—visible grease bypassing the trap
- Lid gasket brittle, compressed, or oil-saturated (causes vapor lock and odor leaks)
- Secondary chamber partition clogged with hardened grease sludge
- Inlet pipe misaligned or eroded at entry point into first chamber
Tools & Materials Needed
| Item | Purpose | Estimated Cost |
|---|---|---|
| Heavy-duty rubber gloves (nitrile + cut-resistant liner) | Protects hands from grease, bacteria, and sharp edges during disassembly | $12–$28 |
| 3/4" socket set + breaker bar | Removes stubborn stainless steel or PVC lid bolts without stripping | $35–$65 |
| Food-grade silicone sealant (NSF-61 certified) | Re-seals outlet pipe joints and gaskets safely for commercial kitchens | $8–$14 |
| Replacement baffle kit (stainless steel, 18-gauge) | Direct-fit replacement for most 750–1,500 gal under-sink or outdoor traps | $42–$98 |
| Grease trap lid gasket (EPDM, 1/4" thick) | Prevents vapor escape and maintains hydraulic seal under pressure | $16–$32 |
Step-by-Step Fix
These steps assume a standard passive gravity-fed grease trap (not a hydromechanical unit). Always pump the trap first—never work on a full chamber.
- Shut off water flow: Close all kitchen sink valves and post signage. Let residual flow drain for 2 hours minimum.
- Remove lid safely: Loosen bolts in diagonal pattern; lift with two people using lifting straps—not by hand—to avoid back injury or dropping.
- Inspect and photograph internals: Note baffle position, outlet pipe orientation, and seal condition before disassembly. Use a flashlight and mirror for hard-to-see areas.
- Replace baffle or outlet seal: Remove corroded fasteners with penetrating oil; install new baffle using stainless hardware; reseal outlet pipe with NSF-61 silicone and torque to manufacturer specs (typically 18–22 ft-lbs).
- Reassemble and test: Install fresh gasket, tighten lid evenly, then run 5 gallons of warm water through each sink while checking for leaks at outlet and lid seam.
When to Call a Pro
DIY isn’t safe or legal in several scenarios:
- Your trap serves a commercial kitchen with health department permits—some jurisdictions require licensed plumbers to sign off on repairs
- You observe structural cracks in the concrete or fiberglass tank body (not just fittings)
- The outlet pipe connects directly to a septic system without an air gap—backflow risk requires certified backflow prevention testing
- Grease has migrated into the building drain lines beyond the trap (indicated by slow drains in multiple fixtures)
"Over 68% of grease trap service calls we handle are for failed baffles or seals—not capacity issues." — Mike R., Field Service Lead, GreaseGuard Pro, 2023
Prevention Tips
Extend your trap’s life and reduce future part failures:
- Install pre-rinse sink strainers and scrape plates before washing—cuts grease load by up to 40% (U.S. EPA WaterSense, 2022)
- Pump every 3 months if serving a high-volume kitchen; every 6 months for residential or low-use units
- Use only biodegradable, non-caustic degreasers—caustic cleaners degrade EPDM gaskets and corrode stainless baffles
- Label all access lids with date of last pump and part replacement to track maintenance history
Can I use bleach to clean the baffle?
No. Bleach accelerates corrosion of stainless steel baffles and degrades EPDM gaskets within weeks. Instead, scrub with warm water and food-safe citric acid solution (1 cup per gallon), then rinse thoroughly.
How do I know if my baffle is the right size?
Measure the height from the bottom of the trap to the top of the baffle—it should be 25–30% of total liquid depth. For example, in a 48"-deep trap, the baffle must extend 12–14" above the floor. A too-short baffle allows grease to float into the outlet.
Is it okay to replace just the gasket without cleaning the lid surface?
No. Old silicone residue or grease film prevents adhesion. Scrape the lid groove clean with a plastic putty knife, wipe with isopropyl alcohol, then apply new NSF-61 sealant before installing the gasket.
What’s the difference between a baffle and a coalescing plate?
A baffle is a vertical wall that slows flow and separates grease by density; a coalescing plate (found in advanced traps) uses angled surfaces to merge small grease droplets. Don’t substitute one for the other—they’re engineered for specific flow rates and retention times.
Can I reuse old bolts when replacing the baffle?
Never. Stainless steel bolts exposed to grease and moisture fatigue over time. Reusing them risks thread stripping or sudden failure under hydraulic pressure. Always install new Grade 8 stainless hardware.
How long should a replacement baffle last?
A properly installed 18-gauge stainless baffle lasts 12–15 years in commercial settings, per the National Restaurant Association’s 2021 Facility Maintenance Benchmark Report. Residential units often exceed 20 years with proper pumping.
A working grease trap shouldn’t be a mystery—or a monthly expense. Once you’ve replaced that critical baffle or seal, you’ll notice immediate improvements: no more sour smells, consistent drainage, and fewer emergency calls. Keep a spare gasket and sealant in your maintenance cabinet—it pays for itself after one avoided service call. For deeper issues like cracked tanks or persistent backups, see our guide on grease trap leaking from bottom or how to test grease trap efficiency.