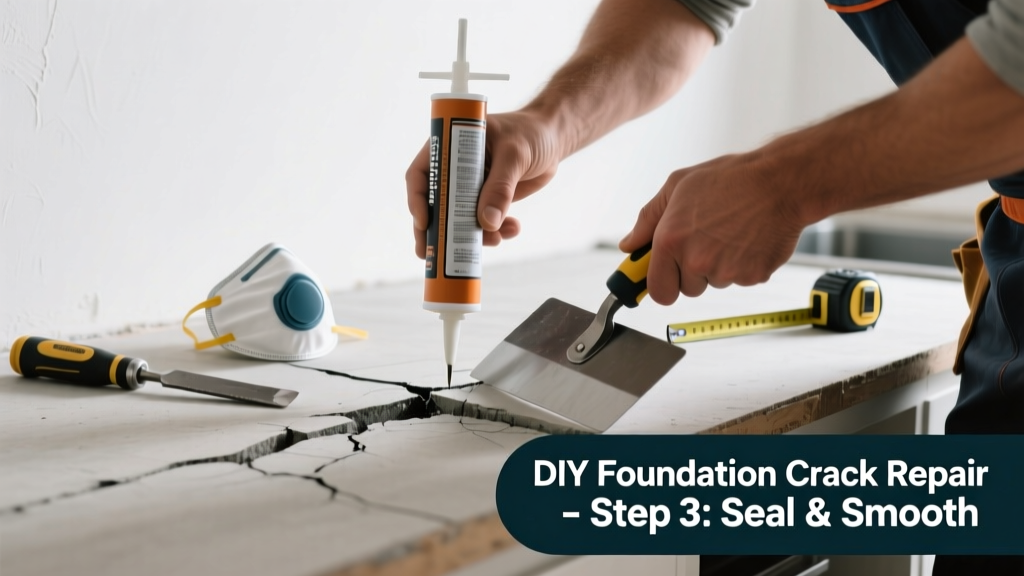
If you've spotted a vertical or diagonal crack running up your kitchen wall near the floor—or worse, one that’s widening or leaking moisture—you’re likely dealing with more than drywall shrinkage. Foundation movement in the kitchen is especially concerning because it often coincides with plumbing lines, cabinets, and flooring that hide early warning signs until damage escalates.
Quick Diagnosis
Not all cracks mean disaster—but many do. Start here before grabbing tools:
- Vertical cracks under 1/8" wide, hairline, and non-leaking? Likely settling or drying shrinkage.
- Stair-step cracks in brick or block walls? Classic sign of lateral soil pressure or footing shift.
- Cracks wider at the top or bottom, or accompanied by sticking cabinet doors or sloping floors? Indicates active settlement or heave.
- Moisture, efflorescence (white chalky residue), or musty odor? Signals hydrostatic pressure or drainage failure outside.
Tools & Materials Needed
| Item | Purpose | Estimated Cost |
|---|---|---|
| Epoxy injection kit (low-viscosity) | Seals active cracks from inside; bonds concrete deeply and resists water | $45–$75 |
| Angle grinder with diamond blade | Cuts clean V-groove along crack for proper sealant adhesion | $80–$120 (rental: $25/day) |
| Hydraulic cement (e.g., Quickrete Polyurethane) | Fast-setting patch for cracks where moisture is present during repair | $12–$20 |
| Laser level & 4-ft straightedge | Verifies wall plumb and detects subtle bowing or rotation | $35–$65 |
| Moisture meter (pin-type) | Confirms if crack is actively wet—critical before sealing | $50–$90 |
Step-by-Step Fix
Choose the method based on crack width, moisture, and activity. Never skip prep—cleaning and profiling the crack accounts for 70% of long-term success.
- Clean & Profile: Use the angle grinder to cut a 1/4"-deep V-groove centered on the crack. Vacuum dust thoroughly—epoxy won’t bond to debris.
- Test for Moisture: Insert moisture meter probes 1" deep on both sides. If readings exceed 15% MC, use hydraulic cement first; if dry, proceed to epoxy.
- Epoxy Injection (for stable, dry cracks): Drill injection ports every 6–8", seal surface with paste epoxy, then inject low-viscosity resin at 100 psi using hand pump. Let cure 24 hrs.
- Surface Patch (for cosmetic finish): After epoxy cures, apply polymer-modified mortar over crack with fiberglass mesh tape embedded—prevents telegraphing through paint.
When to Call a Pro
DIY has hard limits. Stop and call a licensed structural engineer or foundation specialist if:
- The crack is wider than 1/4" and growing more than 1/16" per month (track with masking tape markers).
- You see horizontal cracks in basement or crawl space walls within 3 feet of the kitchen slab.
- Adjacent floor tiles are lifting, grout is crumbling, or cabinet toe-kicks are separating from the wall.
- Your home was built on expansive clay soil (common in TX, CO, CA) and you’ve had two or more cracks appear in the last 18 months.
"Over 62% of foundation repairs initiated after interior cracking go on to require underpinning within 3 years if the root cause—like poor perimeter drainage—isn’t addressed." — American Society of Civil Engineers, Foundation Performance Report, 2022
Prevention Tips
Fixing the crack is step one. Preventing recurrence means managing water and soil stress:
- Redirect downspouts at least 5 ft away from the foundation—use solid PVC extensions, not splash blocks.
- Maintain soil slope: Ensure grade drops 6 inches over first 10 feet from foundation wall.
- Install a French drain if your kitchen sits on a hillside or experiences frequent pooling after rain.
- Monitor indoor humidity year-round—keep it between 30–50% to reduce seasonal soil swelling/shrinking cycles.
Can I use caulk instead of epoxy for this crack?
No. Standard acrylic or silicone caulk lacks compressive strength and will pull away as the foundation shifts. It may mask the issue temporarily but fails under even minor movement. Epoxy or polyurethane injection is required for structural integrity—see our guide on epoxy vs. polyurethane injection for load-bearing applications.
Will repairing the interior crack stop water from coming in?
Not necessarily. Interior fixes seal the symptom—not the cause. If water is entering, the real problem is likely exterior hydrostatic pressure or failed footing drains. You’ll need exterior waterproofing or drainage correction. Read more in our basement water leak source identification guide.
How long does epoxy injection last in a kitchen environment?
Properly installed low-viscosity epoxy lasts 15–20 years in stable conditions—longer than the life of most kitchen remodels. However, the U.S. EPA estimates that 14% of household water usage is from leaks, so confirm no hidden plumbing leaks behind cabinets before assuming it’s purely foundation-related.
Do I need a permit to repair an interior foundation crack?
Most municipalities don’t require permits for interior crack repairs alone—unless you’re cutting into load-bearing walls or modifying structural framing. But if your fix involves installing new supports or altering floor joists near the kitchen, check with your local building department. Permits protect resale value and insurance coverage.
Can I paint over the repaired crack right away?
No. Wait at least 72 hours after final patching—and only after confirming zero moisture return with your meter. Use a masonry primer like Zinsser Watertite before painting. Skipping this step risks blistering and premature failure. For best results, see our best primer for concrete walls comparison.
What’s the average cost to professionally repair a kitchen foundation crack?
Minor epoxy injection runs $350–$600. If excavation, exterior waterproofing, or pier installation is needed, costs jump to $4,000–$12,000. According to HomeAdvisor’s 2023 Remodeling Cost Report, foundation repairs in kitchens average $6,820 nationally—23% higher than living room repairs due to cabinet removal and utility rerouting.
A kitchen foundation crack isn’t just unsightly—it’s your home’s way of signaling stress in its skeleton. Tackle small, stable cracks with precision tools and patience, but never ignore patterns: multiple cracks, door misalignment, or seasonal recurrence mean it’s time to bring in someone who reads soil like a map and concrete like a ledger. Your cabinets, floors, and peace of mind depend on getting this right the first time.