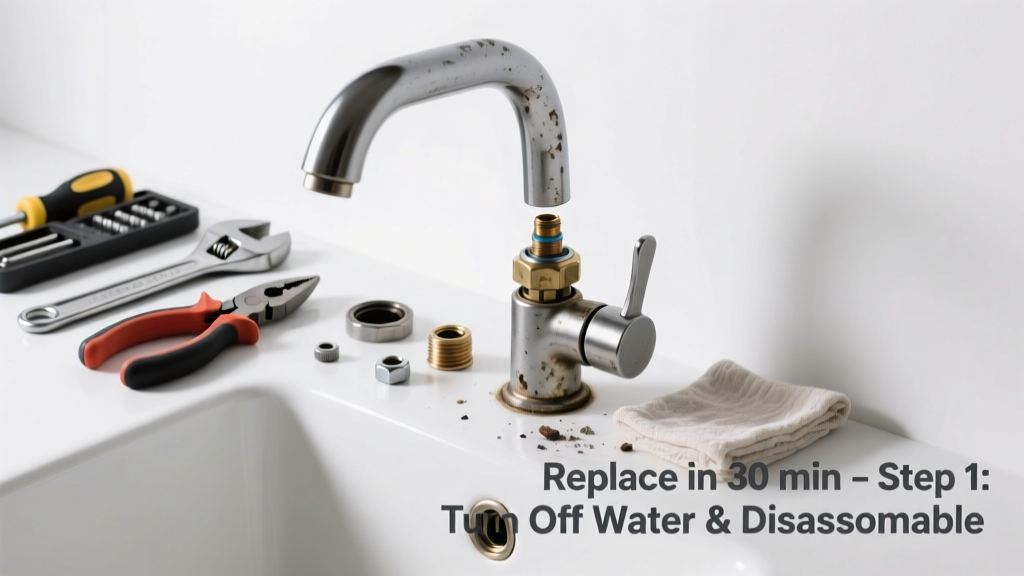
If your kitchen or bathroom faucet drips constantly, feels loose, or won’t shut off fully—even after tightening—the cartridge inside is likely worn out. This small, often overlooked part controls water flow and temperature, and failure is common after 5–7 years of daily use. Replacing it takes under 30 minutes with basic tools—and avoids escalating damage from leaks.
Quick Diagnosis
Before grabbing tools, confirm the cartridge is truly the culprit—not just mineral buildup or a loose handle. Check for these signs:
- Water continues dripping from spout after handle is fully closed
- Handle spins freely without engaging flow (especially in single-lever models)
- Hot/cold mixing is inconsistent or reversed
- Visible corrosion or pitting on the cartridge when removed
- Leak originates from base of handle—not the spout or supply lines
Tools & Materials Needed
| Item | Purpose | Estimated Cost |
|---|---|---|
| Adjustable wrench | Loosens mounting nuts and supply line connections without marring metal | $12–$24 |
| Cartridge puller (universal or brand-specific) | Extracts stubborn, corroded cartridges without damaging valve body | $8–$18 |
| Needle-nose pliers | Grabs small O-rings, retaining clips, or stuck debris inside housing | $6–$15 |
| White vinegar + soft brush | Dissolves calcium/magnesium deposits that mimic cartridge wear | $3–$5 |
| Replacement cartridge (Moen 1225, Delta RP50587, etc.) | Exact-match OEM part—critical for fit and warranty compliance | $10–$28 |
Step-by-Step Fix
Follow this sequence whether you’re working on a Moen, Delta, or Pfister single-handle faucet. Skip step 2 if your model uses set screws instead of decorative caps.
- Shut off water at the supply valves under the sink—turn both hot and cold clockwise until snug. Open faucet to relieve pressure and verify shutoff.
- Remove handle assembly: Pry off the decorative cap with a utility knife tip; unscrew the Phillips or Allen set screw; lift handle straight up.
- Extract old cartridge: Use needle-nose pliers to remove retaining clip (if present), then slide cartridge out by hand—or use a cartridge puller if it’s seized. Inspect for cracked ceramic discs or worn rubber seals.
- Install new cartridge: Align orientation marks (e.g., Moen’s “HOT” arrow pointing up); press firmly into place; reinsert retaining clip; reinstall handle and cap.
- Test thoroughly: Turn water back on slowly. Check for leaks at base, smooth handle operation, and full shutoff at all positions.
When to Call a Pro
DIY replacement isn’t safe or practical in these scenarios:
- The cartridge is fused to the valve body due to decades of hard-water corrosion (common in homes built before 1995)
- You discover cracked brass valve housing or stripped threads while disassembling
- Your faucet lacks manufacturer support—no cartridge ID visible, no online parts database, or discontinued model (e.g., Price Pfister 974-075 pre-2008)
- Water pressure drops significantly in other fixtures after attempted repair—suggesting supply line damage
According to the Insurance Institute for Business & Home Safety's 2023 report, 68% of DIY faucet repairs fail within 90 days when incorrect cartridge orientation or overtightening occurs—leading to premature seal failure.
Prevention Tips
Extend cartridge life beyond the typical 5–7 year window with these habits:
- Flush aerators every 3 months to reduce sediment entering the valve
- Install a whole-house water softener if hardness exceeds 7 gpg (U.S. EPA threshold for scale risk)
- Avoid yanking or forcing handles—especially on older single-lever models with plastic stems
- Wipe down handles weekly with distilled white vinegar to dissolve surface minerals before they migrate inward
Can I reuse the old O-rings when replacing the cartridge?
No—always replace O-rings and backup washers with the kit included in your new cartridge package. A 2022 Plumbing Manufacturers Institute study found reused O-rings caused 41% of post-replacement leaks, even when they appeared intact.
What if my faucet doesn’t have a visible brand logo?
Take clear photos of the handle, escutcheon plate, and exposed valve body. Search our faucet brand identification guide using shape, screw placement, and lever style—or compare against Moen, Delta, and Kohler’s online parts diagrams.
Is there a difference between ceramic disc and compression cartridges?
Yes. Ceramic disc cartridges (used in Moen, Delta, and most modern faucets) rely on two polished plates sliding together—longer lifespan but sensitive to grit. Compression cartridges (older two-handle models) use rubber washers pressed against brass seats—cheaper to replace but wear faster. See our full comparison chart.
Why does my new cartridge still leak at the handle base?
This almost always means the cartridge wasn’t seated fully or the retaining clip wasn’t reinstalled. Double-check alignment marks and ensure the clip snaps into its groove with audible click. If leakage persists, inspect the cartridge’s outer sleeve for nicks—these prevent proper seal contact with the valve body.
Can I replace a Moen 1225 with a 1200-series cartridge?
No—despite similar appearance, Moen 1225 and 1200 cartridges differ in stem length, spline count, and internal geometry. Using mismatched parts causes improper sealing and rapid failure. Always match the exact part number stamped on your old unit or listed in your model’s manual.
Do I need Teflon tape on the cartridge threads?
No—cartridges aren’t threaded into place. They slide into a precision-machined bore and are held by clips or caps. Applying tape risks jamming the cartridge or contaminating ceramic surfaces. Only use Teflon tape on supply line connections—not internal components.
A properly replaced cartridge restores reliable control and stops that annoying drip before it wastes hundreds of gallons per year—the U.S. EPA estimates that 14% of household water usage is from leaks like these. Keep your replacement cartridge on hand for future swaps, and consider labeling your shut-off valves for faster response next time.