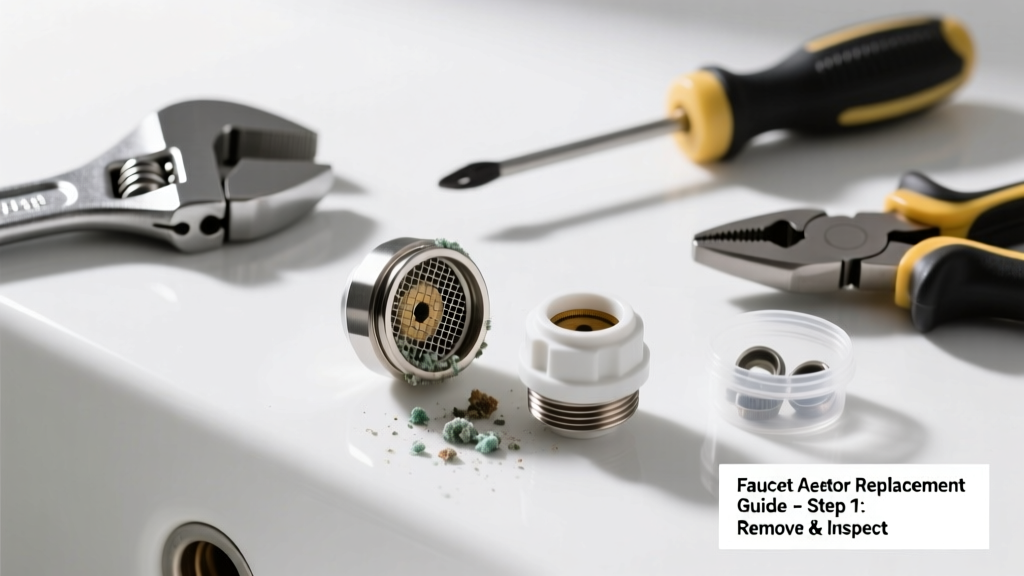
That weak, sputtering stream from your kitchen or bathroom faucet? It’s almost always the aerator — and more often than not, it’s not the whole unit that’s shot, just one tiny, replaceable part inside. Replacing just the clogged screen or flow restrictor takes under five minutes and costs less than $3. You don’t need plumber-level skills — just patience and the right tool.
Quick Diagnosis
Before you swap parts, confirm the issue is truly the aerator — not low water pressure, a failing cartridge, or a shutoff valve issue. Here are the most common culprits behind reduced flow:
- Mineral buildup (hard water deposits) on the fine mesh screen
- A dislodged or warped plastic flow restrictor disc
- Debris like rust flakes or pipe scale lodged in the housing
- Cracked or cross-threaded aerator body causing internal misalignment
- Worn O-ring allowing air leaks that disrupt laminar flow
Tools & Materials Needed
| Item | Purpose | Estimated Cost |
|---|---|---|
| Aerator wrench or rubber grip pad | Provides torque without scratching chrome finish | $2.99–$8.50 |
| Small needle-nose pliers | Extracting stubborn screens or broken plastic restrictors | $4.50–$12.00 |
| Vinegar soak cup (small glass or jar) | Holds aerator parts during 30-minute descaling soak | $0.00 (reuse household item) |
| Replacement aerator kit (e.g., Danco 88600) | Includes interchangeable screens, restrictors, and O-rings | $5.99–$11.99 |
| Lint-free microfiber cloth | Cleans threads and prevents debris re-entry during reassembly | $3.00–$7.50 |
Step-by-Step Fix
Most clogs respond to one of these three methods — try them in order before buying new parts:
- Soak-and-rinse method: Unscrew the aerator, disassemble it, drop the screen and restrictor into white vinegar for 30 minutes, then rinse under hot water and reassemble.
- Screen replacement only: If the mesh is torn or pitted, use needle-nose pliers to lift out the old screen and press in a new 18/20 mesh screen (sold in packs of 10 for ~$3.50).
- Full restrictor swap: For low-flow faucets, remove the gray plastic disc (often stamped "1.5 GPM") and replace it with an identical-rated disc — never remove it entirely unless you’re okay with unregulated flow and potential splashing.
When to Call a Pro
DIY stops making sense when safety or system integrity is at risk. Call a licensed plumber if:
- The aerator body is fused to the spout due to decades of corrosion (attempting removal may crack the faucet)
- You notice visible cracks in the faucet’s metal spout or threaded collar
- Water pressure drops across multiple fixtures — indicating main supply or valve issues
- Your home has galvanized steel pipes built before 1970 and you detect orange sediment in the aerator (a sign of advanced pipe decay)
Prevention Tips
Hard water is the #1 enemy of aerators — especially in areas with >12 grains per gallon (GPG) calcium carbonate. According to the U.S. EPA estimates that 14% of household water usage is from leaks, many triggered by neglected aerator maintenance. Extend aerator life with these habits:
- Rinse and inspect the aerator every 3 months — especially after water main work in your neighborhood
- Install a point-of-use sediment filter under the sink if your municipal supply carries sand or rust
- Use distilled white vinegar (not bleach) for monthly soak cycles — bleach degrades nylon screens and rubber O-rings
- Choose brass-bodied aerators over plastic for kitchens — they resist thermal stress and mineral adhesion better
Can I use bleach on this?
No. Bleach accelerates degradation of nylon mesh and silicone O-rings. It also reacts with copper or brass components, forming corrosive chlorides. Stick to vinegar or citric acid solutions — both dissolve calcium carbonate safely. As plumbing technician Maria Chen notes in Modern Residential Plumbing Repair (2022), "Bleach-based cleaning is the single most common cause of premature aerator failure in rental properties."
Why does my new aerator still sputter?
Sputtering usually means trapped air or incomplete reassembly. Double-check that the flow restrictor sits flush against the screen, the O-ring is seated fully in its groove, and no thread tape residue is blocking the inlet. Also verify the faucet’s internal cartridge isn’t leaking air — test by removing the aerator entirely: if flow is smooth and steady without it, the problem is upstream.
Do all aerators have replaceable parts?
No — about 30% of budget-brand aerators (especially those sold with big-box store faucets) use welded or ultrasonically bonded assemblies. If the housing won’t separate with gentle finger pressure, assume it’s non-serviceable. Look for brands like Neoperl, Jaquar, or Danco that publish exploded diagrams and sell individual components.
What’s the difference between 1.0 GPM and 1.5 GPM aerators?
The number refers to gallons-per-minute flow rate. A 1.0 GPM aerator saves ~30% more water than 1.5 GPM but may feel sluggish for filling pots or rinsing dishes. California and Massachusetts now require ≤1.0 GPM for bathroom faucets (per Title 20 and MA Plumbing Code 2023). Choose based on local code and use case — kitchens typically need ≥1.5 GPM; powder rooms can run fine on 0.5–1.0 GPM.
Can I upgrade to a filtered aerator?
Yes — but with caveats. Filtered aerators (like the Aquasana AQ-2000) add carbon and sediment layers, but they clog 3–5× faster in hard water and require monthly cartridge swaps (~$12 each). They’re best for renters or homes with confirmed chlorine/taste issues — not for high-mineral areas. For whole-house filtration, consider pairing a whole-house water filter installation instead.
How do I know which aerator thread size I need?
Measure the outer diameter of the faucet spout threads with calipers: standard is 15/16"-27 (U.S. standard) or M21.5x1 (metric). If unsure, unscrew your current aerator and take it to a hardware store — most carry thread gauges. You can also check your faucet’s model number online; manufacturer sites like Moen faucet repair guide list compatible aerators by model.
Replacing just the clogged part — not the whole aerator — keeps your faucet running like new without unnecessary expense or waste. Keep a $6 replacement kit in your utility drawer, and you’ll rarely face that frustrating dribble again. And if you’ve got a vintage faucet with odd threading or missing parts, our vintage faucet repair resources page has specialty suppliers and thread adapters you won’t find at Home Depot.