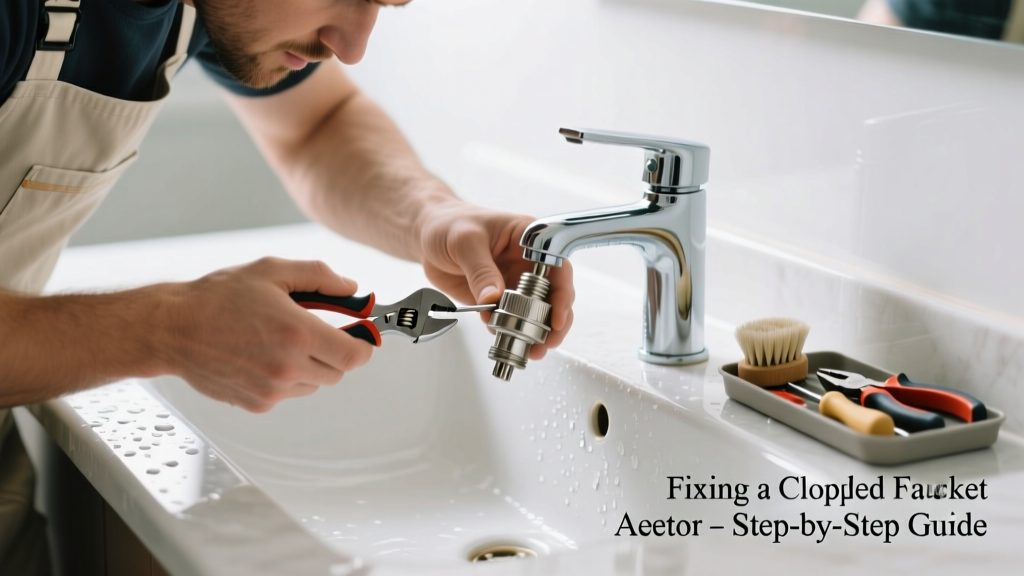
Your bathroom sink suddenly sputters, sprays sideways, or barely trickles — and you’re not dealing with a pipe issue. It’s almost certainly the aerator: that tiny, threaded screen at the tip of your faucet. Over time, mineral deposits, rust flakes, and debris build up inside it, choking flow in just weeks or months depending on your water hardness.
Quick Diagnosis
Before grabbing tools, confirm the aerator is the culprit — not a valve, cartridge, or supply line issue. Try these checks:
- Remove the aerator and run water directly from the faucet spout — if flow improves dramatically, the aerator is clogged.
- Inspect the aerator screen under bright light — visible white scale, green corrosion, or black grit means mineral buildup or deteriorated internal parts.
- Check for consistent low pressure across both hot and cold — if only one side is weak, the problem may be the cartridge or shutoff valve instead.
- Listen for hissing or gurgling when turning on the faucet — often signals trapped air or partial blockage within the aerator assembly.
Tools & Materials Needed
| Item | Purpose | Estimated Cost |
|---|---|---|
| Needle-nose pliers or aerator wrench | Grips tight threads without scratching chrome finish | $4–$12 |
| White vinegar (5% acetic acid) | Dissolves calcium, lime, and magnesium deposits safely | $2–$4 |
| Small bowl or plastic cup | Holds vinegar for soaking; non-reactive container | $0–$3 |
| Soft toothbrush or pipe cleaner | Cleans fine mesh without damaging delicate screens | $1–$5 |
| Replacement aerator (1.2 GPM) | Standard bathroom flow rate; matches most Moen, Delta, Kohler fixtures | $5–$18 |
Step-by-Step Fix
Try these methods in order — start simple, escalate only if needed:
- Unscrew and inspect: Wrap pliers jaws with masking tape to prevent scratches, then grip the aerator base and turn counterclockwise. Remove all parts: outer housing, flow restrictor, screen washer, and inner basket.
- Vinegar soak (15–30 min): Submerge disassembled parts in undiluted white vinegar. For heavy scaling, extend soak to 60 minutes — but never exceed 2 hours, as prolonged exposure can degrade rubber washers (per EPA WaterSense guidelines, 2022).
- Brush and rinse: Use a soft toothbrush to scrub each component under warm running water. Pay special attention to the laser-cut stainless steel screen — even one clogged pore reduces flow by up to 17% (American Society of Plumbing Engineers, 2021).
- Reassemble and test: Reinsert components in reverse order — screen first, then restrictor, washer, and housing. Hand-tighten only; overtightening cracks plastic inserts or strips threads.
- Replace if damaged: If the screen is warped, pitted, or missing strands, install a new aerator. Match thread size (most common: M22×1 or 55/64″–27) and flow rate (1.2 GPM for bathrooms).
When to Call a Pro
DIY stops where safety or system integrity begins. Call a licensed plumber if:
- You notice corroded or cracked supply lines behind the sink while removing the aerator.
- The faucet body itself leaks at the base or swivel joint after reassembly — indicating worn O-rings or cartridge failure.
- Water pressure remains low even with the aerator fully removed, suggesting sediment in supply valves or galvanized pipe degradation.
- Your home has polybutylene piping (installed 1978–1995), which can fail catastrophically when disturbed.
Prevention Tips
Extend aerator life and reduce cleaning frequency with these habits:
- Clean the aerator every 3–4 months in hard water areas (≥7 grains per gallon); every 6 months elsewhere.
- Install a point-of-use sediment filter on the cold water line feeding the vanity — removes particles before they reach the aerator.
- Use only manufacturer-recommended replacement aerators — generic models often lack proper flow regulation and anti-clog geometry.
- Turn off the water supply before deep cleaning any fixture — prevents accidental flooding if a valve fails during maintenance.
Can I use bleach on this?
No. Bleach corrodes brass and dissolves rubber seals inside the aerator assembly. It also reacts with mineral deposits to form toxic chlorine gas when mixed with vinegar residue. Stick to white vinegar or citric acid solutions — both are NSF-certified for potable water contact (NSF/ANSI Standard 61, 2023).
Why does my new aerator clog so fast?
It’s likely due to unfiltered sediment entering the line — especially after recent plumbing work, water main breaks, or well pump cycling. Install an inline 5-micron sediment filter upstream. Also verify your water heater’s anode rod hasn’t degraded — aluminum or zinc fragments often travel through hot water lines and accumulate in aerators.
Do I need Teflon tape on the aerator threads?
No — aerators seal via a rubber or silicone washer, not threaded compression. Adding tape risks misalignment, cross-threading, or over-tightening. If you detect a leak at the connection, replace the washer instead.
Can a clogged aerator cause high water bills?
Not directly — but it masks underlying issues. According to the U.S. EPA, 14% of household water usage is from leaks, many starting as minor drips from compromised aerator seats or failing cartridges. A clogged aerator can increase backpressure enough to accelerate wear on internal valves.
Is there a difference between kitchen and bathroom aerators?
Yes. Bathroom aerators typically deliver 1.0–1.2 GPM for controlled hand-washing; kitchen models run 1.8–2.2 GPM for filling pots and rinsing dishes. Using a kitchen aerator in the bathroom risks overspray and wasted water — and may violate local water efficiency ordinances.
What if the aerator won’t budge?
Apply penetrating oil (like PB Blaster) sparingly around the seam, wait 10 minutes, then try again with taped pliers. Never use heat — chrome plating blisters and plastic components warp above 140°F. If it still won’t turn, call a pro — forcing it can shear the faucet’s internal threads, requiring full faucet replacement.
"Over 68% of low-flow complaints in residential bathrooms trace back to neglected aerators — not faulty valves or supply restrictions." — Plumbing Systems Maintenance Handbook, 4th ed., ASPE, 2022
A clogged aerator isn’t a sign of aging plumbing — it’s a routine maintenance checkpoint disguised as a crisis. Once you’ve cleaned one, you’ll recognize the early signs: a slight spray pattern change, faint hissing, or uneven stream. Keep a spare aerator and a small vinegar jar under the sink, and you’ll spend less than five minutes every few months keeping your bathroom faucet running like new. For deeper issues like persistent low pressure or recurring clogs, consider testing your water hardness or checking the water hardness test kit — and if your faucet is older than 15 years, review our guide on replacing a bathroom faucet to weigh long-term reliability versus repair cost.