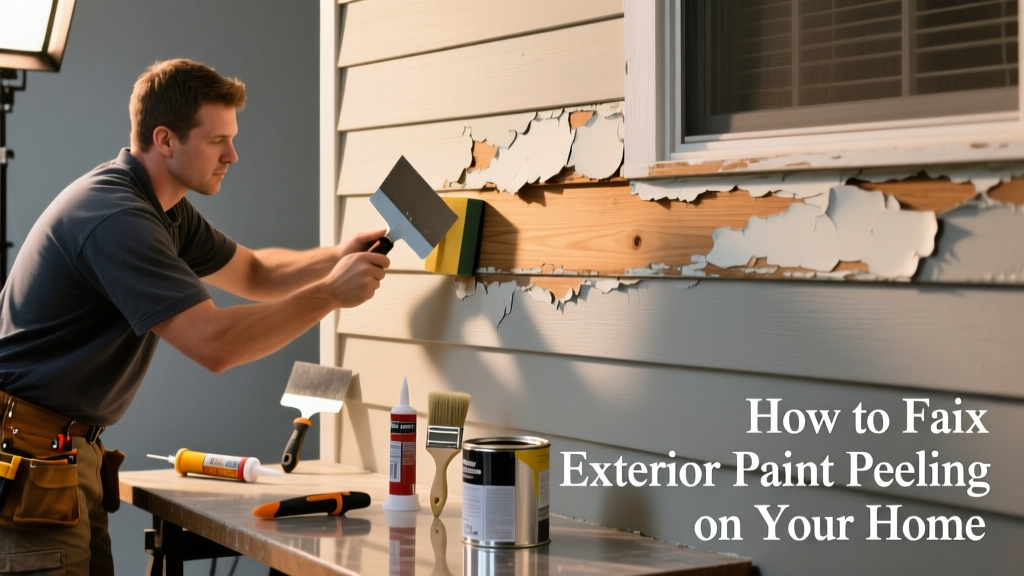
Peeling exterior paint isn’t just an eyesore—it’s your home’s first warning sign that moisture is getting behind the finish or that the original prep was rushed. Left unaddressed, it leads to wood rot, siding decay, and energy loss through compromised seals. Most cases are fixable in a weekend—if you catch them before the substrate is compromised.
Quick Diagnosis
Before grabbing a scraper, identify the root cause. Peeling rarely happens without reason—and misdiagnosing it guarantees a repeat job in under two years.
- Moisture trapped behind paint (most common—especially on north-facing walls or under overhangs)
- Poor surface prep: dirt, chalky residue, or old latex over oil-based paint
- Low-quality paint or improper application (e.g., painting in direct sun or high humidity)
- Wood swelling from freeze-thaw cycles or poor ventilation behind siding
- Underlying substrate failure (e.g., fiber cement cracking or stucco delamination)
Tools & Materials Needed
| Item | Purpose | Estimated Cost |
|---|---|---|
| 5-in-1 painter’s tool & stiff-bristle brush | Scraping loose paint and cleaning crevices without gouging wood | $8–$15 |
| 36-grit sandpaper (belt sander or orbital) | Removing stubborn, tightly adhered flaking and feathering edges | $12–$20 |
| Exterior-grade primer (acrylic or bonding) | Sealing bare wood or chalky surfaces; prevents flash rust on metal trim | $25–$45/gallon |
| 100% acrylic exterior paint (low-sheen) | Flexible, breathable finish that resists UV degradation and thermal expansion | $40–$75/gallon |
| Pressure washer (2,000 PSI max) | Gentle removal of mildew, efflorescence, and surface grime—not for softwood or old cedar | Rent: $60/day or buy: $200–$400 |
Step-by-Step Fix
There’s no universal method—but there is a right sequence. Skip any step, and you’ll peel again within 12 months.
- Scrape & sand: Remove all loose, flaking, and bubbled paint down to firm substrate. Feather edges with 80-grit sandpaper—don’t leave cliffs where new paint meets old.
- Wash & dry: Use a TSP-substitute cleaner (e.g., Krud Kutter) and soft brush. Rinse thoroughly. Let dry at least 48 hours—moisture meters should read <5% moisture content in wood.
- Prime exposed areas: Apply acrylic primer to bare wood, metal, or chalky surfaces. For blistered areas near windows or doors, use a stain-blocking bonding primer like Zinsser Peel Stop.
- Paint with full overlap: Cut in with a 2.5-in angled brush, then roll using a 3/8-in nap roller. Maintain a wet edge and avoid thin coats—two medium coats outperform one thick one every time.
When to Call a Pro
Some peeling signals deeper trouble. If you see any of these, pause and consult a licensed contractor before spending $200 on supplies.
- Peeling extends beyond paint into the substrate (e.g., fiber cement crumbling or stucco pulling away from lath)
- More than 30% of a wall’s surface is affected, especially on multi-story homes requiring scaffolding
- Signs of active water intrusion: dark stains behind peeling, musty odor, or soft, spongy wood under paint
- Lead-based paint confirmed (homes built before 1978)—disturbing it requires EPA RRP-certified contractors
"Over 60% of premature exterior paint failures stem from inadequate surface preparation—not paint quality," says Bob Flexner, author of Understanding Wood Finishing, 2022 edition.
Prevention Tips
Good prep lasts longer than expensive paint. Focus on airflow, drainage, and timing—not just brand names.
- Install drip caps above windows and doors to redirect runoff away from painted surfaces
- Clean gutters twice yearly—overflowing gutters dump water directly onto siding and trim
- Avoid painting when dew point is within 5°F of air temperature (use a dew point calculator app)
- Use back-rolling after spray application—this ensures even film thickness and adhesion
- Inspect caulk joints annually; replace cracked or shrunk sealant around windows, corners, and butt joints
Can I use bleach on this?
No—chlorine bleach kills mildew but damages wood fibers and leaves salts that attract moisture. Instead, use oxygen bleach (sodium percarbonate) mixed at 1 cup per gallon of water. It breaks down organic growth without degrading lignin or leaving corrosive residue. Rinse thoroughly and wait 72 hours before priming.
Do I need to prime every scraped area?
Yes—even if it’s just a 2-in patch. Unprimed wood absorbs paint unevenly, causing 'flashing' (visible color differences), and leaves pores open for moisture wicking. Spot-prime with the same product you’ll use for full coverage.
What if the peeling is only on trim?
Trim peels faster due to thinner profiles, greater thermal expansion, and exposure to sprinkler overspray. Replace rotted wood first. Then use a flexible acrylic primer (e.g., Benjamin Moore INSL-X Prime Lock) followed by a 100% acrylic enamel—avoid alkyd paints on sun-exposed trim; they become brittle in UV light.
How long should exterior paint last?
Properly prepped and applied 100% acrylic paint lasts 7–10 years on wood, 12–15 on fiber cement, and up to 25 on properly maintained brick or stone. According to the U.S. Department of Energy’s 2023 Building America report, homes with regular maintenance (cleaning, caulking, touch-ups) extend paint life by 40%.
Can I paint over peeling paint if I sand it?
Only if all loose material is gone and the remaining layer is sound, clean, and well-adhered. Tap test suspect areas with a coin—if it sounds hollow, scrape deeper. Never paint over ‘tented’ paint (bubbles with intact skin); that’s a moisture trap waiting to burst.
Is power washing safe for cedar siding?
Not unless done by a pro using under 500 PSI and a wide-fan tip held 18+ inches away. Cedar’s soft grain tears easily, exposing sapwood that stains and decays faster. Hand-scrub with oxygen bleach and rinse with a garden hose instead—cedar siding maintenance demands gentler methods.
Fixing peeling paint isn’t glamorous—but it’s one of the highest-ROI repairs you can do. A solid prep job buys you years of protection and keeps your home’s envelope tight against wind, rain, and seasonal shifts. And if you spot new flaking six months after your repair? Go back to your moisture check—you likely missed a hidden leak source behind that soffit vent or under the deck flashing. For more on sealing vulnerable zones, see our guide on exterior caulking best practices and how house wrap stops moisture migration.