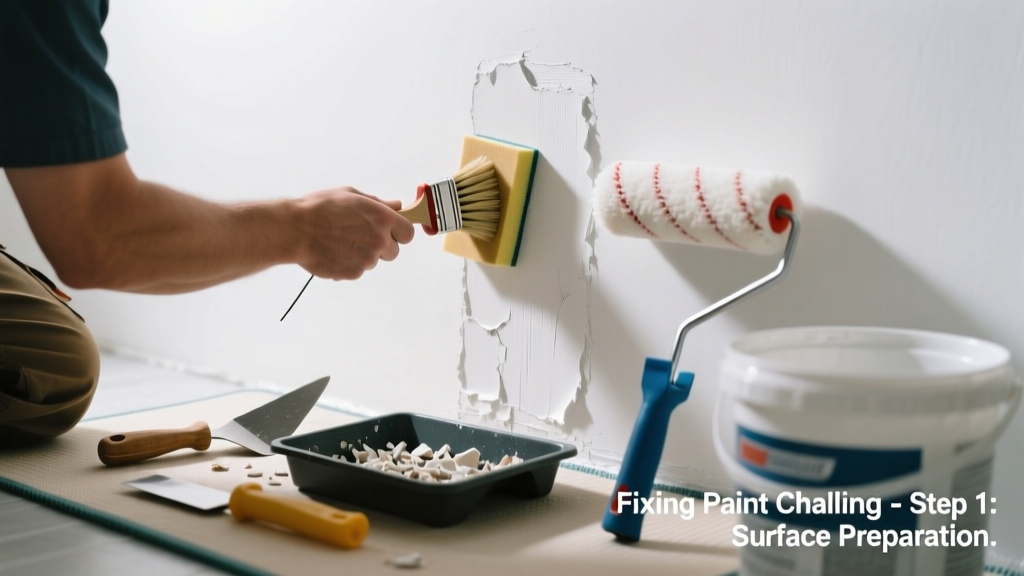
Exterior paint chalking in your bathroom isn’t just odd—it’s a red flag. That powdery residue on walls or ceiling trim means the wrong paint was used where high humidity and steam dominate. Left unaddressed, it leads to poor adhesion, moisture trapping, and potential mold growth behind flaking layers.
Quick Diagnosis
Chalking in a bathroom almost always stems from one or more of these root causes:
- Exterior acrylic or elastomeric paint applied indoors (not formulated for interior humidity)
- Improper surface prep—paint applied over dusty, greasy, or poorly sanded drywall
- Lack of primer before topcoat, especially over patched areas or new drywall
- Continuous exposure to steam without adequate ventilation (e.g., no working exhaust fan)
- Paint applied below manufacturer’s minimum temperature or humidity thresholds during installation
Tools & Materials Needed
| Item | Purpose | Estimated Cost |
|---|---|---|
| HEPA-rated vacuum with brush attachment | Removes chalk dust without redistributing spores or fine particles into air | $85–$140 |
| Non-ammonia TSP substitute (e.g., Krud Kutter Cleaner) | Cleans alkaline residue and waxy film left by degraded exterior binders | $12–$18 |
| 120-grit sanding sponge (medium) | Scuffs chalky surface without gouging drywall paper | $4–$7 |
| Interior semi-gloss acrylic primer (e.g., Zinsser Bulls Eye 1-2-3) | Seals chalk, blocks alkali bleed, and provides proper base for interior topcoats | $24–$32 |
| Interior mildew-resistant paint (e.g., Benjamin Moore Aura Bath & Spa) | Withstands 95% RH, contains EPA-registered fungicides, and resists surfactant leaching | $65–$82 |
Step-by-Step Fix
- Isolate and protect: Close bathroom door, cover floor and fixtures with plastic sheeting taped at seams; run exhaust fan continuously during work.
- Dry-remove chalk: Use HEPA vacuum + soft brush attachment to lift loose powder—never dry-dust or sweep (spreads particles).
- Clean with pH-neutral solution: Mix TSP substitute per label (typically 1/4 cup per gallon warm water); apply with microfiber cloth, rinse with damp cloth, then dry fully (minimum 4 hours).
- Lightly scuff and prime: Sand only chalky patches with 120-grit sponge until surface feels slightly toothy; wipe dust; apply primer in thin, even coats—let dry 2 hours between coats.
- Repaint with interior-specific product: Use 100% acrylic, mildew-resistant interior paint—apply two coats, waiting 4 hours between. Avoid painting overnight if humidity exceeds 70%.
When to Call a Pro
DIY stops being safe or effective in these scenarios:
- Chalking extends behind baseboards or into ceiling corners—suggests hidden moisture intrusion or roof leak feeding vapor into wall cavities
- You detect musty odors, discoloration, or soft drywall—signs of active mold or rot requiring containment and remediation
- Chalking recurs within 3 months after proper repair—points to chronic ventilation failure or plumbing condensation issues
- The affected area exceeds 32 sq ft (e.g., full shower wall), increasing risk of overspray, airborne particulates, or improper containment
Prevention Tips
Stop chalking before it starts—especially in humid zones:
- Always verify paint labels say "For Interior Use Only"—check the Technical Data Sheet (TDS), not just the front can
- Install an ENERGY STAR–rated exhaust fan that moves ≥50 CFM and runs automatically for 20 minutes post-shower (via timer or humidity sensor)
- Prime all bare drywall, patches, and skim-coated surfaces with alkali-resistant primer before any topcoat
- Avoid using "exterior-grade" paints indoors—even if marketed as "tough" or "weather-resistant"—they lack interior-specific binders and mildewcides
- Test humidity levels with a hygrometer: keep bathroom readings below 60% RH during and after showers
Can I use bleach on this?
No. Bleach does not remove chalk—it degrades acrylic binders further and leaves sodium residue that attracts moisture. It also fails against mold embedded beneath chalky layers. According to the U.S. EPA’s Mold Remediation in Schools and Commercial Buildings (2023), chlorine-based cleaners are ineffective for porous substrates and may worsen off-gassing.
Will repainting with exterior paint fix it?
No—it makes it worse. Exterior paints rely on controlled UV exposure and air circulation to cure properly. In enclosed, humid bathrooms, their acrylic emulsions break down faster, accelerating chalking. The American Coatings Association confirms interior and exterior formulations are chemically incompatible for cross-use (2022 Technical Bulletin #AC-77).
How long does the fix last?
With proper ventilation, correct materials, and surface prep, a full repair lasts 7–10 years. Without addressing root causes—like missing exhaust ducts or uninsulated cold-water pipes—the same issue often returns in under 18 months.
Do I need to remove all the old paint?
Only the chalky, powdery layer—not necessarily every coat. If underlying paint is firmly adhered and not chalky, priming over it is acceptable. But if you see alligatoring, bubbling, or peeling beyond the chalk, full removal via chemical stripper (not sanding) is required to avoid silica dust exposure.
Can I spot-treat instead of repainting everything?
Yes—but only if chalking is limited to one small area (<2 sq ft) and you feather-prime 6 inches beyond the edge. Mismatched sheen or color is common, so test a 12"×12" patch first. For larger areas, full-wall repainting ensures uniform appearance and performance.
What’s the best primer for chalky surfaces?
Zinsser Bulls Eye 1-2-3 is widely tested for chalky substrates—it penetrates and binds loose particles without raising grain. Sherwin-Williams’ PrepRite Drywall Primer also performs well but requires 24-hour dry time before topcoating in high-humidity spaces.
"Chalking in interior spaces is rarely about paint quality—it’s about application context. Using exterior paint indoors is like wearing rain boots to swim: the material is engineered for the wrong environment." — Greg Lauer, Senior Formulator, Benjamin Moore R&D Lab (2021)
Once the chalk is gone and the right interior paint is on the wall, keep your bathroom’s humidity in check with consistent fan use and quick wipe-downs after showers. A properly repaired surface shouldn’t chalk again—if it does, revisit your ventilation setup before assuming the paint failed. For ongoing maintenance, inspect caulk lines and grout annually, and reseal tile edges before moisture finds its way behind the finish—because the real enemy isn’t the chalk, it’s what the chalk hides.