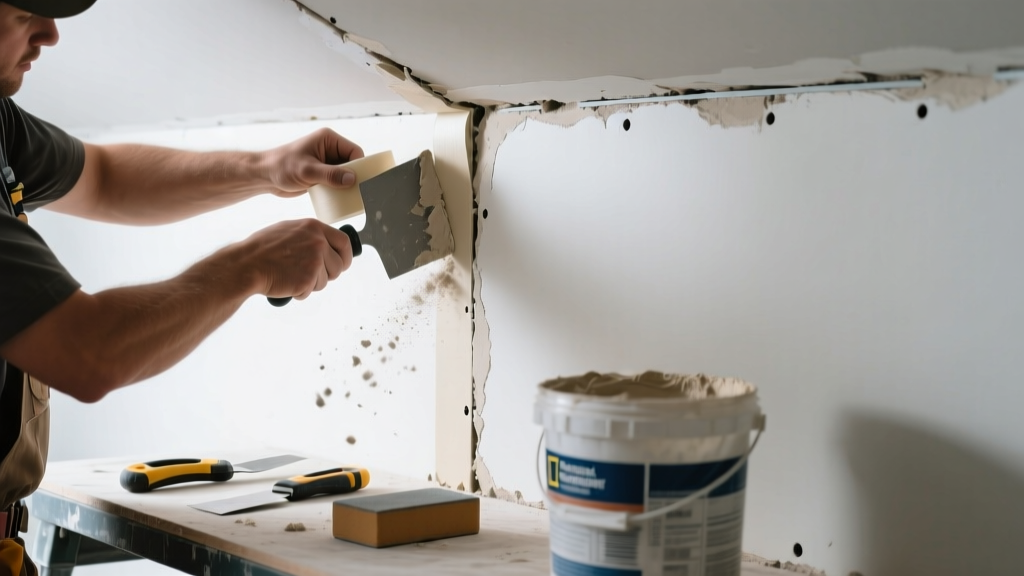
If you hear a faint 'pop' or 'crack' every time someone walks across the floor above—or notice a hairline gap widening along a drywall seam—you’re not just dealing with cosmetic damage. That noise signals structural stress, poor installation, or environmental shifts affecting the wall assembly. Ignoring it risks larger cracks, tape failure, or even moisture intrusion behind the surface.
Quick Diagnosis
Start here before grabbing tools. A noisy, visible seam rarely has one cause—most often, it’s a combination of two or more issues:
- Seasonal wood framing shrinkage (especially in new builds under 3 years old)
- Improper drywall tape application—dry joint compound over loose or unbedded mesh tape
- Insufficient fastener spacing (more than 12" on walls or 7" on ceilings)
- Load-bearing joist deflection from undersized lumber or added weight (e.g., attic storage)
- Moisture exposure causing gypsum board expansion or paper delamination
Tools & Materials Needed
| Item | Purpose | Estimated Cost |
|---|---|---|
| 12-inch drywall knife | Smooths compound over wide seams without ridges | $8–$15 |
| Self-adhesive fiberglass mesh tape | Bridges gaps and resists re-cracking better than paper tape | $4–$9 |
| Setting-type joint compound (90-minute) | Provides rigid, non-shrinking base layer; critical for active seams | $12–$22 |
| Drill with drywall screw bit | Adds screws where framing contact is lost or fasteners are missing | $18–$45 |
| Stud finder with deep-scan mode | Locates exact joist/rafter positions behind existing drywall | $25–$65 |
Step-by-Step Fix
Choose the method that matches your diagnosis. Most cases need a hybrid approach—start with stabilization, then repair.
- Re-fasten the drywall to framing: Use your stud finder to locate studs or joists within 2" of the seam. Drive #6 x 1¼" drywall screws every 6" along both sides of the seam—stopping just below the paper surface. Countersink slightly but don’t break through.
- Remove failed tape and loose compound: Score the seam with a utility knife, then scrape away crumbling mud and detached tape down to bare gypsum. Wipe dust with a damp microfiber cloth—never wet the core.
- Apply setting-type compound and mesh tape: Press self-adhesive mesh tape into a 1/8" bed of 90-minute hot mud. Feather edges with a second coat using all-purpose compound. Let cure fully (24 hrs minimum) before sanding.
- Add backing support (if joist deflection is confirmed): From the attic or crawl space, sister a 2×6 alongside the offending joist using construction adhesive and 3" structural screws every 12". This reduces flex-induced popping.
When to Call a Pro
Some seam noise points to problems beyond patch-and-paint fixes. Call a licensed contractor if you observe any of these:
- The seam widens more than 1/8" over 72 hours (indicates active settlement or foundation shift)
- Cracks run diagonally across corners or stairwells—possible structural framing failure
- You detect musty odors, discoloration, or soft spots near the seam (signs of hidden water damage)
- Noise coincides with HVAC cycling and you find gaps around duct boots—may require air sealing + insulation retrofit
"Over 60% of 'noisy drywall' complaints in homes built between 2015–2022 stem from inadequate fastener schedules—not tape quality," says Jason Rupp, lead inspector at the National Association of Home Builders’ Construction Technology Lab (2023).
Prevention Tips
Prevent recurrence by addressing root causes—not just symptoms:
- Wait until indoor humidity stabilizes (35–55% RH) before final drywall finishing—use a hygrometer to verify
- In attics, maintain at least R-38 insulation and ensure soffit-to-ridge ventilation is unobstructed to reduce thermal cycling stress
- Use construction adhesive on back of drywall sheets during install—especially on ceilings—to resist pull-away from joists
- Avoid installing drywall when framing moisture content exceeds 19% (test with a pinless meter)
Why does my drywall seam pop only in winter?
Cold air holds less moisture, dropping indoor RH below 30%. Wood framing shrinks widthwise, pulling fasteners slightly and releasing tension—then snapping back with an audible pop as humidity rises. It’s normal in tight-tolerance builds—but repeated pops warrant fastener reinforcement.
Can I just paint over the crack and call it done?
No. Painting hides the symptom but accelerates failure. Latex paint bridges tiny gaps temporarily, but movement will force it to split, creating a raised ridge that catches light and worsens visibility. Always re-tape and re-finish properly—see our drywall crack repair guide for prep details.
Is this a sign of foundation problems?
Not always—but monitor closely. Foundation-related cracks typically appear near windows, doors, or at slab level, and widen vertically or stair-step in masonry. If your seam runs horizontally across multiple rooms and aligns with floor joists, it’s likely framing—not footing—related. Still, get a foundation inspection if you see exterior brick cracks >1/4" wide.
How long does the repair last?
A full re-tape with setting-type compound and proper fastening lasts 10–15 years in stable environments. In high-movement areas (e.g., above garages or over trusses), expect 7–10 years before minor touch-ups. For longer life, consider switching to soundproof drywall systems with resilient channels.
Can I use caulk instead of joint compound?
Avoid standard acrylic or silicone caulk—it lacks compressive strength and won’t accept primer evenly. However, elastomeric drywall caulk (like DAP Drydex Ultra) works *only* for hairline gaps (<1/16") where no movement is expected. Never use it over taped seams or on load-bearing surfaces.
Do I need to remove all the old texture before repairing?
Only if texture is loose or peeling near the seam. Otherwise, scuff-sand the area with 120-grit and wipe clean—texture helps compound adhere. Just feather repairs out 12–18" beyond the seam to blend visually. For matching heavy knockdown, refer to our drywall texture matching guide.
Visible seams paired with noise aren’t just ugly—they’re your wall’s way of telling you something’s shifting beneath the surface. Addressing the cause—not just the crack—means your repair holds up through seasonal swings and daily use. Take time to check fasteners, confirm framing stability, and choose materials built for movement. A quiet, smooth wall isn’t luck—it’s layered intention.