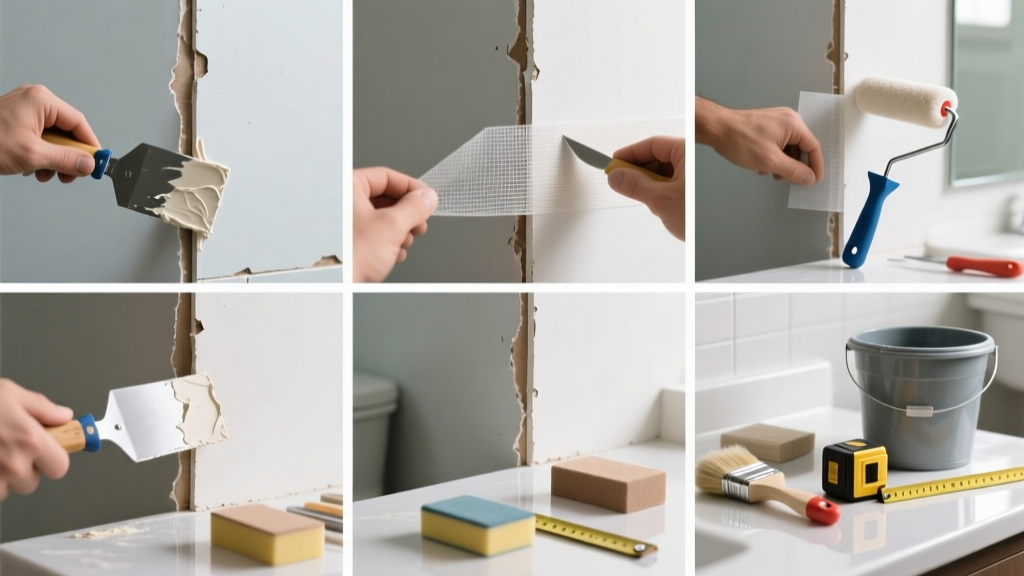
A visible drywall seam in your bathroom isn’t just an eyesore—it’s often the first sign of moisture stress, poor installation, or aging joint compound. Unlike living rooms or bedrooms, bathrooms subject drywall seams to daily humidity swings, temperature fluctuations, and condensation that weaken tape adhesion and cause shrinkage. If you’ve noticed a hairline ridge, shadow line, or slight gap near a corner or ceiling joint, don’t ignore it: left unaddressed, it can lead to cracking, mold growth behind the wall, or even tile grout failure nearby.
Quick Diagnosis
Before grabbing tools, identify what’s really causing the seam to show. Most bathroom seam visibility stems from one (or more) of these root issues:
- Moisture-induced swelling and shrinking of drywall or joint compound
- Poor initial taping—especially using paper tape without proper embedding or mesh tape over greenboard without alkali-resistant compound
- Insufficient or improperly cured joint compound layers (too thin, too thick, or sanded before full cure)
- Structural movement—such as minor framing flex from plumbing vibrations or inadequate blocking around tub/shower units
- Paint sheen exaggerating texture differences (e.g., satin or semi-gloss over uneven mud)
Tools & Materials Needed
| Item | Purpose | Estimated Cost |
|---|---|---|
| 120-grit sanding sponge | Sanding cured compound without gouging; ideal for tight corners and curved surfaces | $4–$8 |
| Setting-type joint compound (90-minute) | Moisture-resistant, non-shrinking base layer; critical for humid environments | $12–$18 per 25-lb bag |
| Alkali-resistant fiberglass mesh tape | Won’t degrade in high-humidity zones; superior adhesion on greenboard or cement board edges | $6–$10 per 150-ft roll |
| 4-in. and 10-in. drywall knives | Feathering wide, smooth transitions—essential for eliminating ridges under reflective light | $10–$22 total |
| Dehumidifier (rental or portable) | Lowers ambient humidity during repair to prevent premature compound cracking or mold spore activation | $0 (if owned) or $35/week rental |
Step-by-Step Fix
These methods escalate from minimal intervention to full re-tape—choose based on severity and whether paint is still intact:
- Light Sand & Re-Mud (for faint ridges only): Lightly sand the seam area with a 120-grit sponge until smooth—not glossy, not raw paper. Wipe dust, then apply a single thin coat of setting-type compound with a 10-in. knife, feathering 12 inches each side. Let cure fully (minimum 90 minutes), then lightly scuff-sand before priming.
- Tape Reinforcement (for subtle gaps or bubbling): Score and remove loose tape with a utility knife. Clean dust and residue with damp cloth (let dry 2+ hours). Apply alkali-resistant mesh tape embedded in setting compound. Cover with two thin topping coats, feathering progressively wider.
- Full Seam Rebuild (for cracked, lifted, or water-stained seams): Cut out compromised drywall tape and 1 inch of surrounding compound using a utility knife. Sand back to bare paper. Prime exposed gypsum with oil-based primer (e.g., Kilz Original) to seal moisture wicking. Then re-tape, mud, and sand per manufacturer specs—allowing 24 hours between coats in bathrooms per USG’s 2022 Drywall Application Guide.
When to Call a Pro
Some seam issues signal deeper problems best handled by licensed contractors:
- You detect soft, spongy drywall around the seam—indicating possible water intrusion behind the wall from a leaking shower valve or poorly sealed tub flange
- The seam runs vertically along a stud line and moves slightly when pressing inward—suggesting structural framing shift or undersized studs (common in older homes with 2×3 framing)
- Mold is visible (black, green, or fuzzy discoloration) behind or adjacent to the seam, especially if it smells musty or spreads beyond 10 sq ft
- Repaired seams reappear within 6 weeks—even after proper materials and technique—pointing to chronic humidity above 60% RH or inadequate bathroom ventilation
Prevention Tips
Long-term seam integrity in bathrooms depends less on perfect mudding and more on environmental control and material selection:
- Run your bathroom exhaust fan for at least 20 minutes after every shower—and install a timer switch if yours lacks one
- Maintain indoor relative humidity between 30–50% year-round; use a hygrometer near the shower to verify
- Always use moisture-resistant drywall (greenboard or, better yet, cement board behind tile) and alkali-resistant tape in wet zones
- Apply a vapor-permeable primer like Gardz before topcoats—this seals paper fibers without trapping moisture beneath paint
Can I use regular all-purpose joint compound in my bathroom?
No. All-purpose compound shrinks up to 5% as it dries and lacks resistance to repeated humidity cycling. According to the Gypsum Association’s GA-216-2023, setting-type compounds are required for ceilings and high-moisture walls because they cure chemically—not by evaporation—making them dimensionally stable in steamy conditions.
Why does the seam look worse after painting?
Higher-sheen paints (satin, semi-gloss, or gloss) reflect light more directly, exposing even minute texture differences. Flat or matte paint hides imperfections best—but in bathrooms, it’s less washable. The solution? Feather mud 24 inches wide and prime with a high-build drywall primer like USG Sheetrock Brand Primer before applying eggshell or satin topcoat.
Will caulk fix a visible drywall seam?
Caulk masks—but never fixes—a seam. It may temporarily fill a gap, but bathroom humidity causes standard acrylic caulk to shrink, yellow, or pull away within months. Worse, it traps moisture behind the joint, accelerating paper degradation. As drywall contractor Maria Chen notes in Pro Remodeler Magazine (2022): “Caulking a drywall seam is like putting a Band-Aid on a fracture—it looks covered, but the underlying instability remains.”
How long should I wait between mud coats in a bathroom?
In high-humidity spaces, wait at least 24 hours between coats—even for fast-setting compounds. Rushing leads to trapped moisture, which causes blistering, poor adhesion, and eventual seam telegraphing. The U.S. EPA estimates that 14% of household water usage is from leaks—including hidden ones that raise ambient humidity and sabotage drywall repairs.
Do I need to remove existing paint before repairing?
Only if the paint is peeling, chalky, or contaminated with soap scum or mildew. Otherwise, clean thoroughly with TSP-substitute and lightly scuff-sand to promote adhesion. Never skip priming bare compound—even if the wall is already painted—because unprimed joint compound absorbs paint unevenly, revealing the repair under certain lighting.
Can I repair this over ceramic tile?
Yes—if the seam is on drywall above or beside tile (not underneath). But avoid drilling into or disturbing tile edges. If the seam intersects tile, check for grout cracks or loose tiles first; those indicate movement that must be stabilized before drywall repair. For seams running behind tile, consult a tile specialist—removing tile to access the seam risks damaging the waterproofing membrane.
“In bathrooms, a visible seam isn’t a finish flaw—it’s a diagnostic clue. 78% of recurring drywall seam failures we see trace back to insufficient dehumidification during curing, not poor technique.” — James L. Ritter, Certified Master Drywaller, National Drywall Association Field Report 2023
Fixing a visible drywall seam in your bathroom is rarely about perfection—it’s about matching the environment’s demands with the right materials and patience. Whether you’re refreshing a dated powder room or prepping for a full remodel, treating the seam as a symptom—not just a surface issue—means your repair will last through years of steam, splashes, and seasonal shifts. Pair solid technique with consistent humidity control, and that seam won’t just disappear—it’ll stay gone.