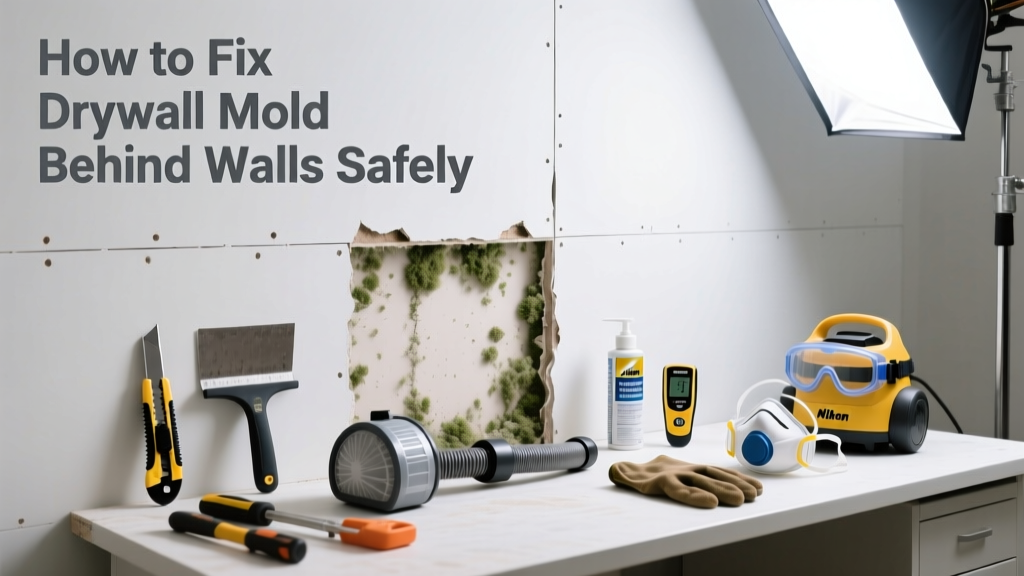
Spotting musty odors, discoloration near baseboards, or bubbling paint? You might have mold growing behind drywall — invisible but potentially hazardous. Left untreated, it can compromise air quality and weaken framing. This guide walks you through safe, code-compliant remediation — starting before you even pick up a utility knife.
Quick Diagnosis
Mold behind drywall rarely appears out of nowhere. It’s almost always a symptom of an underlying moisture problem. Pinpointing the source prevents repeat growth.
- Leaking supply lines or shut-off valves behind bathroom vanities or kitchen cabinets
- Roof leaks tracking down interior walls (especially attic-accessible walls)
- Poorly vented bathroom exhaust fans dumping humid air into wall cavities instead of outside
- Condensation on cold exterior walls in uninsulated or poorly insulated homes (common in basements and north-facing rooms)
- Failed window flashing or deteriorated caulk allowing rain infiltration
Tools & Materials Needed
| Item | Purpose | Estimated Cost |
|---|---|---|
| N95 respirator (P100 recommended) | Filtration for mold spores; standard dust masks won’t cut it | $12–$35 |
| Plastic sheeting (6-mil) | Containment barrier to prevent spore spread during removal | $25–$45 |
| HEPA vacuum with sealed filtration | Clean debris without recirculating spores; shop vacs without HEPA are unsafe | $180–$400 |
| Stud finder with AC detection | Avoid cutting into live wires or plumbing while opening walls | $30–$90 |
| Biocide-treated replacement drywall | Resists future mold growth; standard drywall is porous and vulnerable | $18–$28 per sheet |
Step-by-Step Fix
Remediating mold behind drywall isn’t about cleaning—it’s about removing contaminated material and fixing the moisture source. Here’s how to do it right:
- Seal the work area: Tape 6-mil plastic from floor to ceiling around the affected zone, including doorways. Use negative air pressure if possible (rentable HEPA air scrubber).
- Cut and remove drywall: Using a utility knife, cut 12 inches beyond visible staining or water damage—mold spreads invisibly along framing and insulation. Remove in full sheets, not scraps.
- Inspect framing and insulation: If wood studs show black staining or softness, they’re compromised. Insulation soaked with moisture must be discarded—not dried. According to the EPA’s Mold Remediation in Schools and Commercial Buildings (2022), porous materials like fiberglass batts cannot be effectively cleaned once mold-infested.
- Treat non-porous surfaces only: Wipe exposed framing with a detergent solution, then apply EPA-registered fungicide (e.g., Concrobium Mold Control). Never use bleach on porous surfaces—it doesn’t penetrate and leaves spores alive.
- Rebuild with mold-resistant materials: Install green board or paperless drywall, use mold-inhibiting joint compound, and seal seams with acrylic primer before painting.
When to Call a Pro
DIY works only when mold covers under 10 square feet and affects only drywall—not structural wood or HVAC ducts. Call a certified mold remediator (IICRC-certified) if:
- Mold spans more than two adjacent studs or exceeds 10 sq ft
- You find active water intrusion during inspection (dripping, pooling, or spongy subfloor)
- Mold is inside HVAC ductwork or has entered your return air system
- You or household members experience persistent respiratory symptoms (coughing, wheezing, headaches) tied to the space
- The wall cavity contains knob-and-tube wiring or asbestos-lagged pipes (pre-1980 homes)
"Mold behind drywall is never just cosmetic—it's always a moisture emergency." — Dr. Jeffrey May, indoor air quality expert and author of What’s Making My Client Sick? (2021)
Prevention Tips
Fixing mold is half the job—the other half is stopping recurrence. Focus on humidity control and early leak detection:
- Maintain indoor relative humidity between 30–50% using a hygrometer and dehumidifier or AC
- Verify bathroom and kitchen exhaust fans vent *outside*, not into attics or crawlspaces (test by holding tissue at the exterior vent while fan runs)
- Inspect roof flashing, window seals, and foundation drainage annually—especially after heavy rains
- Install smart water leak detectors (e.g., Moen Flo or Phyn) under sinks and near water heaters to catch issues before drywall is affected
Can I use bleach on this?
No. The CDC and EPA explicitly advise against using bleach for mold remediation on porous surfaces like drywall or wood. Bleach’s high water content wicks deeper into material, feeding remaining spores—and its volatile organic compounds (VOCs) pose inhalation risks. Stick to detergent washes for non-porous surfaces and physical removal for everything else.
Do I need to replace all the drywall in the room?
Only the visibly or suspect-affected sections—and a 12-inch buffer beyond them. However, if moisture testing reveals elevated readings (>15% moisture content) in adjacent areas, expand removal. Use a pinless moisture meter (like the Protimeter Surveymaster) to verify boundaries before cutting.
Is black mold behind drywall always toxic?
No. “Black mold” is a misnomer—Stachybotrys chartarum is one species among thousands, and toxicity depends on strain, concentration, and individual sensitivity. What matters clinically is exposure duration and immune status. The American College of Occupational and Environmental Medicine (ACOEM, 2020) states that all indoor mold growth should be removed regardless of species.
Can I paint over mold to hide it?
Never. Painting over mold traps moisture and accelerates decay. It also masks the problem until spores breach the paint film or become airborne during sanding. Mold-inhibiting paints like Kilz Mold & Mildew Resistant Primer only work on *clean, dry, previously remediated* surfaces.
How long does the whole process take?
Small jobs (under 20 sq ft, no structural damage) take 2–3 days: containment (half-day), removal/drying (1 day), rebuild/finish (1–1.5 days). Larger jobs with framing repair or HVAC involvement may take 5–10 business days. Drying time alone often adds 48–72 hours post-leak repair before rebuilding.
Will my homeowner’s insurance cover this?
Most policies cover sudden, accidental water damage (e.g., burst pipe), but exclude gradual leaks (e.g., dripping faucet for months) or maintenance-related failures. Document everything with timestamps and photos before cleanup. File a claim *before* demolition—many insurers require pre-loss condition verification. For help navigating claims, see our water damage insurance guide.
Mold behind drywall isn’t a DIY project you rush—it’s a moisture investigation disguised as a repair. Take time to map the leak path, verify structural integrity, and choose materials built to resist recurrence. If you’ve already replaced drywall twice in the same spot, the real problem isn’t the wall—it’s what’s feeding it. For related guidance on identifying hidden leaks, check out our how to find hidden water leaks and bathroom fan vent inspection checklist.