If your drywall corner crack keeps reappearing after patching—or if the metal or vinyl corner bead is bent, rusted, or detached—it’s not a surface issue: the structural part itself needs replacement. Ignoring it invites moisture intrusion, mold risk, and worsening wall separation.
Quick Diagnosis
Before grabbing tools, confirm the root cause. A corner crack isn’t always about poor taping—it’s often the corner bead failing. Look for these telltale signs:
- Visible bending, kinking, or corrosion on the metal bead
- Gaps between the bead and drywall edges wider than 1/16 inch
- Loose or hollow-sounding sections when tapped lightly
- Cracks that run straight along the bead’s centerline—not branching outward
- Rust stains bleeding through joint compound (especially in bathrooms or basements)
Tools & Materials Needed
| Item | Purpose | Estimated Cost |
|---|---|---|
| 10-inch utility knife | Cuts away compromised tape and compound without gouging drywall | $8–$15 |
| Needle-nose pliers | Grabs and pulls out bent or corroded fasteners from stud framing | $12–$22 |
| Self-adhesive metal corner bead (10-ft roll) | Replaces damaged bead; galvanized steel resists rust better than aluminum | $14–$24 |
| Drywall screws (1-1/4" fine-thread) | Secures new bead directly to wood studs—no adhesive-only installs | $5–$9 |
| Setting-type joint compound (90-minute) | Provides rigid, crack-resistant base layer under finish coats | $12–$18 |
Step-by-Step Fix
Replacing the corner bead requires precision—not just speed. Follow these verified methods in order:
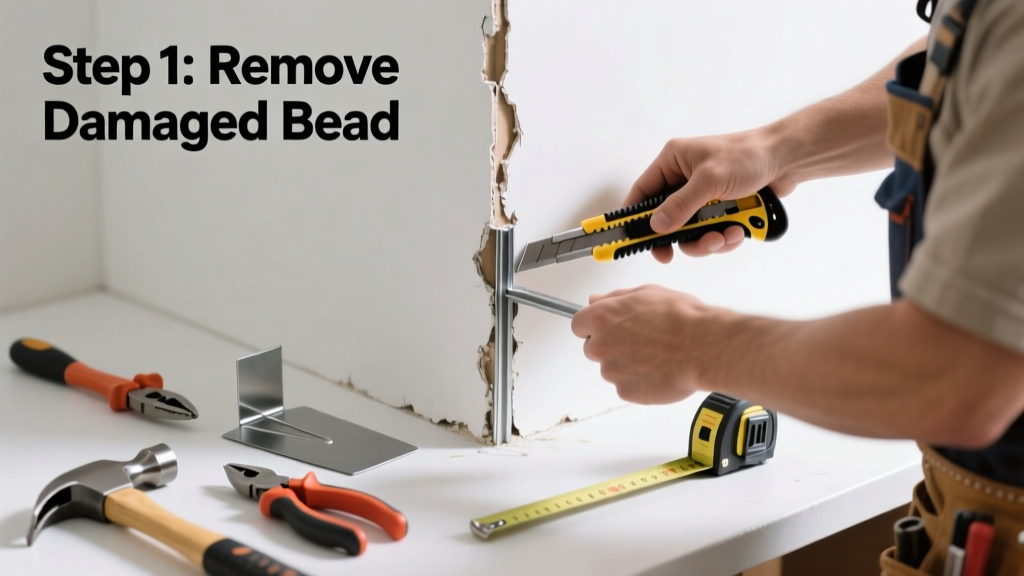
- Remove old bead cleanly: Score compound 1/2" back from each side of the bead with a utility knife. Use a stiff putty knife to pry up the bead while pulling gently with needle-nose pliers. Stop if drywall paper tears—switch to method #2.
- Repair substrate first: If drywall edges are crumbled or torn, cut back to solid paper using a straightedge and utility knife. Apply a thin coat of setting compound to stabilize the edge before installing new bead.
- Install new bead with screws: Align the new self-adhesive bead over the corner. Press firmly, then drive one 1-1/4" screw every 12 inches into the underlying stud—not just the drywall. Use a level to verify vertical alignment before compound application.
- Tape and feather properly: Embed fiberglass mesh tape over the bead’s flange with setting compound. After it cures, apply two thin finish coats—feathering 8–10 inches outward. Sand only after full 24-hour cure.
When to Call a Pro
Some corner failures signal deeper issues no DIYer should handle alone. Call a licensed drywall contractor if you observe any of these:
- Crack extends more than 3 feet vertically and aligns with a ceiling joint or window header
- Adjacent drywall shows bulging, sagging, or soft spots (possible water damage or framing movement)
- The corner is on an exterior wall with visible insulation gaps or cold drafts behind the crack
- You find evidence of termite damage or rot in the underlying stud during removal
"Over 68% of recurring drywall corner cracks stem from improperly secured corner beads—not poor taping technique." — National Association of Home Builders Drywall Installation Standards, 2022
Prevention Tips
Long-term corner integrity depends on installation quality and environmental control. Here’s what actually works:
- Use galvanized steel corner bead—not aluminum—in high-humidity areas like laundry rooms and basements
- Always screw into studs, never rely solely on adhesive—even with self-stick products
- Maintain indoor humidity between 30–50% year-round; use a hygrometer to monitor
- Avoid hanging heavy items (e.g., shelves, mirrors) within 12 inches of outside corners—they concentrate stress
Can I reuse the old corner bead if it’s only slightly bent?
No. Even minor bends compromise the bead’s ability to distribute stress evenly across the joint. A bent bead creates micro-movement points where new cracks will form within weeks. Replacement is the only reliable fix.
Do I need to remove all the old joint compound before installing new bead?
Yes—but only the compound directly covering the bead and its immediate flange (about 1 inch per side). You don’t need to strip back to bare drywall unless the paper is damaged. Over-removal risks tearing the face paper and creating larger repairs.
Is vinyl corner bead better than metal for DIYers?
Vinyl is easier to cut and less likely to dent, but it lacks rigidity. In walls subject to vibration (near doors, HVAC ducts, or second-floor landings), vinyl flexes and promotes cracking. Metal remains the industry standard for durability—see our comparison of drywall corner bead types.
Why does my corner crack keep coming back after taping?
Because taping seals the surface—not the structure. If the bead is loose, bent, or detached, every door slam or temperature shift forces movement at the weakest point: the bead-to-drywall interface. Taping over that won’t stop the motion—it just delays visible failure.
Can I use regular all-purpose joint compound instead of setting-type?
You can, but it’s ill-advised. All-purpose compound shrinks as it dries and lacks compressive strength. Setting-type (e.g., Durabond 90) cures chemically, resists cracking, and holds the bead flange firmly in place during the critical first 24 hours. Read more about joint compound types and uses.
How long should I wait before painting over the repaired corner?
Wait a full 72 hours after the final finish coat has dried to the touch. Setting-type compound may feel dry in 90 minutes, but full chemical cure—and shrinkage stabilization—takes three days. Painting too soon traps moisture and causes blistering or poor adhesion.
A properly replaced corner bead shouldn’t crack again for 10+ years—if installed right and maintained. The key isn’t speed or shortcuts; it’s respecting how stress travels through walls and anchoring the repair where it counts: at the stud. Take your time on screw placement and feathering, and you’ll skip the next round of patching entirely. For tricky corners near windows or angled soffits, consider investing in a corner roller tool to ensure even compound distribution.