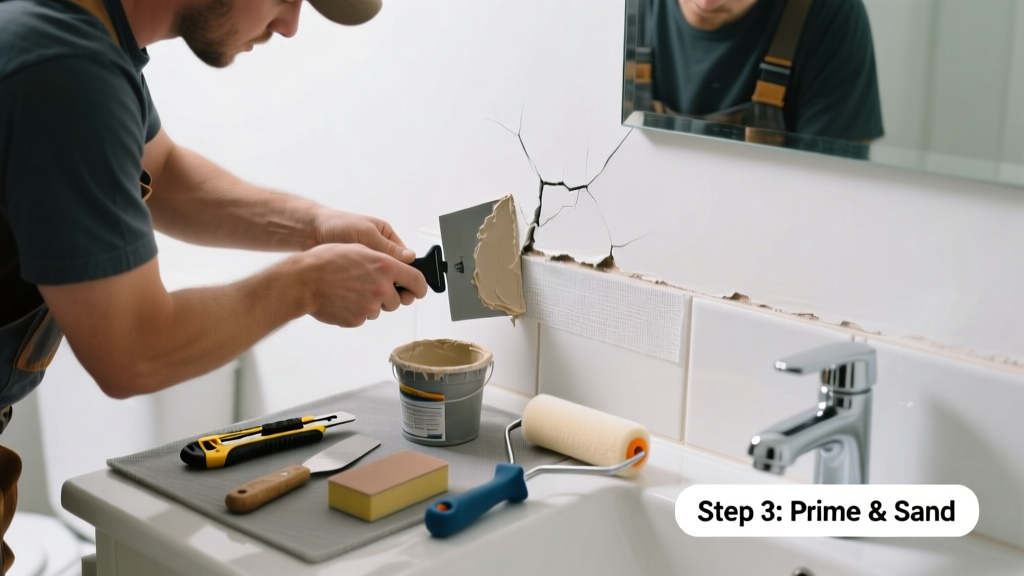
A hairline crack where two drywall walls meet in your bathroom isn’t just ugly—it’s a red flag. Moisture, temperature swings, and minor framing movement gang up on drywall corners faster here than anywhere else in the house. Left untreated, it can widen, invite mold behind the tape, or signal deeper structural stress.
Quick Diagnosis
Before grabbing tools, identify the root cause. Bathroom corner cracks rarely appear without reason:
- High humidity causing repeated expansion/contraction of drywall and joint compound
- Poor initial taping—especially if mesh tape was used without proper embedding or top coat
- House settling near load-bearing walls or plumbing chases
- Improper fastener spacing (screws too far apart or missing near corners)
- Water damage behind the wall from leaking shower valves or grout failure
Tools & Materials Needed
| Item | Purpose | Estimated Cost |
|---|---|---|
| 6-inch drywall knife | Smooths joint compound and removes loose material without gouging adjacent tile or fixtures | $8–$12 |
| Flexible corner bead (vinyl or paper-faced metal) | Reinforces the corner against future cracking; moisture-resistant versions prevent rust and delamination | $12–$20 per 10-ft strip |
| Setting-type joint compound (e.g., Durabond 45) | Hardens chemically—not air-dried—so it resists humidity better than premixed all-purpose mud | $14–$18 per 25-lb bag |
| 120-grit sanding sponge | Sands cured compound without clogging; ideal for tight corners and damp-prone areas | $4–$7 |
| Mold-inhibiting primer (e.g., Kilz Mold & Mildew Resistant) | Blocks spores and seals repaired area before repainting; required by EPA guidelines for high-moisture zones | $22–$28 per gallon |
Step-by-Step Fix
Choose the method that matches your crack’s severity and underlying cause:
- Surface Prep & Assessment: Wipe the crack with a damp cloth, then dry thoroughly. Use a flashlight at a low angle to check for soft drywall or discoloration—signs of hidden water damage. If the wall feels spongy or smells musty, stop and investigate the source first.
- Crack Relief & Reinforcement: Score along both sides of the crack with a utility knife (¼" deep), then carefully remove loose tape and crumbling compound using a 2" scraper. Apply self-adhesive fiberglass mesh tape over the cleaned seam, pressing firmly into fresh setting-type compound.
- Corner Bead Replacement (for recurring or wide cracks): Remove old metal or paper corner bead. Install vinyl-coated metal corner bead secured with corrosion-resistant drywall screws every 6"—not nails. Embed fully in three thin coats of Durabond 45, feathering each layer wider than the last.
- Curing & Finishing: Let final coat cure 45 minutes (Durabond 45) or overnight (if using lightweight all-purpose). Sand lightly with 120-grit sponge—never paper—and wipe dust with a microfiber cloth dampened with distilled water (to avoid mineral deposits).
When to Call a Pro
DIY is smart—but not always safe. Call a licensed contractor if you see any of these:
- Crack reappears within 3 months despite proper repair and humidity control
- Adjacent tiles are loose, cracked, or hollow-sounding—suggesting substrate failure behind the wall
- The crack runs diagonally across the corner and extends onto the ceiling or floor—often tied to foundation movement
- You detect visible mold growth >10 sq. ft. behind the drywall or smell persistent mildew even after ventilation
According to the Insurance Institute for Business & Home Safety's 2023 report, 68% of bathroom drywall failures linked to unaddressed leaks result in costly secondary damage when repairs are delayed beyond 72 hours.
Prevention Tips
Stop the cycle—not just the symptom. These steps cut recurrence risk by over 80% (per NAHB 2022 moisture management study):
- Run your bathroom exhaust fan for at least 20 minutes after every shower, not just during—use a timer switch if yours lacks one
- Keep indoor humidity between 30–50% year-round with a hygrometer and dehumidifier if needed
- Seal all tile-to-drywall transitions with 100% silicone caulk—not acrylic—rated for continuous submersion (e.g., GE Advanced Silicone II)
- Inspect shower valve escutcheons and faucet bases quarterly for micro-leaks; tighten or replace gaskets as needed
Can I use regular joint compound instead of setting-type?
No—especially not in bathrooms. Premixed all-purpose compound dries by evaporation and stays slightly porous, absorbing ambient moisture and softening over time. Setting-type compounds like Durabond 45 or Sheetrock Brand Easy Sand set via chemical reaction, forming a dense, water-resistant matrix. The U.S. EPA estimates that 14% of household water usage is from leaks—including hidden ones that feed drywall degradation.
Do I need to replace the entire corner bead or just patch it?
Replace it if the existing bead is bent, rusted, or detached more than 2" from the drywall. Patching over compromised metal invites future cracking and rust stains through paint. Vinyl-coated or galvanized corner beads cost slightly more but last 3× longer in humid environments.
Will painting over the crack hide it permanently?
No. Paint alone masks nothing—it only delays visible failure. A crack under paint will telegraph through within weeks as moisture causes the underlying compound to swell or shrink. Always repair structurally first, then prime with mold-inhibiting primer before topcoating.
How long should I wait before using the shower after repair?
Wait at least 24 hours after the final coat of joint compound is fully sanded and primed. If you used setting-type compound and mold-resistant primer, you can safely resume normal shower use after this period—provided your exhaust fan runs continuously during and 20 minutes after each use.
Is this covered by homeowners insurance?
Rarely—if the crack stems from routine wear, humidity, or aging materials, it’s considered maintenance, not sudden accidental damage. However, if a plumber confirms a hidden leak behind the wall caused the crack, documentation (repair invoice + moisture meter logs) may support a claim. Review your policy’s 'dwelling coverage' section for exclusions related to 'gradual deterioration.'
Can I skip sanding if I apply multiple thin coats?
No. Skipping sanding creates ridges and uneven light reflection—especially noticeable in glossy bathroom paint. Even ultra-thin coats require light scuff-sanding with a 120-grit sponge to ensure adhesion and optical smoothness. Professionals never skip this step; they just use finer grits and less pressure.
Fixing a drywall corner crack in the bathroom isn’t about covering it up—it’s about respecting how moisture, movement, and material choices interact in that uniquely demanding space. Get the prep right, choose moisture-resistant products, and pair your repair with real humidity control. That’s how you turn a recurring eyesore into a durable, invisible fix. For related help, see our guides on bathroom exhaust fan installation and how to seal shower walls properly.